-16-
Rear View
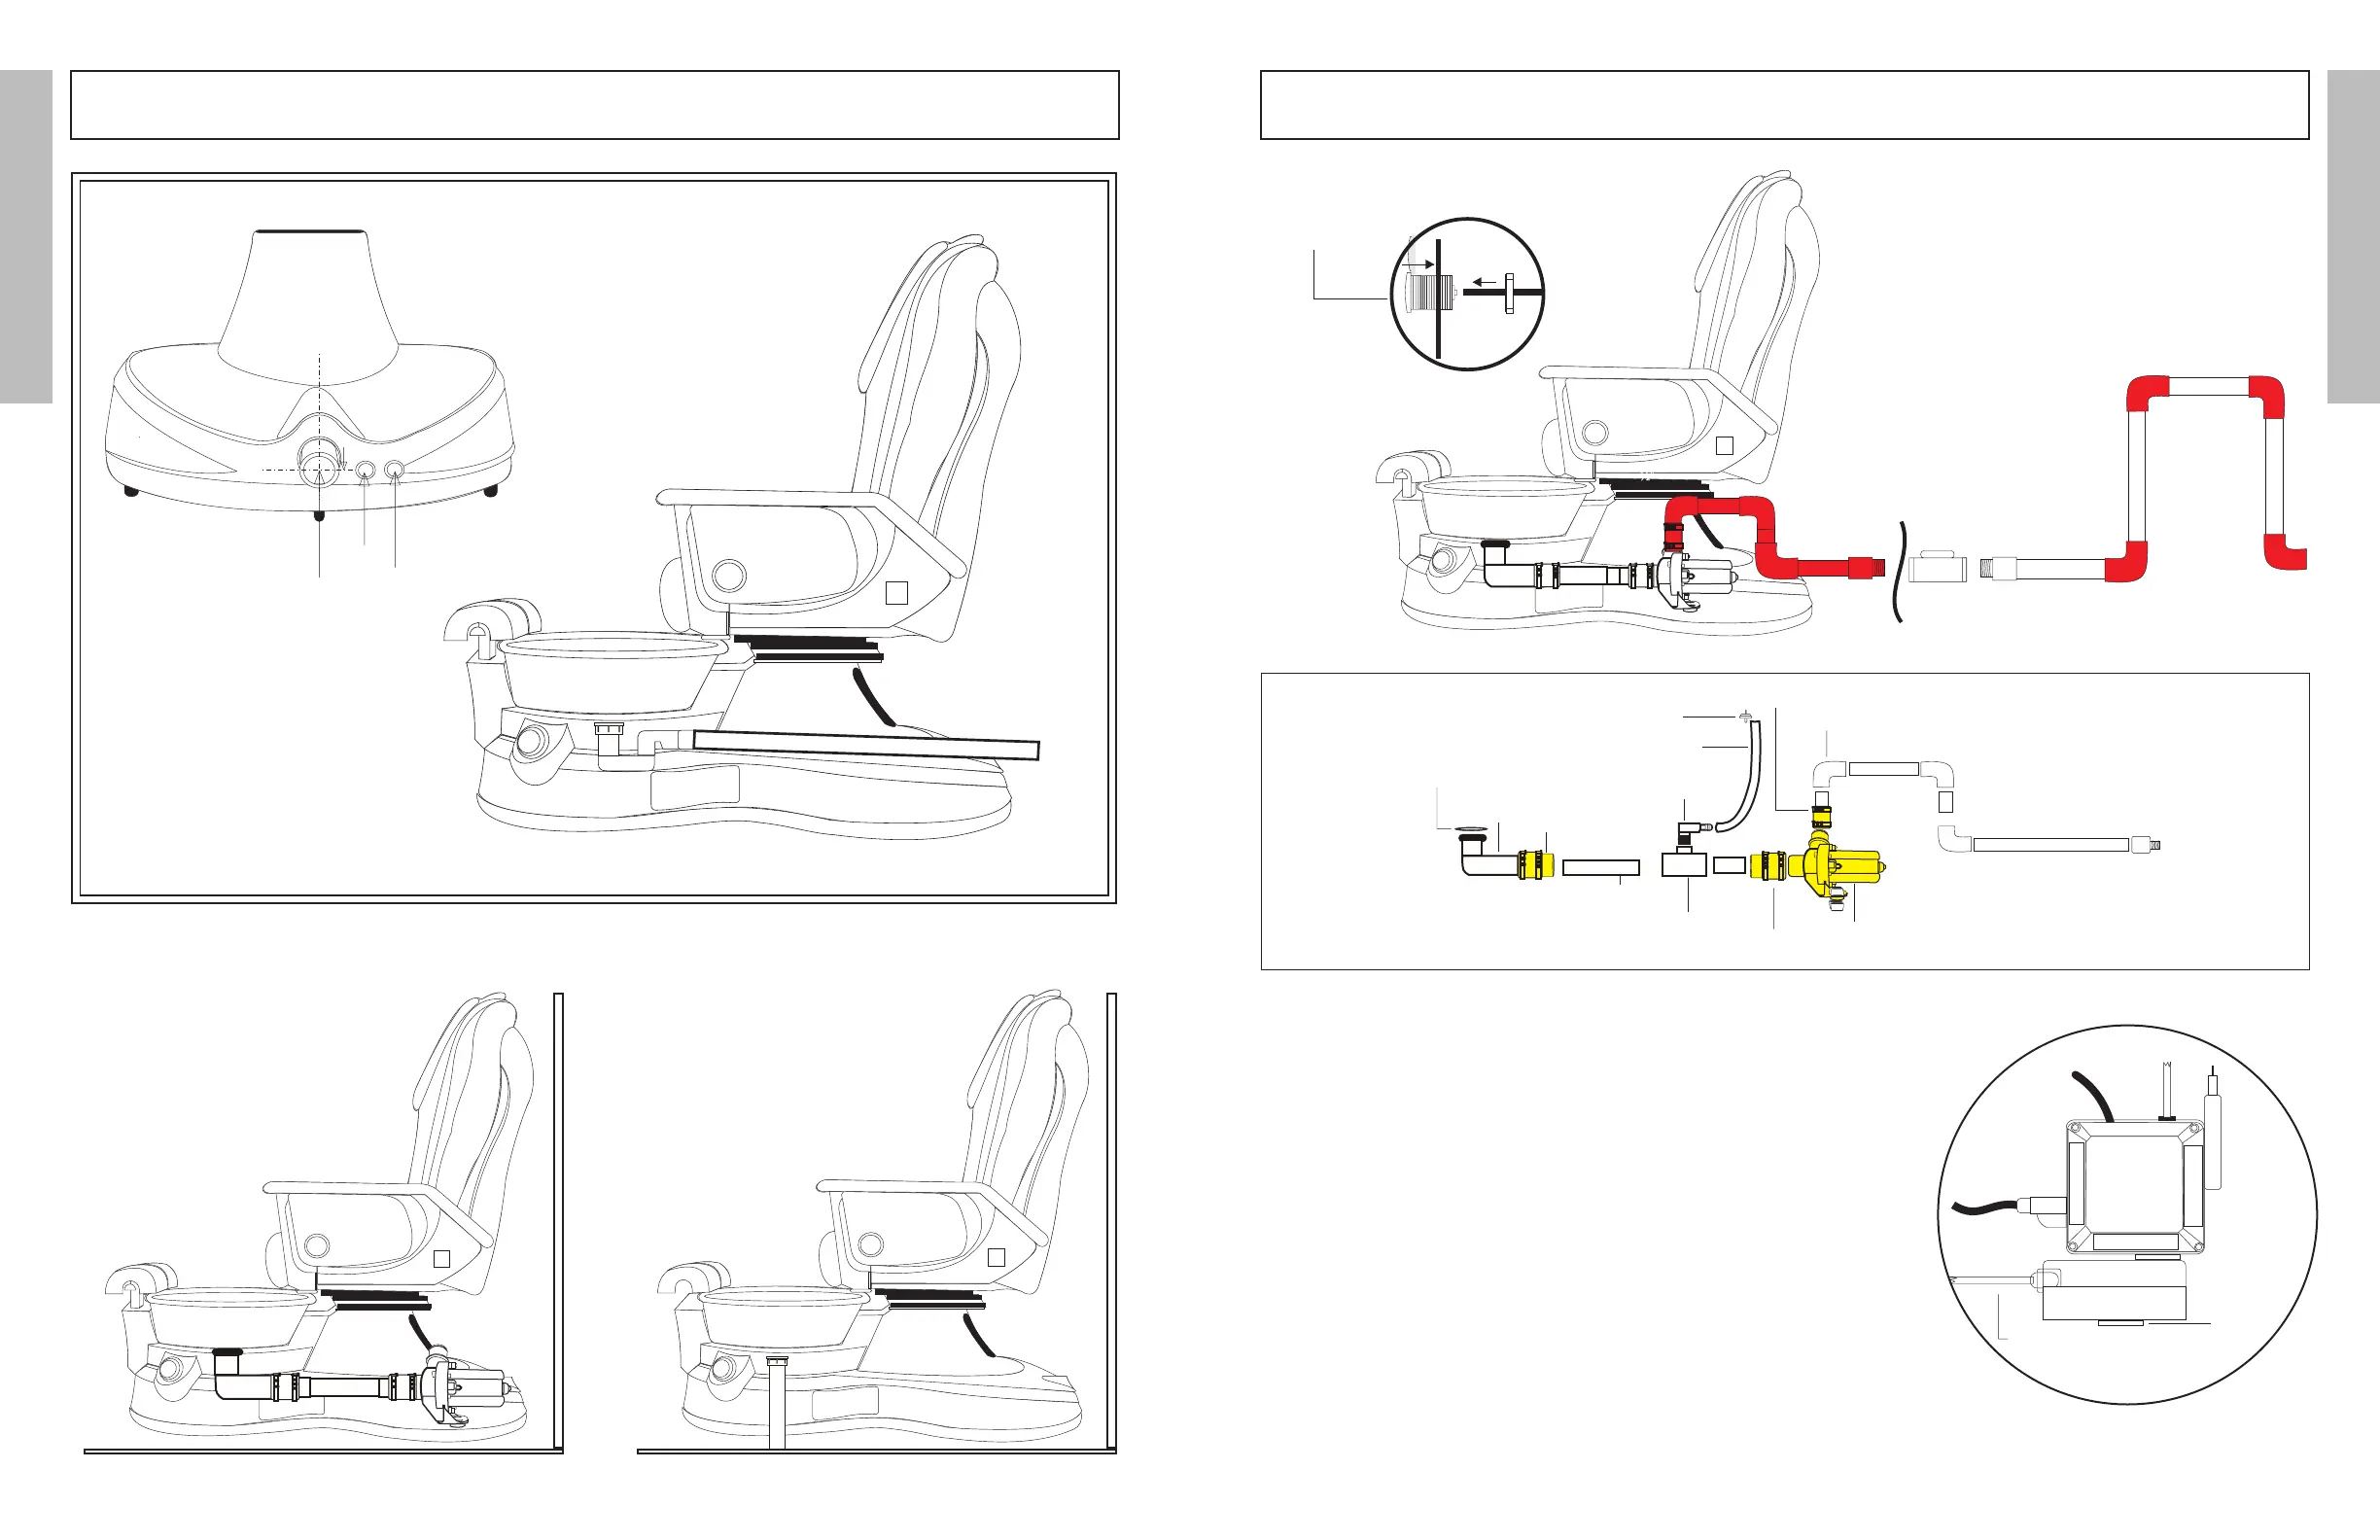
Lenox LX: Drain
Basement Connection
(NOT recommended
onoordrain)
Power Drain
(See detailed power drain pump)
Wall Drain
Hot&ColdWaterInlet:1/2”
Drain Outlet: 1 1/2” PVC Pipe
Drain
Cold
Hot
Drain outlet MUST be 1/2”
or 3/4” for efcient drainage.
Check Valve Required
PLUMBER MUST BE UTILIZED TO INSTALL
CHECK VALVE
Pipeless Motor
Power Plug
(Small Rubber Coupling)
3/4”Elbow
3/4PVCPipe
3/4”PVCPipe
Hanning DPO 40-020
Air Check Valve
Elbow
Rubber Gasket
ClearTubing3/4OD1/2”ID
Large Rubber Coupling
PolyInsert90Elb1/2”
Tee3/4x3/4x1/2
3/4”PVCPipe
(Large Rubber Coupling)
3/4Slipx1/2”MaleAdapter
Light
Transformer
Part Time
Part Time
Full Time
3/8”Cleartubefromon/offforD/P
pump insert into 2 Min. Timer.
Make sure to push in tightly.
2 Min. Timer
(D.pump)
Installation Instruction:
1. Makeahole(size1-3/8”)fortheOn/Offswitchasshown(seeg1).Pre-dril
required.
2. Placeda1/8”clearhoseintotherearoftheswitchandon/offswitchintothe
hole.
3. Thedischargepumpkitismadetotontothepedicureunit.(Seeg2)
4. Connect E-Z connector onto the drain elbow.
5. Plug discharge pump outlet into the two minute timer outlet
6. Plug two minute timer into the wall outlet.
7. It is very important that tip of the clear tub remain above the water Level with
one loop as shown.
Operation Instruction:
Warning ! DO NOT RUN DRY
1. Turn to open drain plug. 3 to 5 second for air to release from the pipe
2. PressOn/Offswitchtoactivatetimer.
3. At any time, water drain completely from the basin. Press
On/Offswitchtostoporbuiltintwominutetimer.
Lenox LX: Discharge Pump (Optional)
Up to 4ft @ +/- 39 sec. with 1/2” Connection to main drain
Power Plug
Fastener
On/Off
Switch
1-3/8”Hole
forOn/OffSwitch
Figure 1
Figure 2
OPTIONAL DISCHARGE PUMP
Power Plug to
Wall Outlet
DRAIN INSTRUCTION
Air breather(check Valve)Must be
above the water level.