EasyManua.ls Logo

Lester 20330-95 User Manual

Lester 20330-95
7 pages
To Next Page IconTo Next Page
Page #1 background imageLoading...
Page #1 background image
Operating Instructions 1 01806E
LESTRONIC II FULLY AUTOMATIC
BATTERY CHARGER
MODEL 20330-95
Specifications
AC Input: 108-128 Volts AC, 12 Amp, 60 Hertz, single-phase
DC Output: 48 Volts DC, 21 amps
Connections: Input – 6 or 9 ft. AC input cord with NEMA 5-15 grounded plug
Output – 8½ ft. or longer output cord with polarized connector
PLEASE SAVE THESE IMPORTANT SAFETY AND OPERATING INSTRUCTIONS
For correct operation of the equipment, it is important to read and be familiar
with this entire manual before installing and operating the charger.
DO NOT DISCARD THIS MANUAL AFTER READING.
LOOK FOR THIS SYMBOL TO POINT OUT SAFETY PRECAUTIONS. IT MEANS:
BECOME ALERT—YOUR SAFETY IS INVOLVED.
IF YOU DO NOT FOLLOW THESE
SAFETY INSTRUCTIONS, INJURY OR PROPERTY DAMAGE CAN OCCUR.
Features
Patented DV/DT electronic timer monitors battery state-of-charge while charging and automatically turns charger off as
battery reaches full charge.
Compensates automatically for AC input line voltage variation by high reliability ferroresonant transformer design. Supply
voltage variation + 10% from nominal, + 1% maximum battery charger voltage variation, decreasing to + ½% at finish rate
with constant electrolyte temperature. No taps or rate controls to set.
Automatic decrease of charge rate for superior battery life through good equalization of cells and low water use rate.
Silicon diodes with inherent surge protection operated at a conservative percentage of their rating.
Convection-cooled design for maximum reliability and minimum maintenance.
INTRODUCTION
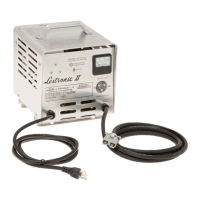
The Lestronic II automatic battery charger is
designed to recharge deep-cycle, lead-acid
batteries. A ferroresonant transformer is used to
provide a highly reliable, line-compensating unit with
a minimum of moving parts, designed for long,
trouble-free service. A patented electronic timer
urns the charger on and off automatically. This
DV/DT electronic timer determines full charge of the
batteries by measuring the rate at which the battery
voltage increases during charge. When the voltage
stops rising, the battery is fully charged and the
charger turns off.
INITIAL INSTALLATION
The AC line to which the charger is to be connected
must be capable of supplying 15 amperes to this
charger.
Question and Answer IconNeed help?

Do you have a question about the Lester 20330-95 and is the answer not in the manual?

Lester 20330-95 Specifications

General IconGeneral
BrandLester
Model20330-95
CategoryBattery Charger
LanguageEnglish

Summary

Specifications

Features

Introduction

Initial Installation

Grounding Instructions

Normal Operation

Connecting the Charger

Connect the charger's AC input plug to a grounded outlet before connecting the DC output to the battery.

Monitoring Charge Rate

Monitor the ammeter for initial charge rate, which varies with battery condition and line voltage.

Charge Rate Tapering

Charge rate decreases as battery voltage rises; normal finish rate is 4-9 amps for good battery cells.

Battery Aging Effects

Aging batteries may have lower finish charge voltage and rate; charger still determines full charge.

Charge Time Factors

Charge time depends on battery capacity, discharge depth, temperature, and break-in status.

Charging New or Cold Batteries

New or cold batteries may require more time and show a lower finish charge rate for equalization.

Disconnecting the Charger

Disconnect the DC output plug from the receptacle after the charger has turned off.

Battery Storage Maintenance

Proper Care of Deep Cycle Motive Power Batteries

Safety Precautions When Working with Batteries

Wear protective gear, avoid metal objects across terminals, and be aware of acid hazards.

New Battery Installation and First Use

Ensure correct polarity for new batteries and give them a full charge before first use.

Battery Break-in Period

Limit use of new batteries for first 20 cycles; they need several cycles to reach rated output.

Avoiding Excessive Discharge

Excessive discharge can cause polarity reversal or cell damage, reducing capacity and life.

Maintaining Electrolyte Levels

Add distilled water when needed, ensuring levels never fall below the top of battery plates.

Storage and Sulfation

Batteries in storage can self-discharge and sulfate, leading to capacity loss.

Cold Temperature Charging

Charge batteries promptly when temperatures drop below 65°F; cold batteries need more time.

Battery Terminal Maintenance

Keep battery tops and hold-downs clean and dry; clean off electrolyte spills immediately.

Connection Tightness

Ensure bolted connections are clean and bright; re-tighten connections twice yearly.

Troubleshooting Guide

Charger Does Not Turn On

Ensure DC plug is reconnected; test outlet with another device.

Charger Fuse Blows

Check fuse visually; reversed battery polarity or diode failure may cause fuse to blow.

Ammeter Stays Above 25 Amps

Indicates misuse, such as connecting to a battery pack with lower voltage or higher capacity.

Charger Does Not Turn Off

May indicate a malfunctioning charger; disconnect input plug if charge time exceeds maximum.

Building AC Breaker or Fuse Blows

Check for a weak circuit breaker, overloaded circuit, or test charger on different outlets.

Wiring Diagram

Parts List

Limited Warranty

Related product manuals