12 13
If you are using multiple RCX Cameras,
it is recommended to give each camera
a unique name the first time it is set
up. This will name the folder where the
images are stored (which includes the
camera name) for easy sorting after
downloading from multiple cameras.
Naming camera
1. With the camera powered on,
connect the controller to the camera
with the USB cable.
2. Select “Setup Camera”from the
main menu. Press
3. Press until “Custom Setting” is
highlighted. Press .
4. Press twice to move to “Page 2”,
then Press to move to the menu.
Press to select “Camera Name”,
then press .
5. Select characters from the keyboard
by using , and use
to input the character. The
name must be between 3 and
10 characters long.
(Be sure the
first 3 characters are unique between
cameras to ensure all folders are easy to
differentiate.)
6. Select “Save”and press .
7. Press . As you exit the custom
settings, an
“Update camera?”
alert window appears. Press to
upload the changes you made. This
will be confirmed with the message
“Camera Setup Complete”
.
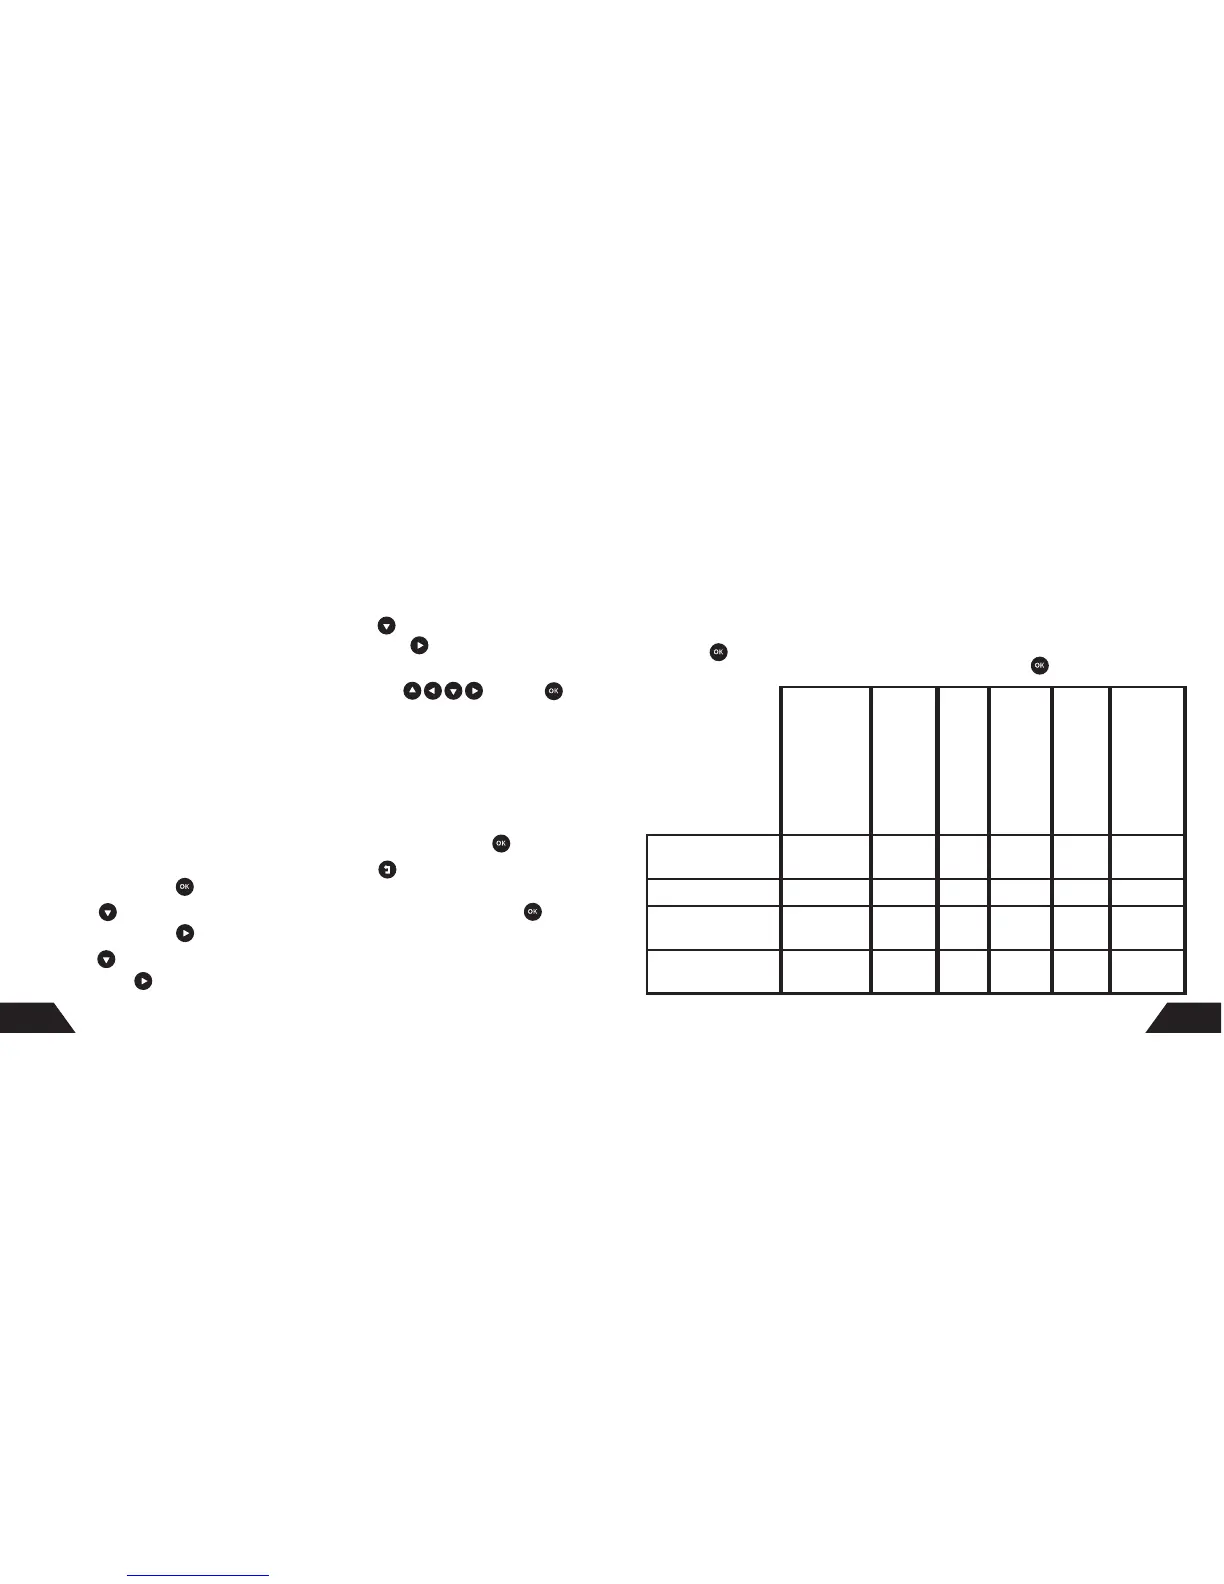
Camera Operation Setup Camera Setup with Preset Modes
Automatically
Selected Settings
with Preset Modes
*DST only available
with RCX-2
Image Quality
Multi-picture
Event delay
(time between photos)
RCX-2 Sensor
(RCX-1 is only 45°)
RCX-2 Flash
(RCX-1 is 36 LED only)
Sensitivity
Best Picture Mode RCX- 1: 8MP
RCX-2: 10MP
OFF OFF DST 48 LED Auto
Most Picture Mode 3MP 3 photos OFF DST 48 LED Super High
Power Saver Mode
(Day/Night)
3MP OFF 5 min DST 36 LED Auto
Normal Video Mode 640x480,
30fps, 5 sec
OFF 5 min DST 36 LED Auto
1. Go to Camera Setup
2. Press .
3. Select from the 4 preset modes the
setting that is closest to what you
want. Press .
For custom camera settings, see “Custom Camera Setup” on page 18