Ready for Use
www.levermovement.com@levermovement
Setup Steps
Position the LEVER GO+ base
on the center of the treadmill
arms. Make sure the pulleys
are located at the rear of the
treadmill.
Strap the LEVER GO+ base
onto the treadmill arms
securely. Use the rubber
straps to connect the base
bars to the treadmill arms.
*IMPORTANT*: Be sure the
straps are securely wrapped
around the treadmill arms
before proceeding.
Similarly, locate the back
angle adjustment mechanism.
Open up the backside to the
recommended angle. “Section
A”
Extend both the front and
rear bars until they click into
place or until fully extended.
The included CamJam® XT™ Aluminum Rope Tightener Large is Designed and engineered by Nite Ize, Inc. in
Boulder, CO USA. MANUFACTURED IN CHINA. Patent and Trademark Information at Niteize.com/IP. The distinctive
shapes, styles, configuration and overall appearance of all Nite Ize products are trademarks of Nite Ize, Inc."
Setting Up the
LEVER GO+ Base
Attach the LEVER
GO+
Adjusting the
Back Side
Extending Bars
Engage the system by pulling the end of the bungee through the
CamJam. To secure the bungee make sure you pull downward to
lock it into place. Pull the bungee until you reach the desired weight.
*WARNING*: 45Ibs max.
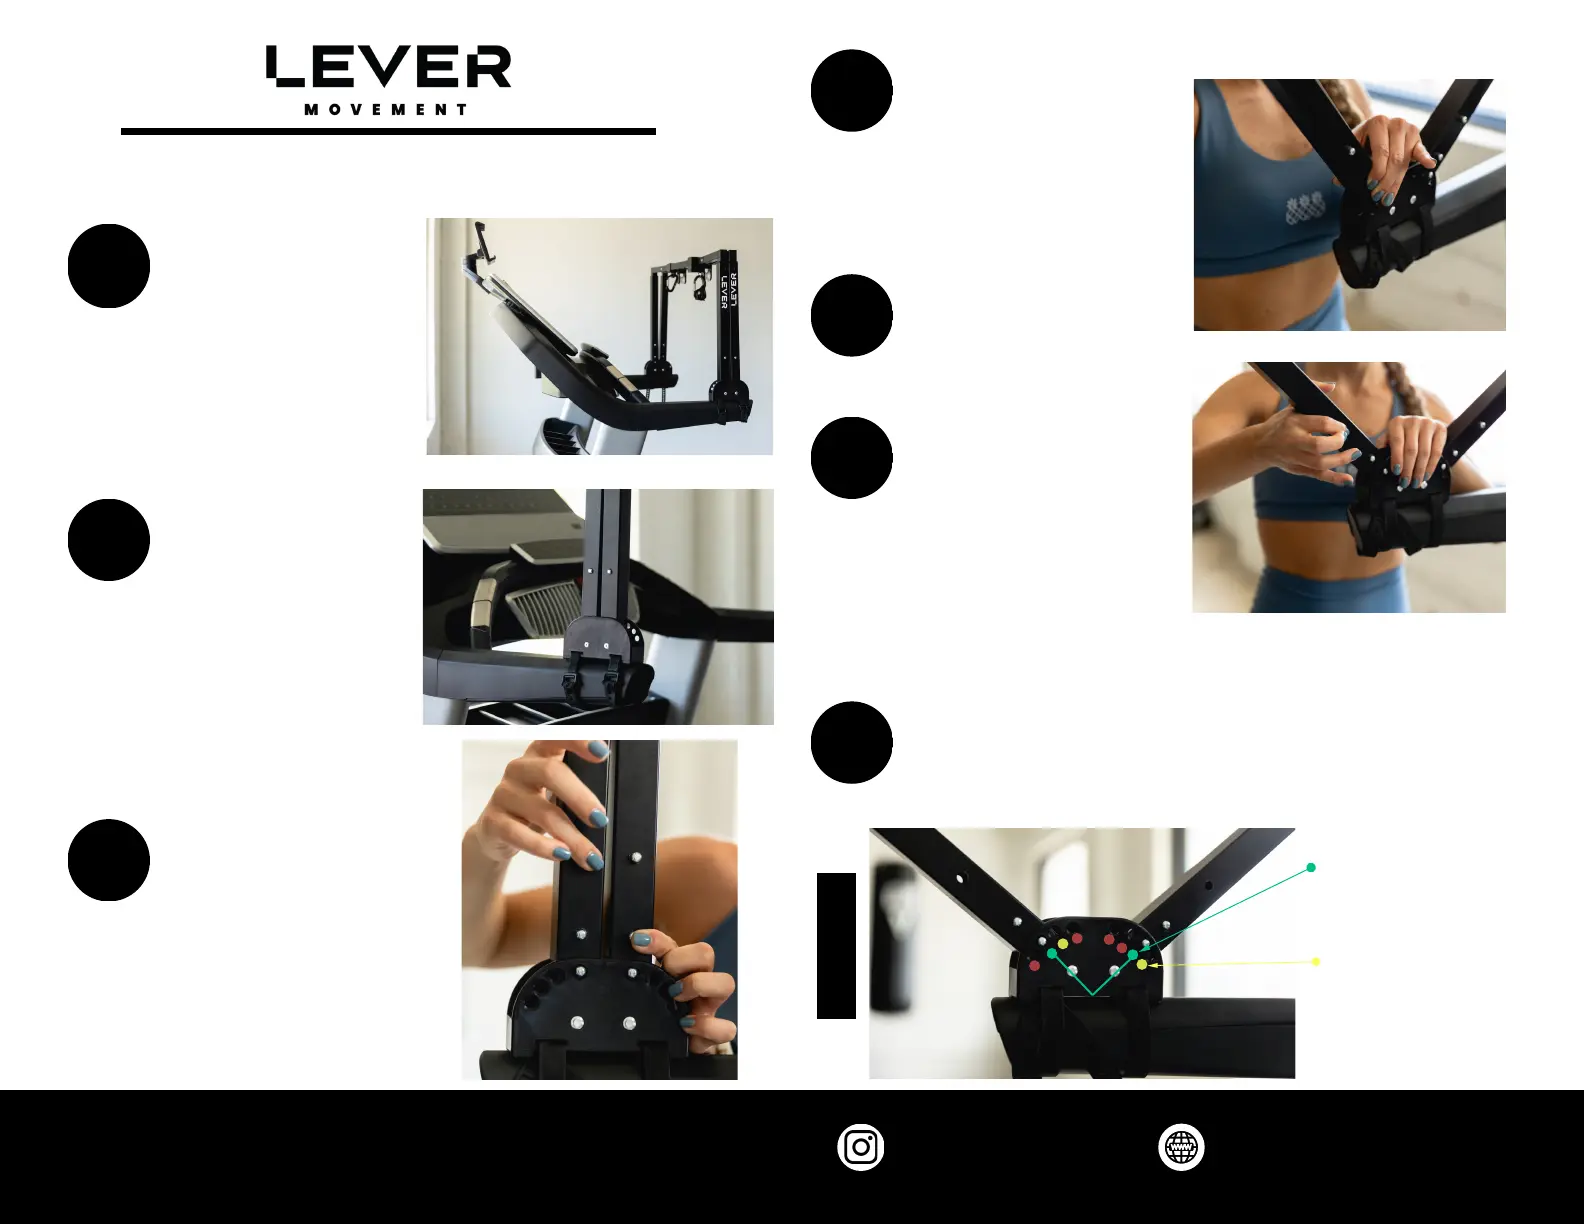
Locate the front angle
adjustment mechanism.
Open up the front side to the
correct angle as indicated in
your user manual or based
on comfort. “Section A”
Adjusting the
Front Side
Green circles represent
standard treadmills
with flat arms designed
for pin placement.
Yellow circles represent
the pin placement for
curved treadmills, such
as the Woodway 4Front.
Feed the free end of the
bungee through the pulley on
your right hip. Continue to feed
the bungee through the two
pulleys on the back crossbar
and then the second pulley on
your left hip. Lastly, run the
bungee through the CamJam
connected to the front left
Cube.
Assemble the
Bungee
Section A
 Loading...