47617-REB &
-RBH Includes
• Low Prole Frame or High Prole Cover (1)
• Cover Plate (1)
• #10 Wood Screws (2)
• #6 Screws (4)
• Swing Clips (4)
• #8 Screws (4)
47617-HPC Includes
• High Prole Retrot Cover (1)
• #8 Screws (4)
47617-LPF Includes
• Low Prole Retrot Frame (1)
• #8 Screws (4)
Tools Needed
• Slotted/Phillips Screwdriver
• Pencil
• Utility Knife
• Cutters
• Wallboard Saw
• Ruler
• Tongue and Groove Pliers
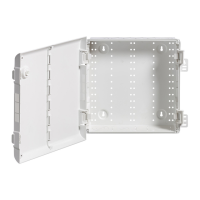
Recessed Entertainment Box
Cat. No. 47617-REB, 47617-RBH, 47617-HPC, and 47617-LPF
INSTALLATION INSTRUCTIONS
ENGLISH
DI-000-47617-00D
WARNINGS:
• TO AVOID FIRE, SHOCK OR DEATH: TURN OFF POWER AT CIRCUIT BREAKER OR FUSE AND TEST THAT THE
POWER IS OFF BEFORE WIRING!
• Never push objects of any kind into this product through openings, as they may touch dangerous voltages.
• To prevent the possibility of electrical shock, each opening must have a device or snap on cover plate installed.
• To be installed and/or used in accordance with electrical codes and regulations.
• If you are not sure about any part of these instructions, consult an electrician.
CAUTIONS:
• Use caution when installing or modifying communications wiring or components.
• Never install communications wiring or components during a lightning storm.
• Never install communications components in wet locations unless the components are designed specically for use in
wet locations.
• Never touch uninsulated wires or terminals unless the wiring has been disconnected at the network interface.
• SAVE THESE INSTRUCTIONS.
New Construction – Stud Mounted
WARNING: TO AVOID FIRE, SHOCK OR DEATH, turn OFF power at circuit breaker or fuse and test that the power is
OFF before wiring.
Line-Voltage Connections
WARNING: TO AVOID FIRE, SHOCK OR DEATH, turn OFF power at circuit breaker or fuse and test that the power is
OFF before wiring.
NOTE: Use a standard 1-gang old work device box.
1. Select the install location on Entertainment Box, and insert the device box from the
inside. Tighten the two mounting screws on the device box to engage the swing arms
and secure it to the Entertainment Box.
2. Route the electrical wires to the device box. Install the desired line voltage device to
support your application needs.
NOTE: Refer to the device installation instructions for complete wiring instructions.
3. Attach the appropriate standard size wallplate to the device if necessary.
4. Repeat steps 1 through 3 to install additional devices in other locations.
Use the Snap-on Cover Plate provided for unused openings.
NOTE: Additional Snap-on Cover Plates are available as an accessory,
Leviton part number 47617-PLT.
1. Select the install location.
2. Consider the wallboard thickness and make sure you have enough space before you mount the device.
NOTE: The Low Prole Cover or High Prole Frame will cover up minor imperfections or irregularities in the
wallboard cut around the Entertainment Box. These components will cover up imperfections that are 3/8 in. (0.95
cm) or less from the edge of the Entertainment Box.
1. Select the install location.
NOTES:
• This installation requires mounting the Entertainment Box between wall studs with a
minimum clearance of 11.0 in. (27.9 cm). If necessary, use a stud nder to locate and
mark studs that are behind the wall surface.
• If there is less than 14.0 in. (35.6 cm) clearance between studs, mount box offset
from the center-line between the studs to ensure there is sufficient space beside the
box to allow for old-work device box installation or cable routing.
2. Use the front of the Entertainment Box as a template, and trace
the enclosure outline with a pencil on the wall surface. Use a
wallboard saw and cut the opening out. This will provide a hole
approximately 8 in. (20.3 cm) x 7.2 in. (18.3 cm) in the
wallboard surface.
NOTE: Make sure to leave enough space above, below, and
beside the Entertainment Box for any device boxes which will be
attached to the Entertainment Box.
3. Assemble the Low Prole Frame or High Prole Cover to Entertainment Box.
Attach the supplied swing clips to the #6 screws as shown. DO NOT tighten
screws all the way down.
NOTE: Ensure that the swing clips are placed on the screws in the proper
orientation, as shown in the image.
4. Insert the Entertainment Box in to the wall surface opening.
Make sure the swing clips are positioned at against the box while
placing the box in the wall opening. Tighten all four screws to secure
the box to the wallboard the swing clips will engage behind the
wallboard as the screws are tightened.
Make sure the swing clips engage the wallboard in all four locations.
Swing clip
Attache
pivotante
Clip oscilante
3. Use the two supplied wood screws to secure the enclosure
to the stud through the two mounting slots.
Mounting slots
Fentes de xation
Ranuras de montaje
Retrot Construction – Wall Mounted
WARNING: TO AVOID FIRE, SHOCK OR DEATH, turn OFF power at circuit breaker or fuse and test that the power is
OFF before wiring.
8 po
(20,3 cm)
20.3 cm
(8 pulg.)
8 in.
(20.3 cm)
7.2 in.
(18.3 cm)
7,2 po
(18,3 cm)
18.3 cm
(7.2 pulg.)
11 po (27,9 cm)
au moins
entre les montants
27.9 cm (11 pulg.)
mínimo
entre vigas
11 in. (27.9 cm)
minimum
between studs
Low-Voltage Connections
WARNING: TO AVOID FIRE, SHOCK OR DEATH, turn OFF power at circuit breaker or fuse and test that the power is
OFF before wiring.
NOTE: Use a 1-Gang Low-Voltage Bracket for low-voltage devices.
1. Select the install location on the Entertainment Box and install the Low Voltage
Bracket. For metal bend-type brackets bend over the folding tabs and use pliers
to clamp the tabs securely to the box.
2. Route the low-voltage cables through the bracket. Install the Leviton
QUICKPORT
®
connectors required to support your application.
NOTE: Refer to the device installation instructions for complete
wiring instructions.
3. Install the Leviton QUICKPORT
®
connectors into the appropriate standard size
wallplate and attach the wallplate to the low-voltage bracket.
4. Repeat steps 1 through 3 to install additional devices in other locations. Use
the Snap-on Cover Plate provided for unused openings.
NOTE: Additional Snap-on Cover Plates are available as an accessory, Leviton
part number 47617-PLT.
4. Cover the Entertainment Box to prevent contamination while the wallboard is installed and nished.
NOTE: The Recessed Entertainment Box requires a wallboard cut of approximately
8.0 in. (20.3 cm) x 7.2 in. (18.3 cm) in the proper location.
5. Once the wall nish is complete, mount the Low Prole Frame or High
Prole Cover to the Entertainment Box with the four #8 screws.
2. Use a utility knife with reinforced point to cut out the knock-out opening from the
Snap-on Cover Plate. Ensure any sharp edges or burrs are removed from the opening.
NOTE: The knock-out opening size is 1.25 in (3.2 cm) in diameter.
4. Repeat steps 1 through 3 to run additional low-voltage connections in other
locations. Use the Snap-on Cover Plate provided for unused openings.
NOTES:
• Each Recessed Entertainment box is supplied with 1 cover plate.
• If additional cover plates are needed they are available as an accessory,
Leviton part number 47617-PLT.
3. Gently, pull low-voltage wires or cables through opening in Snap-on Cover
Plate. Snap the cover plate onto the opening in the Entertainment Box.
1. Use the existing Snap-on Cover Plate to route low-voltage connections from component to component.
Component to Component Connections
WARNING: TO AVOID FIRE, SHOCK OR DEATH, turn OFF power at circuit breaker or fuse and test that the power is
OFF before wiring.
Knockout/Débouchure/Agujero
For Technical Assistance Call: 1-800-824-3005 (USA Only) or 1-800-405-5320 (Canada Only) www.leviton.com
LIMITED 2 YEAR WARRANTY AND EXCLUSIONS
Leviton warrants to the original consumer purchaser and not for the benet of anyone else that this product at the time of its sale by
Leviton is free of defects in materials and workmanship under normal and proper use for two years from the purchase date. Leviton’s
only obligation is to correct such defects by repair or replacement, at its option. For details visit www.leviton.com or call 1-800-
824-3005. This warranty excludes and there is disclaimed liability for labor for removal of this product or reinstallation. This warranty
is void if this product is installed improperly or in an improper environment, overloaded, misused, opened, abused, or altered in any
manner, or is not used under normal operating conditions or not in accordance with any labels or instructions. There are no other
or implied warranties of any kind, including merchantability and tness for a particular purpose, but if any implied warranty is
required by the applicable jurisdiction, the duration of any such implied warranty, including merchantability and tness for a particular
purpose, is limited to two years. Leviton is not liable for incidental, indirect, special, or consequential damages, including
without limitation, damage to, or loss of use of, any equipment, lost sales or prots or delay or failure to perform this warranty
obligation. The remedies provided herein are the exclusive remedies under this warranty, whether based on contract, tort or otherwise.
FOR CANADA ONLY: For warranty information and/or product returns, residents of Canada should contact Leviton in writing
at Leviton Manufacturing of Canada ULC to the attention of the Quality Assurance Department, 165 Hymus Blvd,
Pointe-Claire (Quebec), Canada H9R 1E9 or by telephone at 1-800-405-5320.
LEVITON and the Leviton logo are trademarks of Leviton Manufacturing Co., Inc., and are registered trademarks in many countries
throughout the world. QUICKPORT is a trademark of Leviton Manufacturing Co., Inc. and is registered in many countries including Australia,
Bahrain, Canada, China, Colombia, Costa Rica, Egypt, the EU Member States, Hong Kong, Japan, Jordan, Kuwait, Mexico, New Zealand,
Norway, Oman, Qatar, South Korea, Saudi Arabia, Singapore, Taiwan, United Arab Emirates, United Kingdom, United States and Vietnam.
Patents covering this product, if any, can be found on Leviton.com/patents.
TRADEMARK DISCLAIMER: Use herein of third party trademarks, service marks, trade names, brand names and/or
product names are for informational purposes only, are/may be the trademarks of their respective owners; such use is
not meant to imply afliation, sponsorship, or endorsement.