EasyManua.ls Logo

LEXIN G2P - User Manual

LEXIN G2P
27 pages
Print Icon
To Next Page IconTo Next Page
Loading...
HOW TO
USE G2P
Bluetooth Intercom Headset
V 1.0
64&3(6*%&
Question and Answer IconNeed help?

Do you have a question about the LEXIN G2P and is the answer not in the manual?

Summary

Function Introduction

Headset Features

Details on the high-definition 36MM stereo headset and noise reduction microphone.

Battery Specifications

Information on the 800 mAh battery capacity and its usage times.

Installation Instructions

Helmet Bracket Installation

Instructions for mounting the bracket using clip or 3M tape on a helmet.

Main Unit Mounting and Removal

Steps to attach and detach the G2P main unit from the helmet bracket.

Speaker and Microphone Installation

Guidance on installing speakers and microphones for different helmet types.

Basic Operation

Power On;Off

Detailed steps for powering the G2P device on and off using the power button.

Battery and Charging

Device Pairing

Communication Features

Intercom Pairing and Talk

Warning

Overview

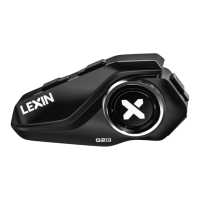
The LEXIN G2P is a Bluetooth Intercom Headset designed for motorcycle riders, offering a range of communication and entertainment features. It is compliant with Bluetooth Specification V5.3 and supports Headset Profile (HSP), Hands-Free Profile (HFP), and Advanced Audio Distribution Profile (A2DP), ensuring broad compatibility with various Bluetooth devices.

Function Description:

The G2P headset provides a comprehensive set of functions for riders. It supports Bluetooth 5.3 for stable and efficient wireless connectivity. Users can connect the device to GPS navigation systems for turn-by-turn directions, and it integrates with Siri and other voice assistants for hands-free control. The headset features USB-C quick charge for convenient and fast power replenishment. For entertainment, it allows users to play music, and for communication, it supports hands-free calling.

One of the key features of the G2P is its universal pairing capability, allowing it to connect with most Bluetooth intercom headsets on the market. It supports Bluetooth pairing for up to six devices for two-way intercom conferences, enabling group communication among riders. The two-way Bluetooth intercom headset function allows for conversations with a distance of up to 1.2 kilometers. To ensure clear communication, the G2P has built-in CVC/DSP noise reduction technology, which intelligently minimizes background noise.

Important Technical Specifications:

The G2P is equipped with a high-definition 36MM stereo headset, designed to deliver clear audio quality. It also features an outstanding built-in CVC/DSP intelligent noise reduction microphone, crucial for effective communication in noisy riding environments. These design choices make the headset suitable for most open-face, full-face, and off-road helmets.

Powering the device is an 800 mAh battery. This battery capacity provides impressive endurance, offering up to 18 hours of music playback or 13 hours of intercom conference time. In standby mode, the device can last for over one week. Charging the G2P is done via a USB-C port and takes approximately 2.5 hours for a full charge using any DC 5V power supply (e.g., mobile phone charger, computer, laptop, or power bank). The LED indicator turns red during charging and blue when fully charged. The device also provides battery life prompts, reporting levels at 100%, 80%, 50%, 25%, and LOW. When the battery capacity drops below 25%, the device will issue notifications every 15 minutes, indicating approximately 1-1.5 hours of remaining operation before it automatically turns off.

Usage Features:

Installation: The G2P offers two mounting options for helmets: a clip mounting bracket and a 3M tape mounting bracket. The clip bracket is inserted into the helmet shell, while the 3M tape bracket adheres to the left side of the helmet, requiring 15 seconds of pressure and 24 hours to dry. LEXIN recommends using the clip mounting bracket for security. The main unit attaches to the bracket by aligning square columns on its back with square holes on the bracket and sliding it down until it clicks. To remove, the main unit is pushed towards the upper left until it slides out.

Speakers are installed by peeling off the 3M tape and sticking them into the helmet's inner padding, then pressing them firmly against velcro pads. Spacers are provided for helmets with deep ear pockets to bring speakers closer to the ears. Wires should be hidden between the helmet liner and shell. The speaker with the shorter wire is for the left ear, and the longer wire for the right, which also enhances FM radio reception. Extra speaker pads are included to adjust speaker thickness for optimal ear proximity.

Microphone installation offers a choice between a button microphone for full-face helmets and a boom microphone for open-face helmets, based on user preference. For full-face helmets, the button microphone is installed by adhering half of its velcro pad to the center of the helmet's mouth section, attaching the microphone to the velcro, and connecting it to the headphone connector from the left. For open-face helmets, the boom microphone is installed by adhering half of its velcro pad to the microphone base and the other half to the helmet underpadding. The microphone's direction is adjusted so the triangular mark points towards the mouth. A boom microphone holder can be used for additional support.

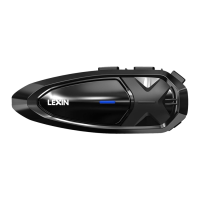
The device also features replaceable decorative shells. To replace, the old shell is pried off from a small gap on the left, and a new shell is aligned and pressed until it fits perfectly.

Basic Operation:

The G2P has several buttons for control: Volume Down/Previous Song, Intercom Button, Volume Up/Next Song, and Power Button/USB-C Charge Port/Headset Port.

  • Power On/Off: Press and hold the Power Button for 2 seconds. A voice prompt "Power On" and current battery life are announced upon powering on. Press and hold for 2 seconds again for "Power Off".
  • Bluetooth Pairing:
    • Mobile Phone: With the unit off, press and hold the Power Button for 5 seconds until the LED flashes red and blue alternately, and "pairing" is prompted. In phone Bluetooth settings, select "LEXIN G2P" (PIN "0000" if needed). A blue LED blink and "Pairing successful" confirm connection. The G2P automatically reconnects to the last paired phone; manual reconnection is possible by clicking the Power Button in standby mode.
    • GPS Navigation: Similar to phone pairing, hold the Power Button for 5 seconds until LEDs flash red and blue, and "pairing" is prompted. Follow GPS pairing instructions. Once paired, GPS navigation sounds will be audible.
    • Clear Bluetooth Pairing History: In standby mode, press and hold the Volume Up Button for about 7 seconds until the LED flashes red quickly, indicating all previous pairing history is cleared.
  • Phone Calls:
    • Answer: Click Power Button.
    • End: Click Power Button.
    • Reject: Double-click Power Button.
    • Answer Second Call: During a call, double-click Intercom Button for an incoming second call.
    • Reject Second Call: During a call, double-click Volume Up Button for an incoming second call.
    • Voice Dial: Double-click Power Button to activate Siri or other voice assistants and speak a name from your phone list.
  • Music and Volume Control:
    • Volume: Click Up/Down Button. Voice prompts indicate maximum/minimum volume.
    • Play/Pause: Click Power Button to play or pause music.
    • Change Song: Double-click Up Button for next song, Down Button for previous song. Note: Adjust phone volume for louder audio.
  • FM Radio:
    • Turn On/Off: Press Volume Up and Down Buttons simultaneously for 1 second.
    • Station Searching: Double-click Volume Up or Down Button.
  • Two-way Bluetooth Pairing (G2P to G2P):
    • Clear existing Bluetooth connections first (hold Volume Up for 7 seconds until LED flashes red quickly).
    • In standby mode, press and hold the Intercom Button for 2 seconds on both units until LEDs flash red and blue, and "pairing" is prompted. Devices connect automatically, then LEDs flash blue slowly with "pairing successful".
    • Activate Intercom Talk: Click Intercom Button on Unit 1. Indicator light flashes purple.
    • Exit Intercom Talk: Click Power Button. Click Intercom Button again to re-initiate. Double-click Up or Down Button to exit Bluetooth pairing mode and return to standby.
  • Universal Pairing (G2P with other LEXIN devices): G2P supports universal pairing with other LEXIN models (B4FM, G16, MTX, NOVUS X2). The process is similar to G2P-to-G2P pairing.
    • Function Priority: Mobile phone > Intercom Talk > Music/FM/GPS. Higher priority functions interrupt lower priority ones.
  • Universal Pairing (G2P with non-LEXIN Bluetooth Intercom Headsets):
    • With G2P powered on, press and hold the Intercom Button for 2 seconds until LEDs flash blue and red, and "pairing" is prompted.
    • Follow pairing instructions for the other Bluetooth device. G2P will pair automatically.
    • After pairing, LED flashes blue, and "pairing successful" is prompted.
    • Start intercom talk by clicking Volume Up and Down Buttons together. LED flashes purple.
    • End intercom talk by clicking Power Button during conversation.
  • Pairing 6 G2P Devices (Group Intercom): G2P supports group intercom for up to 6 devices, allowing two-way communication between any two paired devices.
    • Channel A Pairing: In standby, press and hold Intercom Button for 2 seconds on Unit 1 and Unit 2 until LEDs flash red and blue, and "pairing" is prompted. Devices connect automatically, then LEDs flash blue slowly with "pairing successful".
    • Start Intercom Talk (Channel A): Click Intercom Button on Unit 1. LEDs on both connected units blink purple.
    • Answer Second Intercom Talk: Double-click Power Button.
    • End Intercom Talk: Click Power Button.
    • Channel B Pairing: In standby, press and hold Volume Up Button for 2 seconds on Unit 1 and Unit 3 until LEDs flash red and blue, and "pairing" is prompted. Devices connect automatically, then LEDs flash blue slowly with "pairing successful".
    • Start Intercom Talk (Channel B): Double-click Intercom Button on Unit 1. LEDs on both connected units blink purple.
    • Channel C Pairing: In standby, press and hold Intercom Button and Volume Up Button for 2 seconds on Unit 1 and Unit 4 until LEDs flash red and blue, and "pairing" is prompted. Devices connect automatically, then LEDs flash blue slowly with "pairing successful".
    • Start Intercom Talk (Channel C): Triple-click Intercom Button on Unit 1. LEDs on both connected units blink purple.
    • Channel D Pairing: In standby, press and hold Volume Down Button for 2 seconds on Unit 1 and Unit 5 until LEDs flash red and blue, and "pairing" is prompted. Devices connect automatically, then LEDs flash blue slowly with "pairing successful".
    • Start Intercom Talk (Channel D): Four times click Intercom Button on Unit 1. LEDs on both connected units blink purple.
    • Channel E Pairing: In standby, press and hold Intercom Button and Volume Down Button for 2 seconds on Unit 1 and Unit 6 until LEDs flash red and blue, and "pairing" is prompted. Devices connect automatically, then LEDs flash blue slowly with "pairing successful".
    • Start Intercom Talk (Channel E): Five times click Intercom Button on Unit 1. LEDs on both connected units blink purple.
    • Cross-pairing: After Unit 1 is paired with the other 5 units, cross-pairing is needed for the remaining 2-6 units to establish full Bluetooth connectivity between any two devices. The manual provides a table outlining which channel setting (A, B, C, D, E) to use for specific unit pairings (e.g., Unit 2 with Unit 3 uses Channel C). For detailed operation and LED light indication, refer to the specific pairing method for each channel.

Maintenance Features:

The manual includes warnings regarding local laws and regulations concerning the use of in-helmet speakers while operating motorized vehicles. It also provides FCC compliance information, noting that the equipment has been tested and found to comply with Class B digital device limits. Users are advised that changes or modifications not expressly approved by the responsible party could void their authority to operate the equipment. The device complies with Part 15 of the FCC Rules, meaning it may not cause harmful interference and must accept any interference received. Measures to correct interference include reorienting/relocating the receiving antenna, increasing separation between equipment and receiver, connecting to a different circuit, or consulting a dealer/radio/TV technician.

LEXIN G2P Specifications

General IconGeneral
BrandLEXIN
ModelG2P
CategoryHeadsets
LanguageEnglish