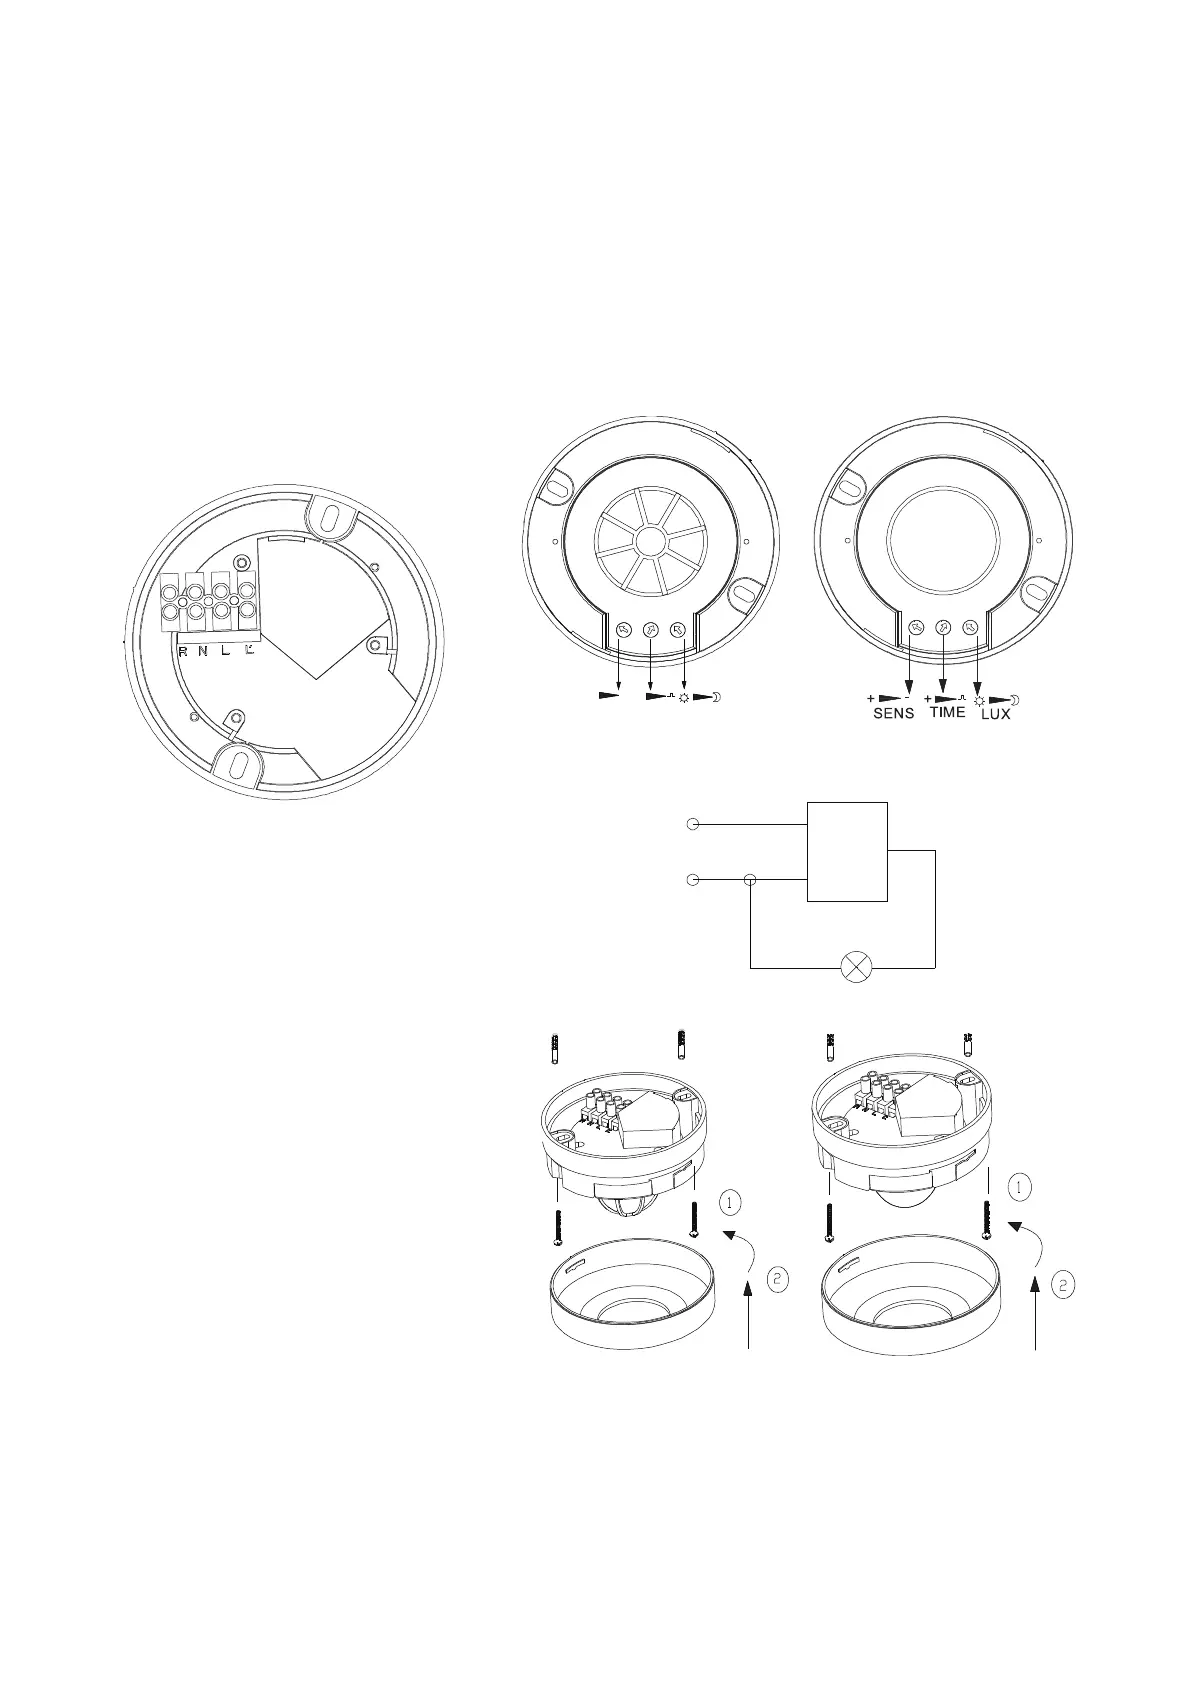
② TIME: Adjust time setting of load work. Turn clockwise to increase it and turn anti-clockwise to decrease it.
The time setting is about 8±3min when turn to max. It is in impulse mode when turn to mini. In impulse mode
if you want turn to short time mode turn anti-clockwise a little when LED blink three times is ok.
③ LUX: Adjust working light. Turn clockwise to increase it and turn anti-clockwise to decrease it. When turn to
mini, it will only work below the light-control about 10LUX, when turn to max, it can work any light-control.
L: Power input
N: Neural
L′: Load
brown L
blue N
~ in
L' red
load
sensor
(1)Before installing switch off power;
(2)Rotate top cover anti-clockwise and take
off it, tighten off the screws fixing bottom
cover;
(3)Install the bottom cover on selected
position with screw(like①);
(4)According to the connection-wire diagram
connect the power wire and load wire into the
connection line column in sensor;
(5)Button top cover on sensor and rotate it
tighten clockwise(like②), the installing
finished.
① SENS: Adjust detection range. Turn clockwise to increase it and turn anti-clockwise to decrease it. It is 1m
when turn to mini, and it is 8m when turn to max.
TIME
+
-
SENS
+
LUX
Should be installed by electrician or experienced man.
Avoid installing it on the unrest objects.
There shouldn’t be hindrance and moving object in front of the detection window effecting detection.
Note
Knob setting
Connection-wire diagram
Installation instruction
 Loading...