EasyManua.ls Logo

Lexing LX-PR-29A - User Manual

Lexing LX-PR-29A
3 pages
Print Icon
To Next Page IconTo Next Page
Loading...
The product is a new saving-energy switch, it adopts good sensitivity
detector, integrated circuit and SMT. It gathers automatism, convenient safe,
saving-energy and practical functions. One detector inside compose a wide
range detection field, it utilizes the infrared energy from human as
control-signal source, it can start the load at once when one enters detection
field. It can identify day and night automatically. It is easy to install and used
widely, possessing the functions of power show and detecting show.
Power source: 220-240V/AC,50Hz
100-130V/AC,60Hz
Rated load:1200W Max.tungsten (220-240V/AC)
300W Max.fluorescent (220-240V/AC)
600W Max.tungsten (100-130V/AC)
150W Max.fluorescent (100-130V/AC)
Time setting: 10±3sec~8±3min
You can manually adjust the time setting, Sensitivity and light-control (For detail: see 1.knob setting); it is very easy to use.
Install Sensor at 2.5~3.5m position on the wall (For detail: see 3. installation instruction) and connect the wire according to
the 2. connection figure. Switch on power, after about 1 minute the unit enter stable working state. Here please turn TIME
knob to the position close to minimum, and turn LUX to sun for testing. If it works normally, turn the TIME knob to the
minimum” IMPULSE” position( ). When it senses again, the controlled lamp will be turned on and off regularly. If the
above tests go through, then select the time, light-control and sensitivity to your need. So its installation is ok.
Sensor´s LED:
1. It always light after switch on power, and be off after the unit enter working state.
2. It light once when the unit receives sensing signal.
Height of installation2.5~3.5m
2.5~3.5m
LX-PR-29A Infrared Sensor Instruction
Summary
Specifications
Function
105mm
59mm
88.0mm
Sensing angle adjustment range Sensing distance adjustment range
Height of installation2.5~3.5m
2.5~3.5m
Sensor information
8m
360°
8m
1m 1m
105mm
58mm
1 X Detector
Light-control: 10LUX~2000LUX
Detection range: 1-8m (radii.)
Detection angle: 360º (ceiling installation)
Installation height: 2.5~3.5m
Working temperature: -10°C~+40°C
Power consumption: working 0.45W(static 0.1W)
Sense motion speed: 0.6~1.5m/s
Question and Answer IconNeed help?

Do you have a question about the Lexing LX-PR-29A and is the answer not in the manual?

Summary

Summary and Specifications

Product Summary

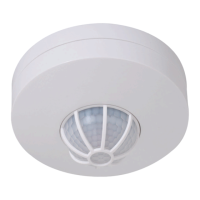
Overview of the energy-saving infrared sensor, its sensitivity, and automatic functions.

Technical Specifications

Details power source, load ratings, time setting, light control, detection range, angle, and operating conditions.

Sensor LED Indicators

Describes the behavior of the sensor's LED after power-on and upon receiving a sensing signal.

Sensor Information Diagrams

Illustrates installation height, sensing distance adjustment range, and sensing angle adjustment range.

Functional Overview

Explains how to manually adjust time, sensitivity, and light-control settings for operation.

Setup and Wiring

Knob Settings Explained

Details the function of SENS, TIME, and LUX knobs for adjusting detection range, time delay, and light sensitivity.

Wiring Diagram and Connections

Provides a visual guide for connecting power input (L, N) and load (L') wires to the sensor terminals.

Installation Procedure

Step-by-step instructions for installing the sensor, including cover removal, mounting, and wire connection.

Installation Notes

Important considerations for installation, including professional requirements and avoiding obstructions.

Troubleshooting and Guidelines

Installation Precautions

Advises against installing near temperature alteration zones and emphasizes safety during installation.

Load Not Working Issues

Troubleshooting steps for when the connected load fails to operate, checking power, load, and detection.

Poor Sensitivity Diagnosis

Addresses issues with sensitivity, checking for obstructions, high ambient temperature, and correct installation.

Automatic Shut-off Problems

Solutions for when the sensor fails to shut off the load automatically, checking continuous signals and time settings.

Overview

The LX-PR-29A Infrared Sensor is an energy-saving switch designed for automatic control of lighting based on motion detection. It integrates a highly sensitive detector, an integrated circuit, and Surface Mount Technology (SMT) to provide convenient, safe, and practical functions. The device utilizes infrared energy emitted by humans as a control signal source, activating connected loads when a person enters its detection field. It can automatically distinguish between day and night conditions, making it versatile for various environments. The sensor is easy to install and features indicators for power and detection status.

Function Description

The primary function of the LX-PR-29A is to automatically switch on a connected load (e.g., a lamp) when motion is detected within its sensing range and angle. It then switches off the load after a set time delay if no further motion is detected. This automation helps in saving energy by ensuring lights are only on when needed. The sensor's wide detection field is achieved by a single internal detector.

Important Technical Specifications

  • Power Source:
    • 220-240V/AC, 50Hz
    • 100-130V/AC, 60Hz
  • Rated Load:
    • 220-240V/AC:
      • 1200W Max. for tungsten lamps
      • 300W Max. for fluorescent lamps
    • 100-130V/AC:
      • 600W Max. for tungsten lamps
      • 150W Max. for fluorescent lamps
  • Time Setting: Adjustable from 10±3 seconds to 8±3 minutes.
  • Light-Control (LUX): Adjustable from 10 LUX (darkness) to 2000 LUX (daylight).
  • Detection Range: 1-8 meters (radius).
  • Detection Angle: 360° (suitable for ceiling installation).
  • Installation Height: 2.5-3.5 meters.
  • Working Temperature: -10°C to +40°C.
  • Power Consumption: 0.45W (working), 0.1W (static).
  • Sense Motion Speed: 0.6-1.5 m/s.

Usage Features

The LX-PR-29A offers several user-adjustable features through its three control knobs:

  1. SENS (Sensitivity/Detection Range): This knob adjusts the detection range. Turning it clockwise increases the range to a maximum of 8 meters, while turning it anti-clockwise decreases it to a minimum of 1 meter.
  2. TIME (Time Setting): This knob controls how long the connected load remains on after motion is detected. Clockwise rotation increases the time up to 8±3 minutes. Turning it anti-clockwise decreases the time. At its minimum setting, it operates in "impulse mode." To set a short time mode from impulse mode, turn the knob slightly anti-clockwise until the LED blinks three times.
  3. LUX (Light-Control): This knob determines the ambient light level at which the sensor will operate. Turning it clockwise allows the sensor to work in any light condition (up to 2000 LUX). Turning it anti-clockwise sets it to only operate in low light conditions (approximately 10 LUX), meaning it will only activate when it's dark.

Sensor's LED Indicators:

  • The LED lights up continuously after power-on and turns off once the unit enters its stable working state.
  • The LED blinks once each time the unit receives a sensing signal, confirming detection.

Installation and Setup: The sensor is designed for ceiling installation at a height of 2.5 to 3.5 meters.

  1. Before installation, ensure the power is switched off.
  2. Rotate the top cover anti-clockwise to remove it, then loosen the screws fixing the bottom cover.
  3. Mount the bottom cover to the desired position using screws.
  4. Connect the power wire (brown L for live, blue N for neutral) and the load wire (L' red for load) to the connection line column within the sensor, following the provided wiring diagram.
  5. Attach the top cover by aligning it and rotating it clockwise until secure.
  6. After installation, switch on the power. The unit will enter a stable working state after about 1 minute.
  7. For testing, set the TIME knob to minimum and the LUX knob to the "sun" position. If it functions correctly, adjust the TIME, LUX, and SENS settings to your specific needs.

Maintenance Features

The manual provides troubleshooting steps for common issues:

Load not working:

  • Verify correct power and load connections.
  • Check if the load (e.g., lamp) is functional.
  • Observe if the indicator lamp accelerates its speed after detection.
  • Ensure the working light conditions match the light-control setting.

Poor sensitivity:

  • Check for any obstructions in front of the detection window.
  • Verify that the ambient temperature is not excessively high.
  • Confirm that the signal source (person) is within the detection field.
  • Ensure the installation height matches the recommended height.
  • Check if the moving orientation is correct relative to the sensor.

Sensor not shutting off automatically:

  • Check for continuous signals or movement within the detection field.
  • Ensure the time setting is not set to the longest duration.
  • Verify that the power supply matches the instruction's requirements.
  • Check for significant temperature changes near the sensor (e.g., from air conditioning or central heating), which might interfere with detection.

Important Notes:

  • Installation should be performed by a qualified electrician or experienced personnel.
  • Avoid installing the sensor on unstable objects.
  • Ensure there are no obstructions or moving objects directly in front of the detection window that could affect detection.
  • Avoid installation near areas with significant air temperature alterations, such as air conditioners or central heating units.
  • For safety, do not open the cover if you encounter issues after installation.
  • In case of discrepancies between the product and the instruction manual, the product's actual behavior should take precedence.

Lexing LX-PR-29A Specifications

General IconGeneral
BrandLexing
ModelLX-PR-29A
CategoryAccessories
LanguageEnglish