The provided document is a Wi-Fi Setting Guide for the 1000i IPKTS (IP Key Telephone System) series, specifically for models 1040i and 1050i. It details how to configure Wi-Fi settings using both the LCD menu on the phone and a web-based interface.
Function Description
The 1000i IPKTS devices support Wi-Fi connectivity via a USB port, allowing them to connect to a wireless network. This feature enables the phones to operate in environments where wired network connections are not feasible or desired. The Wi-Fi setting guide outlines the procedures for turning on Wi-Fi, scanning for available access points (APs), connecting to new or saved APs, configuring network settings, and managing connected or saved APs. The device maintains wired network settings for all network and server configurations, except those directly related to Wi-Fi connection.
Important Technical Specifications
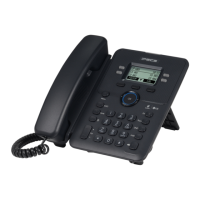
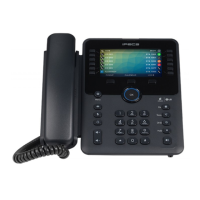
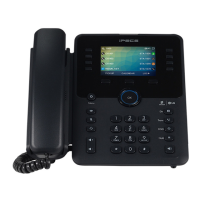
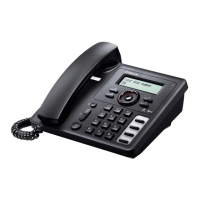
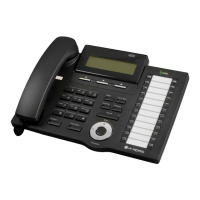
- Supported Models: 1040i and 1050i.
- Software Version: Rls1.2.0 or later.
- Connectivity: USB port for Wi-Fi dongle.
- Wi-Fi Dongle Support:
- TP-LINK Archer T3U: AC1300 Mini Wireless MU-MIMO USB Adapter (Ver:1.0).
- TP-LINK Archer T4U: AC1300 Wireless Dual Band USB Adapter (Ver:3.0).
- D-Link DWA-182: Wireless AC1300 MU-MIMO Wi-Fi USB Adapter (Revision D).
- Wi-Fi Frequencies: Supports both 2.4GHz and 5GHz bands, with options to search for either or both.
- Security Protocols: Supports WPA-PSK, WPA2-PSK, WPA/WPA2-PSK, WPA-802.1x, and WPA2-802.1x.
- Network Configuration: Allows manual configuration of IP Address, Subnet Mask, Default Gateway, and DNS Servers.
- Signal Strength Indication: Provides visual indicators for Wi-Fi signal strength (Very Poor, Poor, Fair, Good, Excellent).
Usage Features
The LCD menu provides a direct way to manage Wi-Fi settings on the phone itself.
- Accessing Wi-Fi Settings: The Wi-Fi setting menu appears only when a Wi-Fi dongle is plugged into the USB port. To access it, navigate through "Network Settings" -> "Profile" -> "Network Configuration" and select "11. Wi-Fi Settings".
- Wi-Fi On/Off: Users can turn Wi-Fi on or off using dedicated soft buttons.
- Scanning for APs: The "SEARCH" button initiates a scan for available APs. Options are available to search for 2.4G, 5G, or both frequency bands.
- Connecting to APs:
- Scanned APs: Select an AP from the scanned list and press "CONNECT". For secured APs, users will be prompted to enter an ID and Password (for WPA-Enterprise) or a Key (for WPA-Personal).
- Saved APs: APs that have been previously connected are saved. Users can select a saved AP and press "CONNECT" to reconnect without re-entering credentials, unless the AP's information has changed, in which case "EDIT" can be used.
- Manually Adding APs: Users can manually add an AP by pressing "ADD", entering the SSID, selecting the authentication type, and providing the necessary ID/Password or Key.
- Network Configuration: After connecting to an AP, users can configure network settings (MAC Address, Network Mode, IP Address, Subnet Mask, Default Gateway, DNS Address, VLAN Settings, 802.1x, LLDP-MED, VPN) by pressing "BACK" from the connected AP information screen and navigating to "Network Configuration" or "System Configuration".
- Phone Entering Text: The guide provides a detailed character entry chart for inputting text using the dial pad, with options for Upper Case, Lower Case, Symbols, and Numeric modes, and a "MODE" soft key or "TRANS" button to switch between them.
- Wi-Fi Status Icon: A dedicated icon on the phone's display indicates the Wi-Fi connection status and signal strength.
The web menu offers a more comprehensive and graphical interface for managing Wi-Fi settings.
- Accessing Wi-Fi Settings: Log in to the web manager, navigate to "Network Configuration", and select "Wireless" as the Interface. This will display the Wi-Fi specific settings.
- Wi-Fi On/Off: Changing the interface from "Wired" to "Wireless" effectively turns on the Wi-Fi functionality in the web menu.
- Scanning for APs: Click the "Scan" button in the "AP List" section to search for connectable APs. The results are displayed in the AP List, categorizing them as "connected AP", "saved AP", or "new searched AP".
- Connecting to APs:
- Saved APs: Select a saved AP from the list. Its information will be pre-filled. Click "Connect" to establish the connection. Users can modify information if needed before connecting.
- New APs: Select a new AP. Enter the required authentication information (ID/Password for WPA-Enterprise, Key for WPA-Personal) and click "Connect".
- Network Configuration: After connecting, users can configure network settings (Network Mode, IP Address, Subnet Mask, Default Gateway, Primary DNS Server) in the IPv4 section.
- Reboot Requirement: Any changes to network or server settings, or turning Wi-Fi on/off, require a reboot of the phone to apply the modifications.
Maintenance Features
- Disconnecting APs:
- LCD Menu: Press "DISCONNECT" from the connected AP information screen. This retains the AP's data for future reconnection.
- Deleting APs:
- LCD Menu:
- Connected AP: Press "DELETE" from the connected AP information screen. This erases all data for that AP and disconnects the network. A reboot is required to operate as a wired network after deletion.
- Saved AP: Select a saved AP from the search results screen and press "DELETE". This removes the AP from the saved list.
- Web Menu: Select a saved AP from the "AP List" and click "Forget" to delete it.
- Reboot Confirmation: Both LCD and Web interfaces prompt for a reboot when critical network or Wi-Fi settings are changed, ensuring that modifications are applied correctly.
- Wired Connection Fallback: If Wi-Fi is turned off or disconnected, the device is designed to maintain or revert to its wired connection settings, though a reboot might be necessary for the wired connection to operate wirelessly after Wi-Fi is turned off.