EasyManua.ls Logo

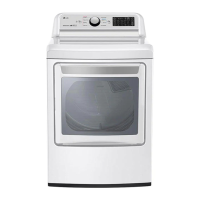
LG DLG7188WM User Manual

LG DLG7188WM
32 pages
To Next Page IconTo Next Page
Page #1 background imageLoading...
Page #1 background image
P/No.: 3828EL3010A
DLE7177WM/DLG7188WM
DLE7177NM/DLG7188NM
DLE7177RM/DLG7188RM
Thank you for buying a LG Dryer.
Please read your manual carefully, as it provides instructions
on safe Installation, Use and Maintenance.
Record the Model and Serial Numbers, and retain the
manual for future reference.
For more information, visit our website at http://us.lge.com
1-800-243-0000
24 HOURS A DAY, 7 DAYS A WEEK FOR LG CUSTOMER SERVICE

Other manuals for LG DLG7188WM

Questions and Answers:

LG DLG7188WM Specifications

General IconGeneral
BrandLG
ModelDLG7188WM
CategoryDryer
LanguageEnglish

Summary

PRODUCT FEATURES

OUTSTANDING PERFORMANCE

Highlights key benefits: capacity, efficiency, quiet operation, and energy saving.

STAINLESS STEEL DRUM

Describes the benefit of a rust-free stainless steel drum.

ARTISTIC DESIGN

Focuses on the modern front panel look and large crystal-clear glass door.

DIGITAL FABRIC CARE

Explains the multi-level temperature control for better garment care.

EASY OF USE

Highlights the selection of user-friendly functions for simple dryer operation.

USING THE RLM (REMOTE LAUNDRY MONITOR)

Details the function of the optional Remote Laundry Monitor for status updates.

DUAL SENSOR TECHNOLOGY

Explains the technology for accurate load sensing, even for small loads.

Part 1 SPECIFICATIONS

ACCESSORIES

Lists and describes available accessories such as dryer rack, stacking kit, pedestal, and remote laundry monitor.

Part 2 IMPORTANT WARRANTY AND SAFETY INSTRUCTIONS

SEEKING WARRANTY ASSISTANCE

Provides guidance on how to obtain warranty service and what information is needed.

IMPORTANT SAFETY INSTRUCTIONS

Details crucial safety precautions to reduce risks of shock, fire, and personal injury.

GROUNDING INSTRUCTIONS

Explains the importance and method of grounding the appliance for electrical safety.

WHAT TO DO IF YOU SMELL GAS

Provides emergency steps to take if a gas leak is detected.

California Safe Drinking Water and Toxic Enforcement Act

Informs about potential chemical exposure from gas appliances and mitigation.

Part 3 INITIAL STEPS FOR INSTALLING YOUR DRYER

STEP 1 Positioning the Dryer

Guides on choosing a location and ensuring proper clearances for dryer installation.

STEP 2 Procedure for Reversing the Door

Provides step-by-step instructions to change the direction the dryer door opens.

STEP 3 Connecting the Exhaust and Venting System

Details how to properly connect the dryer's exhaust system for safe and effective operation.

STEP 4 Connection of Gas Supply

Instructions for connecting the gas supply to the dryer, with specific warnings.

STEP 5 Electrical Plug Connections

Guidance on making electrical connections for electric dryers, including warnings.

STEP 6 Preparation of the Dryer

Instructions for cleaning the dryer drum and preparing for electrical connection.

STEP 7 Confirming Heat Source Operation

How to verify that the gas or electric heat source is functioning correctly.

STEP 8 Dryer Airflow

Explains how to measure and ensure adequate airflow for efficient drying.

STEP 9 Additional Instructions for Installation of Your Dryer in a Manufactured or Mobile Home

Specific requirements and warnings for installing the dryer in manufactured or mobile homes.

Part 4 ACCESSORIES INSTALLATION

Stacking Kit Installation Instructions

Detailed steps for safely installing the stacking kit to mount the dryer on a washer.

Pedestal Installation Instructions

Step-by-step guide for installing the dryer pedestal, including preparation and placement.

Part 5 ELECTRICAL REQUIREMENTS FOR ELECTRIC DRYERS

Instructions for Grounding of your Electric Dryer

Details the essential grounding methods and requirements for safe electrical connection.

4-wire connection : Direct wire

Instructions for making a direct wire connection using a 4-wire setup for electric dryers.

3-wire connection : Direct wire

Instructions for making a direct wire connection using a 3-wire setup for electric dryers.

Option 1: 4-wire connection with a Power supply cord

Guidance on connecting a 4-wire power supply cord to the dryer.

Option 2: 3-Wire Connection with a Power Supply Cord

Instructions for connecting a 3-wire power supply cord to the dryer.

Option 3: Optional 3-wire connection

Details an alternative 3-wire connection method, especially if direct grounding is restricted.

Part 6 ELECTRICAL REQUIREMENTS FOR GAS DRYERS

Electrical Requirements for Your Dryer

Covers electrical needs for gas dryers, including voltage, amperage, and grounding.

Part 7 GAS REQUIREMENTS AND INSTRUCTIONS

Gas supply requirements

Details the necessary gas supply specifications, pressure, and connection types for the dryer.

Part 8 EXHAUST REQUIREMENTS AND MAINTENANCE

Exhaust Requirements and Instructions

Specifies requirements for dryer exhaust ducting, length limitations, and installation best practices.

Exhaust and Dryer Maintenance

Covers periodic maintenance for the exhaust system and the dryer itself.

Cleaning the Lint Screen

Detailed guide on how to clean the lint filter for optimal performance and safety.

Part 9 OPERATING YOUR DRYER

1 Power Button

Explains how to turn the dryer on and off using the power button.

2 Cycle Selection

Details how to choose between Sensor Dry and Manual Dry cycles based on laundry needs.

3 Time Change Button

Explains how to adjust drying time using the MORE TIME and LESS TIME buttons.

4 Estimated Time Remaining

Describes the display that shows the estimated time left in the drying cycle.

5 Status/Clean Filter/Wrinkle Care Indicator

Explains the indicators for drying status, filter cleaning reminders, and wrinkle care.

6 Child Lock

How to enable and disable the child lock feature to prevent accidental changes.

7 Option Buttons

Details various options like CUSTOM PROGRAM, DRY LEVEL, TEMP. CONTROL, and WRINKLE CARE.

3. Wrinkle Care

Option to help prevent wrinkles by periodically tumbling clothes after drying.

4. Anti Bacterial

Uses high temperature to reduce bacteria on specific fabric types.

5. Damp Dry Beep

Alerts when the load is approximately 80% dry for removing lightweight items.

9 Time Dry

Allows manual setting of drying time and temperature for specific drying needs.

10 Temp. Control

Used to select temperature for manual cycles; cannot be used with sensor dry cycles.

11 Dry Level

Allows selection of desired dryness level for sensor dry cycles.

12 Start / Pause Button

Button used to start, pause, or resume the dryer cycle.

2. Loading

Guidance on how to properly load the dryer for optimal performance and efficiency.

4. To use a manual dry cycle

Instructions for setting manual dry cycles, adjusting time and temperature.

5. Pausing or restarting

How to pause and restart the dryer, with notes on interruption duration.

Clean lint filter

Instructions on cleaning the lint filter after each use for optimal performance and safety.

Part 10 TROUBLESHOOTING GUIDE

1.Problem:My Dryer Won 't Start

Troubleshooting steps for when the dryer fails to power on.

2.Problem:My Dryer Doesn't Heat

Troubleshooting steps for when the dryer tumbles but does not produce heat.

3.Problem:There are Greasy Spots on My Clothes

Addresses issues of greasy spots appearing on clothes after drying.

4. Problem: My Dryer Displayed Error

Explains common error codes (tE1, tE2) and their solutions.

5.Problem:There is Lint on my Clothes

Troubleshooting steps for excess lint found on clothes after drying.

6.Problem:There is static in my clothes after drying

Solutions for reducing static electricity in clothes after the drying cycle.

7.Problem:The drying time is not consistent

Explains factors affecting drying time and how to ensure consistency.

8.Problem:It takes too long for my clothes to dry

Troubleshooting tips for when the dryer cycle takes longer than expected.

9.Problem:My clothes are wrinkled

Advice on preventing wrinkles by adjusting drying time and removing clothes promptly.

10.Problem:My clothes are shrinking

Guidance on avoiding shrinkage by following garment care instructions.

Related product manuals