This document is an owner's manual for an LG LED LCD Monitor, covering models E2242V, E2342V, E2442V, and E2742V. It provides comprehensive instructions for assembling, operating, customizing settings, troubleshooting, and maintaining the monitor, ensuring users can maximize its functionality and lifespan.
The primary function of this device is to serve as a display unit for personal computers and other A/V equipment. It supports various input signals, including D-SUB (analog), DVI-D (digital), and HDMI (digital), allowing for versatile connectivity with different sources. The monitor is designed to offer a clear and stable visual experience, with features aimed at optimizing display quality and user comfort.
Usage Features:
The manual details several key usage features that enhance the monitor's functionality and user experience:
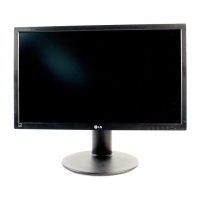
- Assembly and Setup: The manual provides step-by-step instructions for attaching and detaching the stand base, ensuring proper and secure setup on a table. It also includes guidelines for wall mounting, emphasizing VESA compatibility and safety precautions for installation. Proper ventilation is highlighted, recommending a minimum 10 cm clearance from walls.
- Connectivity: The monitor offers multiple input options. For PC connections, it supports D-SUB, DVI-D, and HDMI. The D-SUB connection transmits analog video, while DVI-D and HDMI transmit digital video signals. HDMI also supports digital audio signals from PCs or A/V equipment. The manual illustrates how to connect these cables and advises on using a Mac adapter for Macintosh users.
- Power Management: The monitor features a power button on the bottom switch panel to turn the device on and off. A power indicator light shows the monitor's status (on, off, or sleep mode). The manual also introduces "SUPER ENERGY SAVING" mode, an energy-efficient function that helps reduce power consumption and CO2 emissions. Users can enable or disable this mode and reset saving data.
- Self Image Setting Function: This feature, supported in Analog Mode, automatically adjusts the display to optimal settings when the monitor is connected to a PC for the first time. This ensures a good initial display quality without manual intervention.
- AUTO Function: Also supported in Analog Mode, the AUTO function helps resolve common display issues like blurry screens, blurred letters, screen flicker, or tilted screens. Pressing the AUTO button can improve resolution after changing screen settings or when encountering problems.
- Input Signal Selection: Users can manually select the input signal (D-SUB, DVI-D, HDMI) if multiple sources are connected. If only one signal is connected, the monitor automatically detects it, with D-SUB as the default setting.
- OSD (On Screen Display) Menu: The monitor provides an intuitive OSD menu for customizing various display settings. Users can navigate the menu using buttons on the bottom of the monitor. The OSD includes options for PICTURE, COLOR, DISPLAY, VOLUME, and OTHERS settings.
- Picture Mode Settings: The "PICTURE MODE" OSD allows users to select from predefined display modes such as CUSTOM, TEXT, PHOTO, CINEMA, and GAME. These modes optimize the screen for specific content types. Additionally, for AV mode, there are VIVID 1, VIVID 2, and STANDARD options. The CUSTOM mode allows for manual adjustment of elements like contrast, brightness, color, and sharpness.
- Picture Adjustments: Within the PICTURE menu, users can adjust SHARPNESS for screen clearness, BLACK LEVEL to set offset levels (affecting screen brightness/darkness, especially for HDMI input), and OVER SCAN to select the output image range for DTV timing in HDMI input, recommended for AV equipment.
- Color Adjustments: The COLOR menu offers GAMMA settings (GAMMA 0, 1, 2) to control the display of whitish or blackish images. COLOR TEMP allows users to select screen color (WARM, MEDIUM, COOL) or customize RED, GREEN, and BLUE color levels.
- Display Adjustments: The DISPLAY menu includes options for HORIZONTAL and VERTICAL positioning, CLOCK to minimize vertical bars or stripes, and PHASE to adjust display focus and sharpen characters.
- Volume Control: For HDMI input, the VOLUME menu allows users to adjust the headphone/earphone volume.
- Other Settings: The OTHERS menu provides options for LANGUAGE selection for OSD control names, POWER INDICATOR (ON/OFF) to control the power light, and WHITE BALANCE to adjust signal levels for optimal image quality, especially when white and black colors are present.
- OSD Lock/Unlock: A security feature allows users to lock the OSD controls to prevent inadvertent changes. This can be toggled by pressing and holding the MENU button for several seconds.
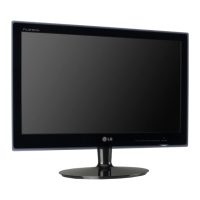
- Ergonomic Design: The manual emphasizes proper posture for using the monitor, including adjusting the monitor's location to avoid reflecting light and positioning hands gently on the keyboard with arms bent at the elbows. The monitor's tilt range (+20 to -5 degrees) allows users to adjust the viewing angle for comfort.
Maintenance Features:
The manual also touches upon aspects related to the maintenance and care of the device:
- Safety Precautions: Users are advised to read safety precautions before using the product and to retain the owner's manual for future reference.
- Handling and Movement: When moving the monitor, users are cautioned to unplug the power cord to prevent electric shock. Instructions for adjusting the monitor's angle include warnings against holding the bottom frame or pressing the screen, which could cause injury or damage. It also warns against carrying the product upside down by the stand base alone, as it may fall and cause damage or injury.
- Screen Care: To prevent image burn, users are advised to avoid displaying fixed images for long periods and to use a screensaver.
- Troubleshooting: A dedicated troubleshooting section helps users diagnose and resolve common issues such as no image, power indicator problems, "OUT OF RANGE" or "NO SIGNAL" messages, "OSD LOCKED" messages, and incorrect display images (position, vertical bars, horizontal noise, color abnormalities, screen blinking). It guides users to check cable connections, adjust brightness/contrast, use the AUTO function, and configure display settings.
- Driver Installation: For display issues, users are reminded to install the display driver from the provided CD or LG's website and to ensure the video card supports Plug&Play.
- Kensington Security System: The monitor includes a Kensington security system connector, allowing users to secure the monitor to a table with a compatible cable, deterring theft.
- Product Information: The manual instructs users to record the model and serial number, located on the back and side of the set, for future service needs.
- Product Updates: It notes that product specifications and manual contents may change without prior notice due to function upgrades, implying continuous improvement and potential need for updated information.