Do you have a question about the LG LDF6920(WW,BB,ST) and is the answer not in the manual?
Service information for individuals with electrical, electronic, and mechanical experience; any repair attempt may result in injury or damage.
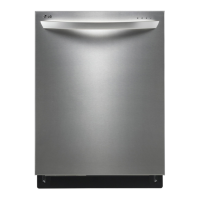
Details key product features including capacity, motor, drying, spray, and filter systems.
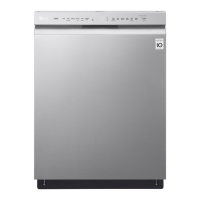
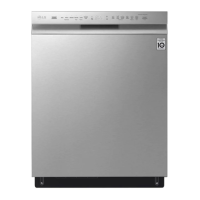
Details the control panel layout, indicator lights, and program selection buttons.
Locks control buttons to prevent accidental changes; activated/deactivated by pressing Delicate and Rinse Only buttons.
Select Sanitary for high temperature heating rinse (161°F/72°C) or Extra Rinse for an additional rinse cycle.
Turns the appliance on and automatically switches off for safety and economy.
Allows delaying the start of a selected program by one hour increments, from 1 to 12 hours.
Details the button sequences and corresponding displays for various test modes and component checks.
Step-by-step instructions for the complete disassembly of the dishwasher unit, including initial preparation.
Detailed steps for disassembling the door, including front cover, control panel, and latch assembly.
Instructions for removing the fan assembly, including air duct and inner cover.
Steps to remove the detergent dispenser, involving wire connections and screws.
Guidance on removing door springs and the door liner, with safety notes about sharp edges.
Steps to remove the lower frame by pressing holder hooks and removing screws.
Steps to remove the drain hose holder by pressing holder hooks and pulling the drain hose.
Instructions for removing the base cover by removing screws and pulling it out.
Steps to remove wiring connections and hose connections from the sump assembly.
Steps to remove the cabinet base by removing screws and lifting it upwards.
Instructions for removing the foot by twisting and the nut by pushing the hook.
Steps to remove the rear leg adjustment system components: holder, leg adjust, and shaft assembly.
Instructions to disassemble the inlet valve by removing two screws.
Steps to remove the air breaker assembly by disconnecting hoses and turning the nut.
Steps to remove the sump assembly by removing screws, holder, and pulling aside the hook.
Instructions for removing the heater and drain motor from the sump assembly.
Steps to remove the Vario Motor and Micro Switch.
Instructions to pull out the soil sensor.
Instructions for removing holder supporter, tub packing, and hinge supporter assembly, with notes on reassembly and potential damage.
Guides for diagnosing and resolving issues based on specific error messages displayed by the dishwasher.
Troubleshooting steps for 'INLET ERROR' related to water supply, inlet valve, and air guide.
Troubleshooting steps for 'DRAIN ERROR' concerning drain hose, wiring, and drain pump/motor.
Troubleshooting steps for 'LEAKAGE ERROR' caused by hose leaks, motor seal, drain hose height, or pump impeller.
Troubleshooting steps for 'EXCESS ERROR' due to inlet valve or controller issues.
Troubleshooting steps for 'THERMAL ERROR' related to inlet water temperature, thermistor, or PCB.
Troubleshooting steps for 'MOTOR ERROR' concerning wiring, pump impeller, motor rotor, or blade lock.
Troubleshooting steps for 'HEATER ERROR' involving heater circuit, thermistor, heater short, or relay circuit.
Diagnostic flowcharts and repair procedures for common dishwasher symptoms.
Troubleshooting guide for when the dishwasher does not power on after pressing the power button.
Troubleshooting steps if the wash pump or motor fails to operate, checking door closure and wiring.
Addresses issues like white deposits, streaks, or remaining food soils on dishes after washing.
Guidance on improving drying performance, including adjusting rinse-aid and selecting appropriate programs.
Troubleshooting steps when the power button does not automatically turn off after the operation cycle.
Steps to prepare the cupboard opening, select location, and ensure proper dimensions for dishwasher installation.
Guidelines for safe electrical wiring preparation, including warnings and compliance with codes.
Instructions for connecting the water supply, including hot/cold water options and leak prevention.
Adjusting the dishwasher legs for proper height and ensuring it is level before final placement.
Steps for sliding the dishwasher into the prepared cabinet opening, ensuring no kinks in the drain hose.
Instructions for connecting the drain hose to the disposal or air gap, including requirements and anti-siphoning methods.
Detailed steps for connecting the water supply line to the inlet valve, ensuring no kinks.
Instructions for making the electrical power connection, including safety precautions and wire routing.
Final checks after installation, including restoring power and water, and running a test cycle.
Exploded diagram of the tub assembly components for part identification.
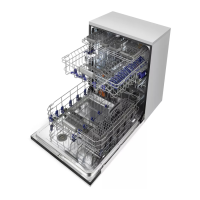
Exploded diagram of the upper and lower rack assemblies and related parts.
Exploded diagram of the front panel assembly components, including control and display elements.
Exploded diagram of the door assembly components, including inner and outer parts.
Exploded diagram of the sump assembly components, including motor, heater, and sensors.
| Brand | LG |
|---|---|
| Model | LDF6920(WW, BB, ST) |
| Category | Dishwasher |
| Language | English |