EasyManua.ls Logo

LG LMV2055ST - User Manual

LG LMV2055ST
15 pages
Print Icon
To Next Page IconTo Next Page
Loading...
Website: http://www.lg.com
MICROWAVE OVEN
INSTALLATION INSTRUCTIONS
PLEASE READ AND SAVE THESE INSTALLATION INSTRUCTIONS.
MFL37192905
Question and Answer IconNeed help?

Do you have a question about the LG LMV2055ST and is the answer not in the manual?

Summary

Safety and Warning Guidelines

Before Installation

Recommendations for proper installation and reading the manual before beginning.

Electrical Safety

Essential warnings about electric shock, grounding, and cord usage.

Installation Safety

Warnings about potential microwave energy exposure and proper mounting.

Space and Support Requirements

Guidelines on wall construction, mounting, and weight support requirements.

Installation Precautions

Caution to protect countertops/cooktops during installation using protective material.

Parts, Tools, and Materials

Included Parts

Lists and illustrates parts supplied with the oven for installation.

Required Tools and Materials

Lists and illustrates tools and materials required for the installation process.

Step 1: Electrical Connection

Grounding Requirement

Critical warning about electric shock and the necessity of grounding the appliance.

Outlet and Grounding Warnings

Emphasizes the need for a qualified electrician if the proper wall outlet is missing.

Grounding Risks

Reinforces the severe consequences of improper grounding.

Step 2: Venting System Preparation

Venting Mandate

Critical warning emphasizing the necessity of proper ventilation for the oven.

Venting Methods Overview

Outlines the three available methods for venting the microwave oven.

Venting Clearance and Reminders

Important notes on clearance for rear exhaust and key installation reminders.

Venting Fittings and Length

Details standard fittings, adapters, and guidelines for duct length.

Step 3: Venting Blower Preparation

Blower Electrical and Wiring Safety

Critical warnings to unplug the unit and avoid pulling blower wiring.

Roof-Venting Blower Assembly

Specific instructions for assembling the damper and exhaust adaptor for roof-venting.

Vent Fan Installation Warnings

Critical warning about fire hazard if the vent fan is not installed correctly.

Wall-Venting Blower Configuration

Detailed steps for reconfiguring the blower unit for wall-venting installation.

Room-Venting Blower Configuration

Detailed steps for reconfiguring the blower unit for room-venting (recirculating) installation.

Step 4: Wall and Cabinet Preparation

Wall Stud Installation Safety

Warning against installation without a wall stud and advice to consult a professional.

Template Marking Procedures

Instructions for using templates to mark wall and cabinet locations for drilling.

Electrical Hazard Warnings

Warnings about electrical hazards and the importance of disconnecting power before drilling.

Power Cord Hole Safety

Warning to cover the power supply cord hole edge with a bushing to prevent injury.

Drilling and Filler Block Guidance

Instructions for drilling holes and guidance on using filler blocks.

Cutting Vent Openings

Instructions for cutting ventilation openings based on the chosen venting method.

Step 5: Mounting Plate Installation

Wall Stud Mounting Requirement

Emphasizes the critical requirement for the oven to be secured to at least one wall stud.

Template Positioning and Drilling

Detailed steps for positioning templates and drilling mounting holes.

Mounting Plate Attachment

Steps for attaching the mounting plate to the wall using toggle bolts.

Step 6: Attach Oven to Wall

Two-Person Installation Warning

Critical warning requiring two people for safe installation of the microwave oven.

Oven Hanging and Positioning

Steps for lifting, hanging, and positioning the oven against the upper cabinet.

Securing Oven and Ductwork

Instructions for securing the oven from the top and installing roof ductwork.

Power Cord and Filter Installation

Instructions for securing the power cord and inserting filter screens.

Final Connection and Operation Check

Advice to plug in the power cord and check oven operation.

Overview

This document provides comprehensive installation instructions for an LG microwave oven, ensuring safe and proper setup for various venting configurations. The manual emphasizes safety precautions, necessary tools, and detailed steps for preparing the electrical connection, venting system, and mounting the appliance.

Function Description

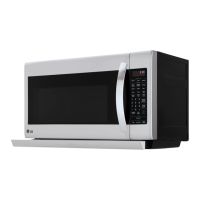
The LG microwave oven is designed for cooking, reheating, and defrosting food items, offering convenience and efficiency in the kitchen. It features a powerful microwave heating system and an integrated ventilation system to remove smoke, steam, and cooking odors from the kitchen environment. The ventilation system can be configured for roof-venting, wall-venting, or room-venting (recirculating) to suit different kitchen layouts and external exhaust requirements.

Usage Features

The microwave oven is intended for residential use and is designed to be installed above a cooking surface, typically a range or cooktop. Its primary function is to provide rapid and even heating for a variety of food items. The integrated ventilation system helps maintain air quality in the kitchen by drawing air from the cooking area and either expelling it outside (roof-venting or wall-venting) or filtering and recirculating it back into the room (room-venting).

The installation process is detailed to ensure optimal performance and safety. Key usage features derived from the installation instructions include:

  • Versatile Venting Options: The oven supports three venting methods:
    • Roof-Venting: Ideal for installations where the oven is on an outside wall near the roof, expelling air through a duct system that goes up through the roof. This method requires specific ductwork (3 1/4" x 10" or 6" round duct) and a roof cap.
    • Wall-Venting: Suitable for ovens located on an outside wall of the house, where air is expelled directly through the wall. This also requires specific ductwork (3 1/4" x 10" or 6" round duct) and a wall cap.
    • Room-Venting (Recirculating): Used when external venting is not feasible. Air is filtered and recirculated back into the kitchen. This method involves reorienting the blower unit to face the front of the cabinet.
  • Integrated Lighting: While not explicitly detailed in the installation steps, microwave ovens typically include interior lighting for visibility during cooking and often feature task lighting underneath to illuminate the cooking surface below.
  • User-Friendly Controls: The manual implies standard microwave operation, which typically involves a control panel for setting cooking times, power levels, and various functions like defrost, reheat, and specific food programs.
  • Safety Interlocks: The document highlights the importance of safety interlocks, stating that the oven should not be operated if the door is open or if the interlocks are tampered with. This ensures the microwave radiation is contained during operation.
  • Grease Filters: The installation instructions mention the inclusion and proper placement of grease filters, which are crucial for capturing grease and other particles from cooking fumes, especially in recirculating mode, but also beneficial for external venting to keep ducts cleaner.

Maintenance Features

The installation manual provides insights into maintenance aspects, primarily focusing on ensuring the longevity and proper functioning of the appliance and its ventilation system.

  • Regular Cleaning: The document warns against allowing "soil or cleaner residue to build up on the flat surfaces around the microwave oven door," indicating that regular cleaning of these areas is necessary to maintain safe operation and prevent damage to door seals.
  • Ventilation System Maintenance:
    • Ductwork Integrity: The instructions emphasize sealing all joints in the duct system with duct tape and using caulking to seal exterior wall or roof openings around the cap. This prevents air leaks, which can reduce ventilation efficiency and lead to moisture issues or energy loss.
    • Damper Functionality: Users are instructed to ensure the damper swings freely after installation, which is critical for proper airflow and preventing backdrafts. Regular checks of the damper's movement are implied for continued efficient operation.
    • Grease Filter Management: The mention of grease filters suggests they are removable and likely require periodic cleaning or replacement to maintain effective grease capture and airflow. The manual details how to insert the filter screens, implying they are user-serviceable for cleaning.
    • External Hood Opening Check: After installation, users are advised to "check outside hood opening and operation," which suggests a need for periodic inspection to ensure it remains clear of obstructions and functions correctly.
  • Professional Repair: The manual explicitly states, "DO NOT ATTEMPT TO ADJUST OR REPAIR THE OVEN YOURSELF!" if the oven is damaged (e.g., bent door, broken hinges, loose latches, broken seals). It recommends that a "qualified technician" perform adjustments and repairs, including checking for microwave leakage. This highlights the specialized nature of microwave oven repairs and the importance of safety.
  • Electrical Connection Integrity: The instructions stress the importance of a dedicated electrical circuit and proper grounding. While not a direct maintenance task, ensuring the electrical connection remains dry and free from pinching or crushing (as warned during installation) is a continuous maintenance consideration to prevent electrical hazards.
  • Blower Unit Inspection (Post-Installation): For wall-venting and room-venting configurations, the manual instructs users to "check the air ventilation path" after installation. This implies that periodic checks of the blower unit and its alignment might be necessary if ventilation performance degrades. Abnormal noise, weak ventilation, and product overheating are listed as potential problems resulting from improper installation, suggesting these symptoms should prompt an inspection.

Overall, the LG microwave oven is designed for safe and efficient operation, with a strong emphasis on correct installation to ensure optimal performance of both its cooking and ventilation functions. The maintenance aspects primarily revolve around keeping the appliance clean, ensuring the ventilation system is free of obstructions and leaks, and seeking professional help for any repairs or significant issues.

LG LMV2055ST Specifications

General IconGeneral
TypeOver-the-Range
Capacity2.0 cu. ft.
Power1000 Watts
Control TypeTouch
Interior MaterialEasyClean
Width29.875 inches
Height16.5 inches
Depth15.75 inches
TurntableYes
Sensor CookYes
Vent Fan CFM300 CFM
ColorStainless Steel
Cooking PresetsYes
Child LockYes

Related product manuals