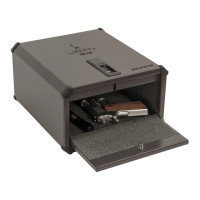
This document is a quick start guide for a Revere security safe, manufactured by Liberty Safe and Security Products, Inc. It provides essential information for setting up, using, and maintaining the safe, with a strong emphasis on safety and security.
Function Description:
The Revere security safe is designed to provide secure storage for valuables, particularly firearms, from theft and fire. It features a robust construction and a SafeLogic TopLit electronic lock for access. The safe is intended for home use and offers a high level of security when properly installed and maintained. Its primary function is to protect contents from unauthorized access and environmental hazards like fire.
Usage Features:
The guide begins by congratulating the user on their purchase and immediately stresses the importance of reading the quick start guide before opening the safe. This highlights a critical safety and setup sequence.
Registration: Users are instructed to register their safe at www.LibertySafe.com within 30 days of purchase. This is crucial as failure to register may void the warranty, emphasizing the importance of this step for warranty coverage.
Safety Precautions: A significant portion of the guide is dedicated to safety.
- Heavy Door: The safe door is explicitly stated to be heavy, and users are warned against opening it on uneven or unstable floors. There's a serious warning about the safe tipping forward if not lag-bolted to the floor, which could result in severe injury or death.
- Bolt-Down Kit: If a bolt-down kit is included, it's strongly recommended to bolt the safe to the floor to prevent tipping when the door is opened. This reinforces the importance of secure installation.
- Children Safety: A specific warning addresses the danger of small children climbing inside and becoming locked in, which could lead to serious injury or death. This emphasizes the need to keep the safe secured at all times, especially in homes with children.
Packaging Materials: After opening, users should remove plastic protectors or foam from the door corners.
Inspection: Upon receipt, users must inspect the safe for shipping damage. Any damage found must be reported to the delivery company immediately. Damage not reported within 15 days may result in no recourse, underscoring the time-sensitive nature of this inspection.
Serial Number & Master Combination:
- Location: The serial number is found in two locations: on the top, back right side of the safe, and inside the opening edge of the door.
- Verification: Users are instructed to compare the serial number in the guide with the one on the safe. If they don't match, Liberty Safe or the local dealer should be contacted immediately.
- Storage: Crucially, users are advised to record the safe's serial number and combination and store them in a secure location other than the safe itself. This is a fundamental security practice.
SafeLogic TopLit Electronic Lock Operation:
The guide provides a step-by-step process for operating the electronic lock:
- Enter Factory Code: The initial step is to enter the factory-set master code (123456).
- Rotate Handle (Clockwise): The handle hub should be rotated clockwise (or counterclockwise if the handle is set left of the door center) to open the safe.
- Swing Door Open: The door should be swung open at least 90 degrees.
- Rotate Handle (Counterclockwise): The handle hub is then rotated counterclockwise (or clockwise if set left of center) to extend the locking bolts/bars. This allows testing the lock with the door open. Some models may require pressing and holding the bolt detent (underside bottom edge of the door) during this step.
- Change Master Code: While the door is open, users are guided to change the factory master code to a more secure one by entering "000000", then "123456", followed by the new 6-digit code entered twice.
- Verify New Code: The new code must be verified with the door open.
- Store Combination: A critical reminder to store the combination outside of the safe is reiterated.
Changing the Batteries in Your Lock:
- Battery Life: Battery life depends on usage. The lock will emit short chirps when battery power is low.
- Recommended Batteries: Liberty Safe recommends Duracell® 9V Alkaline Batteries for optimal performance.
- Memory Retention: The lock's memory chip retains codes during battery changes, even if the battery dies.
- Weak Battery Issue: A weak battery can prevent the lock from opening, even if it beeps, necessitating replacement.
- Replacement Steps:
- Turn the housing ring counterclockwise and pull it off.
- Push the battery from the bottom left and unsnap it from the connector.
- Snap a new 9V alkaline battery onto the clip, pushing it from the right side. Users are reminded to tuck the cable into the compartment and ensure it's not caught in the housing ring.
- Align the three tabs on the housing ring with the grooves on the entrypad base and slide it on.
- Turn the ring clockwise until it clicks.
Removing Safe from Pallet:
This section emphasizes extreme caution due to the safe's weight, recommending two or more adults for the task.
- Remove Interior Items: Side shelves and accessories must be removed from the interior floor.
- Locate Lag Screws: Lag screws securing the safe to the pallet are located in one of two areas:
- Under plastic caps in the carpeted floor corners.
- Under floorboards accessed by pulling up straps in the front center of the floor.
- Unscrew Lag Screws: A 9/16 inch socket wrench is used to unscrew the four lag screws. An adult must steady the safe to prevent tipping during this step.
- Close Door: After removing screws, the door should be closed and the handle turned to prevent it from swinging open.
- Slide Off Pallet: With one person on each side, the safe is carefully slid off the pallet until one edge rests on the floor. While tilted, the pallet is removed, and the safe is then lowered to its upright position.
Interior and Handle Setup:
This section should only be started after the lock has been tested.
- Install Handle Spokes: Locate the padded yellow envelope inside the safe. Remove handle spokes and screw them into the hub. (This step is skipped for solid single-point handles).
- Install Shelf Clips: Remove shelf clips from the envelope. Insert the top of each clip at the desired shelf level and firmly press down until the bottom snaps onto the track. Four clips are needed per shelf, ensuring they are at the same level.
- Place Shelves: Side shelves are placed on the installed clips. The guide notes that shelf style and quantity vary by model.
Installing Concrete Anchors / Installing Wood Anchors:
These sections detail how to securely anchor the safe to the floor, which is crucial for security and safety. Anchor kits are sold separately.
- Importance: Anchoring the safe is highlighted as the highest level of security and safety, preventing removal by thieves and tipping when the door is open.
- Protective Barrier: A protective barrier (carpet, treated wood, or rubber mat) is recommended between the safe and floor to prevent scratching and rust.
- Leveling: The safe must be level before anchoring.
- Hardware: Appropriate hardware for the specific floor surface (wood or cement) must be used.
- Bolt-Down Kit: If a bolt-down kit was included, bolting the safe to the floor is strongly recommended to prevent tipping.
- Steps (Concrete/Wood):
- Remove the safe from the pallet and place it in the desired location. Floorboards/caps should remain removed to access anchor points.
- Drill holes at each of the four anchor points (3" deep, using a ⅝" concrete drill bit or ¼" wood drill bit).
- Use a vacuum to clean debris from the holes.
- Hammer anchor bolts into holes and tighten with a ½" socket set (for concrete) or place washers on wood bolts and secure with a 9/16" socket set or drill (for wood).
- Replace floor caps/floor panels.
Maintenance Features:
Cleaning and Maintaining Your Safe:
- Manual Locks: Annual servicing by a certified lock technician is recommended for manual locks. Electronic locks do not require this.
- Locking Pins/Bars: Once a year, extend the bolts and apply a small amount of lubricating oil or Vaseline to the bottom of the middle bolt on both the hinge and open sides of the door.
- Internal Locking Mechanism: This advanced mechanism requires no maintenance. Opening the door panel by anyone other than a certified technician may void the warranty.
- Exterior:
- Use a soft, non-abrasive cloth dampened with water to clean gloss, powder coat, or textured finishes. Other materials can cloud or scratch the finish.
- Logos and graphics should be wiped gently, never rubbed or polished.
- The lock and handle have a protective coating; do not use metal polishes or solvents. Simply wipe with a soft cloth.
- Scratches and blemishes can be touched up with a paint kit from a dealer.
- Fire Seal: The fire seal requires no maintenance unless it is ripped or destroyed.
Loading Your Safe:
- Gun Placement: Guns should rest securely against provided cutouts to prevent accidental tipping when the door is closed.
- Electronic Media: A Media Cooler is recommended for additional protection of electronic media.
- Door Pressure: Nothing should be placed in the safe that puts pressure on the door or locking bolts when closed.
- Humidity Control: In humid environments, a dehumidifier or desiccant is recommended to protect contents from rust or mildew. These devices, or any other personal contents, should not be placed near the locking bars to avoid interfering with the mechanism.
Troubleshooting:
- Combination Opens Intermittently: Check for lock-bolt pressure. Some free play should exist in the handle. This issue might be due to out-of-place interior shelves or improper storage (e.g., gun barrels, oversized items).
- Combination Works But Handle Will Not Turn: Corner protectors (packaging material) might cause undue pressure on locking bolts. Pushing on the door while turning the handle can alleviate resistance. If the handle turns partially, the bars may be jammed; rotating the handle back and forth can free them.
- Combination Works and Handle Turns But Safe Will Not Open: Verify the handle is fully rotated. Check the 5/16" Allen set screw on the handle for tightness. Some safes have a clutch mechanism that can engage due to improper storage or excess door adjustment. Pushing on the door while turning the handle can help.
- Door Will Not Shut: Ensure the lock is unlocked and locking bolts are fully retracted. Interior shelves should be pushed back as far as possible. The handle should travel the same distance with the door closed as it does when open.
Service Contact: For service, users are directed to call Liberty Safe's dedicated Tractor Supply Company customer service team at 1-800-281-7216.
Warranty Claims & Repairs:
The document includes a comprehensive "Limited Lifetime Warranty" from Liberty Safe and Security Products, Inc.
- Coverage: Covers defects in material and workmanship for the original purchaser's lifetime. Also covers damage from fire (not arson by purchaser/family), illegal/unauthorized break-in, or attempted break-in if homeowner's insurance doesn't cover it.
- Exclusions: Does not extend to safe contents, and the limited lifetime warranty specifically excludes the lock, painted surface, and electrical items (which have separate, shorter warranties).
- Cost:
- Inside US: No cost to purchaser (including labor and shipping).
- Inside Canada: No cost to purchaser, but purchaser is responsible for freight charges if a safe is replaced.
- Outside US & Canada: Liberty provides replacement parts at no cost, but purchaser is responsible for all labor, repair, service costs, and freight charges if a safe is replaced.
- Lock and Painted Surface Warranty: 5 years from purchase date. Covers defects in workmanship and materials. Liberty will repair/replace parts. Outside US/Canada, purchaser pays labor/repair/service costs.
- Electrical Items Warranty: 1 year from purchase date. Covers light fixtures, transformers, cords, and light switches. Liberty will replace parts. Purchaser pays labor/service costs.
- Proper Use: Warranty is valid if the safe is properly installed and cared for as instructed. Misuse, neglect, unusual conditions, or modifications void the warranty. Emphasizes bolting the safe to the floor for optimal security.
- Registration: Online registration MUST be completed within 30 days of purchase to validate the warranty.
- Claims: Claims are made by calling 1-800-281-7216 or writing to Liberty Safe. Fire/break-in claims require homeowner's insurance statement and police/fire department reports, and must be made within six months of the incident.
- Venue/Choice of Law: Claims resolved in Utah, under Utah law.
- No Other Warranties: This is the complete and exclusive agreement, superseding all prior agreements. No employee is authorized to make additional warranties.
- Limitation of Remedies: Liberty is not liable for punitive, special, indirect, incidental, or consequential damages (e.g., loss of profits, contents, use of safe, associated equipment, cost of capital, downtime, third-party claims, injury to property). Maximum liability is limited to the cost of the safe paid by the purchaser.
- Disclaimer: Explicitly states that the limited warranty is exclusive, and there are no other express or implied warranties, including merchantability or fitness for a particular purpose. Implied warranties do not extend beyond the duration of this limited warranty. Some states do not allow limitations on implied warranties, so these may not apply.
In summary, the Revere security safe is a robust storage solution with an electronic lock, designed for security and fire protection. Its usage involves careful setup, including anchoring to the floor, and regular maintenance to ensure longevity and proper function. The comprehensive warranty provides peace of mind, provided the user adheres to the strict registration, usage, and maintenance guidelines outlined in this quick start guide.

 Need help?
 General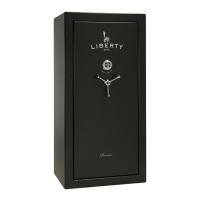

 To Next Page