2 3
SAFETY PRECAUTION
The safe door is heavy. Do not open the door with the safe on an uneven or unstable oor.
Hanging on an open door may cause the safe to tip forward when not lag-bolted to the oor,
resulting in serious injury or death to yourself or others. If a bolt down kit was included in
your safe, it is strongly recommended that you bolt the safe to the oor to prevent the safe
from tipping when the door is opened. If you have or have occasion to have small children in
your home, please make sure you never leave your safe unsecured. It is possible for small
children to climb inside your safe and become locked in. This could result in serious injury or death.
PACKAGING MATERIALS
After opening the safe, remove the plastic protectors or foam in the corners of the door.
INSPECT YOUR SAFE
Inspect your safe for shipping damage as soon as you receive it. If you nd any damage,
please contact the delivery company (or carrier) immediately. Any damage not noted upon
delivery must be reported within fteen (15) days or there will be no recourse. !PLEASE
NOTE: Record your safe’s serial number and combination and store in a secure location OTHER
THAN YOUR SAFE.
SERIAL NUMBER & MASTER COMBINATION (See opening instructions before proceeding)
!PLEASE NOTE: If your safe has been installed with an Electronic Lock, use the Electronic Lock
Opening Instructions before proceeding. Your safe’s serial number is in two (2) locations
on the safe. One is located on the top of the safe, back right side. The second is located
inside the opening edge of the door. Compare the serial number in this guide with the
serial number on the safe. All serial numbers should match. If they do not, contact your
local dealer or Liberty Safe immediately. You will need your safe serial number when
contacting customer service about your safe.
USING THE KEY-LOCK (DAY-LOCK) FEATURE
!PLEASE NOTE: The Key-lock will prevent the dial from being turned to open the safe.
However, to obtain the highest level of security it is recommended to lock the safe using
the combination and key-lock together rather than the key-lock alone.
Before using the key-lock feature you will need to close the door and rotate the handle
until the bolts extend into their locked position.
Step 1. Rotate the dial to the number 0.
Step 2. Insert the key and turn it 180 degrees counterclockwise until it stops (the jagged
edge of the key should be facing up).
Step 3. Remove the key and verify the safe is locked by trying to turn the handle.
NOTE: If the safe is NOT locked, try rotating the dial counterclockwise to the
number 4 and then back clockwise to 0, then repeat steps 2-3.
CHANGING COMBINATIONS ON MANUAL LOCKS
It is inadvisable for anyone other than a CERTIFIED LOCKSMITH to change the combination
on a manual lock. Changing the combination by anyone other than a certied technician
will void the lock portion of your warranty. Call your dealer or Customer Service at Liberty
Safe @ (800) 247-5625 for help locating an approved locksmith. As part of our continuing
service, a record of your combination by serial number is kept on le at Liberty Safe. If
you lose your combination it can be restored to you for a $25.00 research fee provided
Liberty has been informed of any combination changes made and you have also met the
documentation requirements.
TO GET STARTED, nd the lock type below that resembles the one
installed on your safe. Then proceed to the instruction set marked
in yellow.
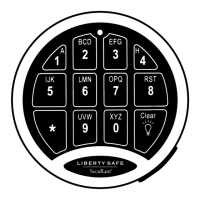
LOCK TYPE/MODEL
Model 6700
Dial Combination with & without Keylock
INSTRUCTION SET
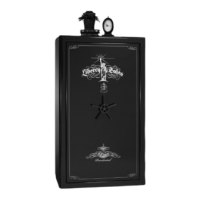
Model Safelogic
TopLit & BackLit Electronic
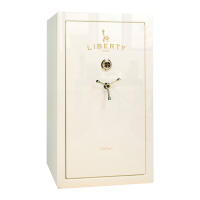
Model Prologic
L01 Electronic
0
10
20
30
40
50
60
70
80
90
B
A
C
 Loading...