EasyManua.ls Logo

Lifegoods LG1000 - User Manual

Lifegoods LG1000
30 pages
Go to English
Print Icon
To Next Page IconTo Next Page
Loading...
1
User Manual - 13.000 mAh Jump Starter & Powerbank
Gebruiksaanwijzing - 13.000 mAh Jumpstarter & Powerbank
MADE IN CHINA
!
Lees de instructies
Please read the manual
NL: p.2-15
EN: p.16-29
Model: LG1000

Questions and Answers

  • B
    Bruce CampbellAug 4, 2025
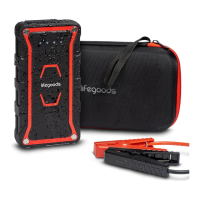
    What to do if my Lifegoods Remote Starter cannot jump start?
    • G
      George LeonAug 4, 2025
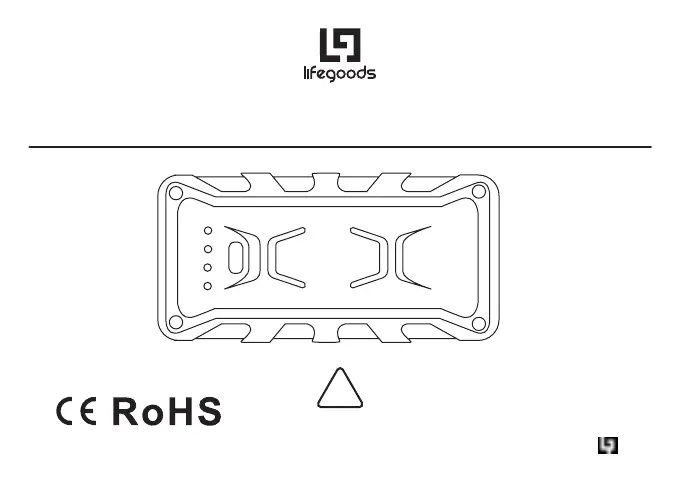
      If your Lifegoods Remote Starter won't jump start, it might be due to low battery. To resolve this, charge the jump starter using the USB cable until at least three solid lights are showing, or until it reaches at least 51% charge.
  • T
    Tony PowellAug 9, 2025
    Why is the flashlight on my Lifegoods Remote Starter not working?
    • L
      lorikelleyAug 9, 2025
      If your Lifegoods Remote Starter's flashlight isn't working, it could be due to a low battery. Try charging the jump starter using the USB cable to resolve this issue.
  • J
    joshuaallenAug 13, 2025
    What to do if flashlight doesn’t work when Lifegoods Remote Starter is charging?
    • A
      amanda21Aug 14, 2025
      The flashlight on your Lifegoods Remote Starter won't work while the unit is charging. Disconnect it from the power source, or wait until it's fully charged before using the flashlight.
  • Z
    zmartinezAug 19, 2025
    Why there is no indication light on my Lifegoods Remote Starter?
    • C
      Christopher Torres MDSep 12, 2025
      If there's no indication light on your Lifegoods Remote Starter, it may be because the power bank is turned off. Press the on/off button to turn it on.
  • J
    Jason WatkinsAug 25, 2025
    What to do if my Lifegoods Remote Starter has no indication light?
    • J
      Jeff FisherAug 25, 2025
      If your Lifegoods Remote Starter shows no indication light, it might be because of a low battery. Try charging it using the USB cable.
  • E
    Emily WatkinsAug 28, 2025
    How to charge Lifegoods Remote Starter without wall adapter?
    • W
      William PerezAug 29, 2025
      If your Lifegoods Remote Starter didn't come with a wall adapter, insert the USB cable into a computer or any USB 2A wall adapter.

Summary

Introduction and Product Overview

Product Description

Details the portable powerbank's features: 2 quick charge USB ports, charging via micro USB/USB Type-C, 12V vehicle compatibility, IP67 waterproof, LED flashlight, SOS strobe, and carrying case.

Safety Warnings and Precautions

General Safety Guidelines

Keep packaging from children (suffocation risk). Read manual carefully before use. Be aware of misuse risks causing injury or damage.

Usage and Handling Restrictions

For private use only, not unattended. Not for persons with disabilities or lack of experience without supervision. Keep away from children/pets.

Maintenance and Environmental Safety

Do not reconstruct/repair. Use correct voltage outlets. Check cables. Use only LifeGoods parts. Avoid excessive water exposure or damp hands.

Operational Environment and Temperature

Do not operate in explosive environments. Operating temperature: -20°C to +60°C. Avoid extreme temperatures.

Battery Care and Handling

Avoid moisture, heat, and heat sources. Prevent battery leakage. Handle battery acid contact with care, seek medical attention. Ensure proper ventilation.

Safe Usage and Vehicle Compatibility

Connect clamps correctly. Do not place on floor below 457mm. Use only with 12V vehicles. Disconnect plug, not cord. Do not use damaged appliances.

Personal Protection and Handling Hazards

Wear eye protection and gloves. Ensure correct connections. Have assistance nearby. Avoid sparks/flames near battery. Remove jewelry. Do not cover device.

Shipment Reception

Verifying Shipment Contents

Check contents against packing list. Notify distributor of missing items. File claim with carrier for damaged equipment.

Package Contents and Product Features

Included Accessories

Lists accessories: User Manual, Carrying Case, Jumper Cables (Red/Black), Micro USB Cable, USB-C Cable.

Product Features and Functions

Controls and Indicators

Details functions of On/Off Button, Charging Indicator Lights, Flashlight modes, LED indicator, and Forced Start Button.

Ports and Cables

Describes Output ports (1 & 2), USB-C input, USB-Micro input, Jump Starter Port, Plug, and Jumper Cables (Red/Black).

Technical Specifications

General Specifications

Provides size, weight, color, material, input/output specs, power, USB ports, battery capacity, quick start current, capability, and IP rating.

Additional Features

Highlights built-in flashlights with multiple modes and protective features like short circuit, overheat, and reverse polarity protection.

Operating Instructions

Power Indicator and Charging

Check device capacity via power button. Charge using certified adapters, USB cables, or car adapters.

Charging Electronic Devices

Charge mobile phones or tablets via USB ports (1, 2) or Type-C port by connecting the device and pressing the on/off button.

LED Flashlight Operation

Turn on by pressing the on/off button for 3 seconds. Switch modes (Strong, strobe, SOS) with short presses.

Jump Starting a Car

Preparation and Cable Connection

Ensure 12V vehicle compatibility and 50%+ battery. Connect RED clamp to POSITIVE (+) and BLACK clamp to NEGATIVE (-).

Jump Start Procedure

Insert plug, connect clamps, check indicators. If red light is on, check clamp connection. Adjust for maximum contact.

Forced Start and Completion

Use forced start if initial attempts fail. Remove cables within 30 seconds after successful start.

Troubleshooting Guide

Jump Start Issues

Addresses issues like reversed cables, expired timer, or low battery, providing solutions like checking connections or charging the device.

Flashlight and Indicator Issues

Covers flashlight not working (low battery or charging) and no indication light (low battery or powerbank off).

LED Indication and Safety

LED Status Meanings

Explains LED indications: green/red flashing (ready), green steady (work status), red steady (reversed/shorted clamps), red flashing (back charge/high temp), green flashing (low voltage).

Maintenance, Storage, and Disposal

Maintenance and Cleaning

Check battery monthly, charge timely. Clean with a dry cloth. Avoid abrasive agents.

Storage Guidelines

Store in a clean, dry, ventilated place. Avoid temperatures above 50°C or extreme low temperatures.

Disposal and Recycling

Do not dispose of with household waste. Contact local authority for proper recycling guidance.

Service and Warranty Information

Customer Support and Warranty Policy

Contact support for service. 2-year warranty covers product defects reported within 2 years, excluding misuse or customer neglect.

Lifegoods LG1000 Specifications

General IconGeneral
Remote RangeUp to 1000 feet
Engine StartYes
Keyless EntryYes
InstallationProfessional installation recommended
Security SystemYes
Battery LifeUp to 12 months (remote)