EasyManua.ls Logo

Lifescan Ultra User Manual

Lifescan Ultra
73 pages
To Next Page IconTo Next Page
Page #1 background imageLoading...
Page #1 background image
Ultra
Ultra
Ultra
Blood Glucose
Monitoring System
Owner’s
Booklet
DCO_06405104B_OTU_Uni_OBC_US 3/8/06 12:48 PM Page 2
Question and Answer IconNeed help?

Do you have a question about the Lifescan Ultra and is the answer not in the manual?

Lifescan Ultra Specifications

General IconGeneral
BrandLifeScan
CategoryBlood Glucose Meter
DisplayLCD
Test Time5 seconds
Measurement Range20-600 mg/dL
Relative Humidity10-90%
ModelUltra

Summary

Important Safety Information

Unit of Measure Setting

Correct Setting for US Users (mg/dL)

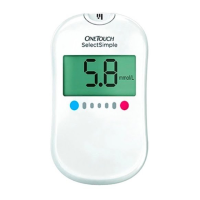
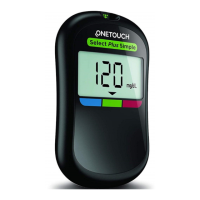
Explains the mg/dL setting and its importance for accurate results in the United States.

Unit of Measure: mmol/L

Incorrect Setting and Action Required

Explains the implications of the mmol/L setting and when to seek assistance.

OneTouch® Ultra® Meter Overview

Important Test Strip Information

Before Testing: Meter and Coding

Coding the Meter Importance

Explains why coding the meter is essential for obtaining accurate results.

Coding the Meter: Steps 1 & 2

Match Code Numbers

Compare meter code with test strip vial code to ensure accuracy.

Coding the Meter: Step 3

Set Correct Code

How to select the correct code number using the meter buttons.

Control Solution Testing

Control Solution: Preparation

Control Solution Test: Step 1

Insert Test Strip into Meter

Inserting the test strip and initial meter response.

Control Solution Test: Step 2

Mark as Control Solution Test

Pressing the C button to display 'ctl' for control tests.

Control Solution Test: Step 3

Apply Control Solution to Strip

Applying the control solution to the narrow channel of the test strip.

Control Solution Test: Step 4

Compare Result to Control Range

Comparing the test result with the control range printed on the vial.

Testing Your Blood: Overview

Preparing the Blood Sampler

Blood Sampler: Step 1

Blood Sampler: Steps 2 & 3

Fingertip Blood Sampling

Forearm Blood Sampling: Setup

Forearm Blood Sampling: Procedure

Step-by-Step Test Procedure: Step 1

Insert Test Strip

Inserting the test strip into the meter and initial meter response.

Step-by-Step Test Procedure: Step 2

Apply Blood Sample to Strip

Obtaining and applying the blood sample to the test strip.

Step-by-Step Test Procedure: Sample Details

Ensure Sufficient Sample Volume

Hold strip until confirmation window is full before meter counts down.

Step-by-Step Test Procedure: Step 3

Get Accurate Test Results

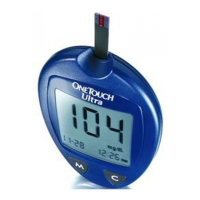
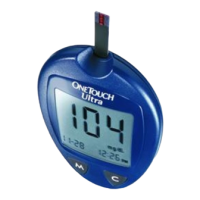
Meter counts down and displays the blood glucose test result.

Special Messages: Low Glucose

Special Messages: High Glucose & Ketones

Downloading Test Results: Step 1

Downloading Test Results: Steps 2 & 3

Comparing Meter and Lab Results: Pre-Lab

Meter Set-up: Step 1

Meter Set-up: Steps 2 & 3

Meter Set-up: Steps 4 & 5

Meter Set-up: Steps 6 & 7

Meter Set-up: Step 8

Set Unit of Measure to mg/dL

Setting the unit of measure to mg/dL, the standard in the United States.

Display Messages: Basic Checks

Display Check and Uncoded Meter Messages

Explains the display check and alerts for an uncoded meter.

Display Messages: Meter Readiness

Display Messages: Results & Ketones

Display Messages: Glucose Levels

Display Messages: Error Codes 1-3

Error Codes Er 1, Er 2, Er 3

Explains common error messages and their troubleshooting actions.

Display Messages: Error Code 4

Error Code Er 4 Explained

Explains causes and actions for the Error 4 message.

Display Messages: Error 5 & Battery

Error Code Er 5 and Battery Alerts

Explains Er 5 (strip issue) and low battery indicators.

Display Messages: Power & Temp

Troubleshooting: Meter Issues

Meter Not Displaying Message or Starting

Possible causes and solutions for meter not starting or showing messages.

Related product manuals