18
TOOLS AND HARDWARE REQUIRED / OUTILS ET QUINCAILLERIE REQUIS / INSTRUMENTAL Y HERRAJE REQUERIDOS
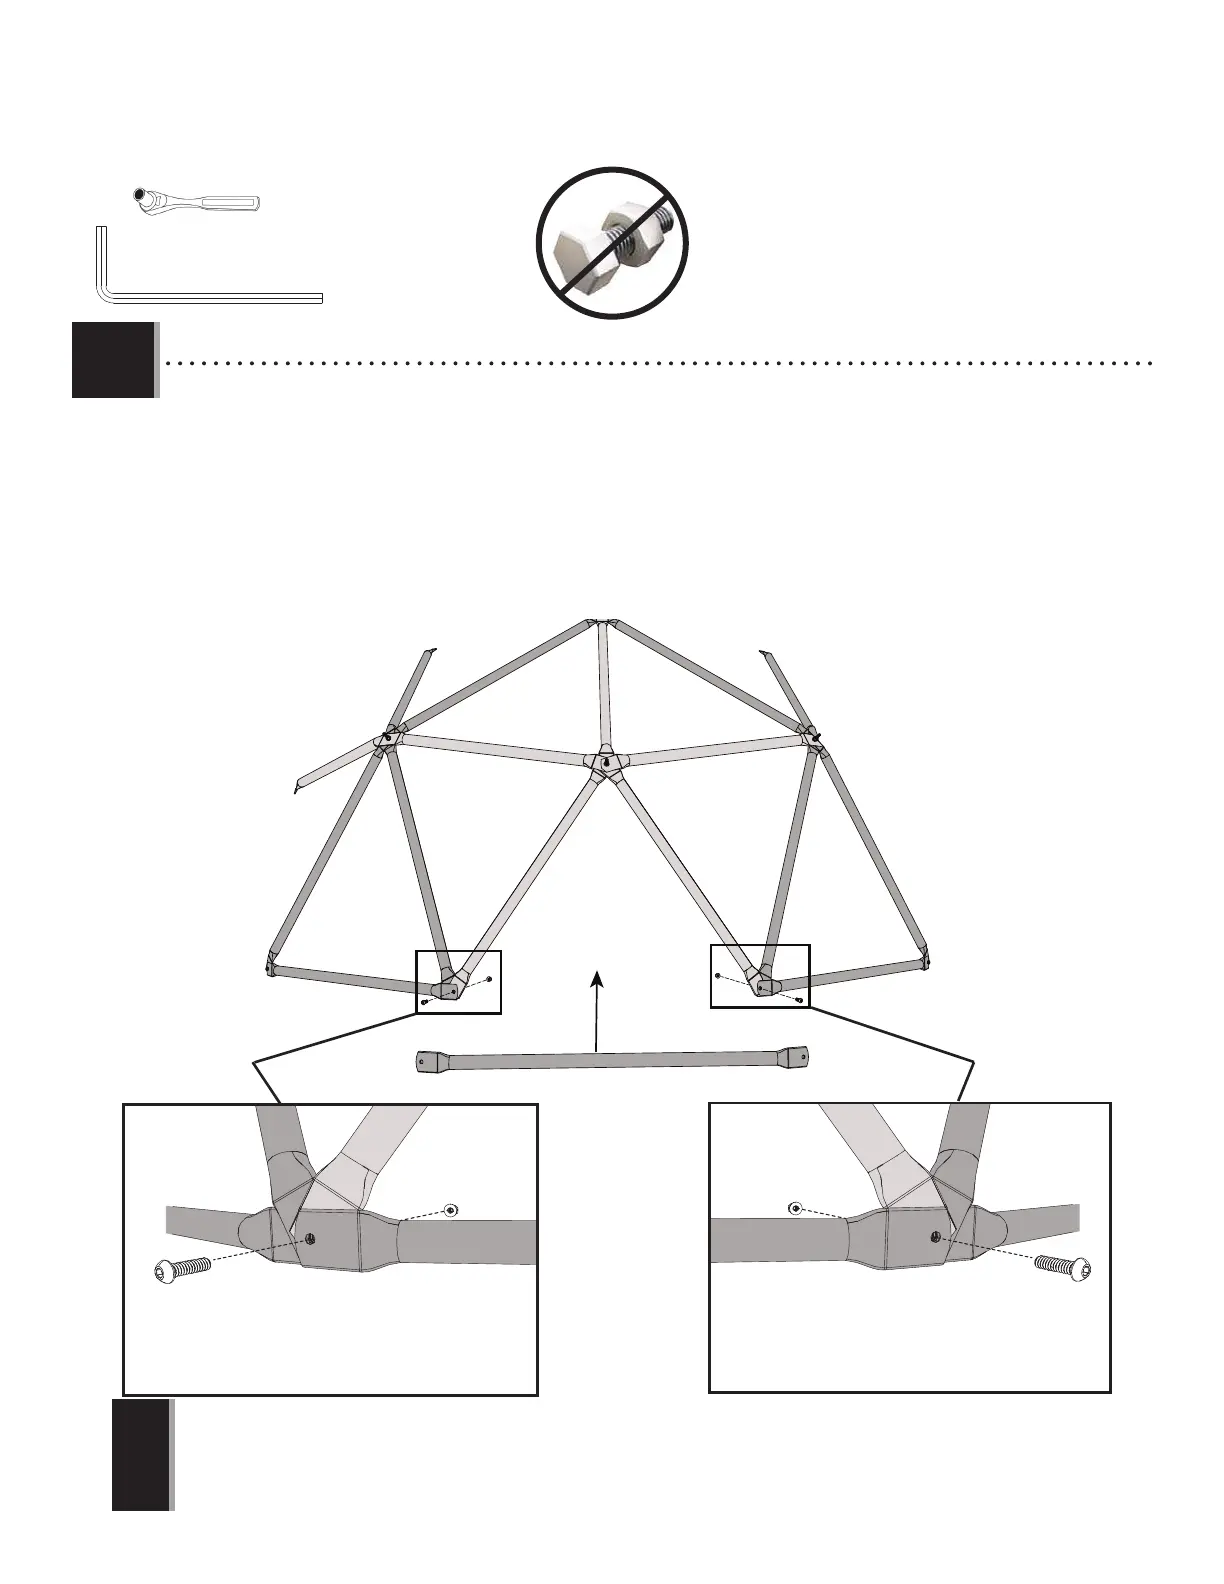
X SECTION 1 (CONTINUED) / SECTION 1 (SUITE) / SECCIÓN 1 (CONTINUACIÓN)
6
1.5
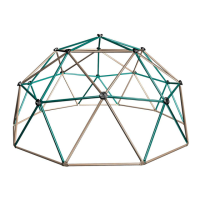
• Make sure all Bolts on the bottom go in the direction shown, with the head of the Bolt on the outside, to prevent injury.
• Assurez-vous que les boulons dans le bas sont dans la direction montrée, avec la tête du boulon vers l’extérieur afi n de prévenir les
blessures
• Asegúrese de que todos los Tornillos de la parte inferior vayan en la dirección mostrada, con la cabeza del Tornillo hacia afuera para
evitar lesiones.
!
Joint B / Junta B
JointA / Junta A
Joint C / Junta C
CPD
• Remove Flange Lock Nut (GAX) and the Bolt (GAV) from the bottom two Blue Tubes (CPD). Place a new Blue Tube (CPD) at
the bottom of the Red pentagon assemblies. Secure the Blue Tube (CPD) and Red Tubes (CPC) to the existing joint by
replacing the Bolt and the Flange Lock Nut. Tighten completely.
• Retirez l‘écrou à embase (GAX) et le boulon (GAV) des deux tubes bleus inférieurs (CPD). Placez un nouveau tube
blue (CPD) au bas des assemblages du pentagone rouge. Fixez les tubes bleus (CPD) et les tubes rouges (CPC) à
l’assemblage existant en remplaçant le boulon et l’écrou à embase. Serrez complètement.
• Retire la tuerca de seguridad de brida (GAX) y el tornillo (GAV) desde los dos tubos azules de la parte inferior (CPD).
Coloque un nuevo tubo azul (CPD) en la parte inferior de los ensamblados del pentágono rojas. Fije el tubo azul
(CPD) y los tubos rojas (CPC) a la unión existente sustituyendo el tornillo y la tuerca de seguridad de brida. Apriete
completamente.
(1)
CPC CPC
(1)
GAV
GAX GAX
GAV
3/16 " (|5 mm)
1/2" (|13 mm)