TOOLS AND HARDWARE REQUIRED / OUTILS ET QUINCAILLERIE REQUIS / INSTRUMENTAL Y HERRAJE REQUERIDOS
u SECTION 1 (CONTINUED) / SECTION 1 (SUITE) / SECCIÓN 1 (CONTINUACIÓN)
9
AMZ
AGN
AGN
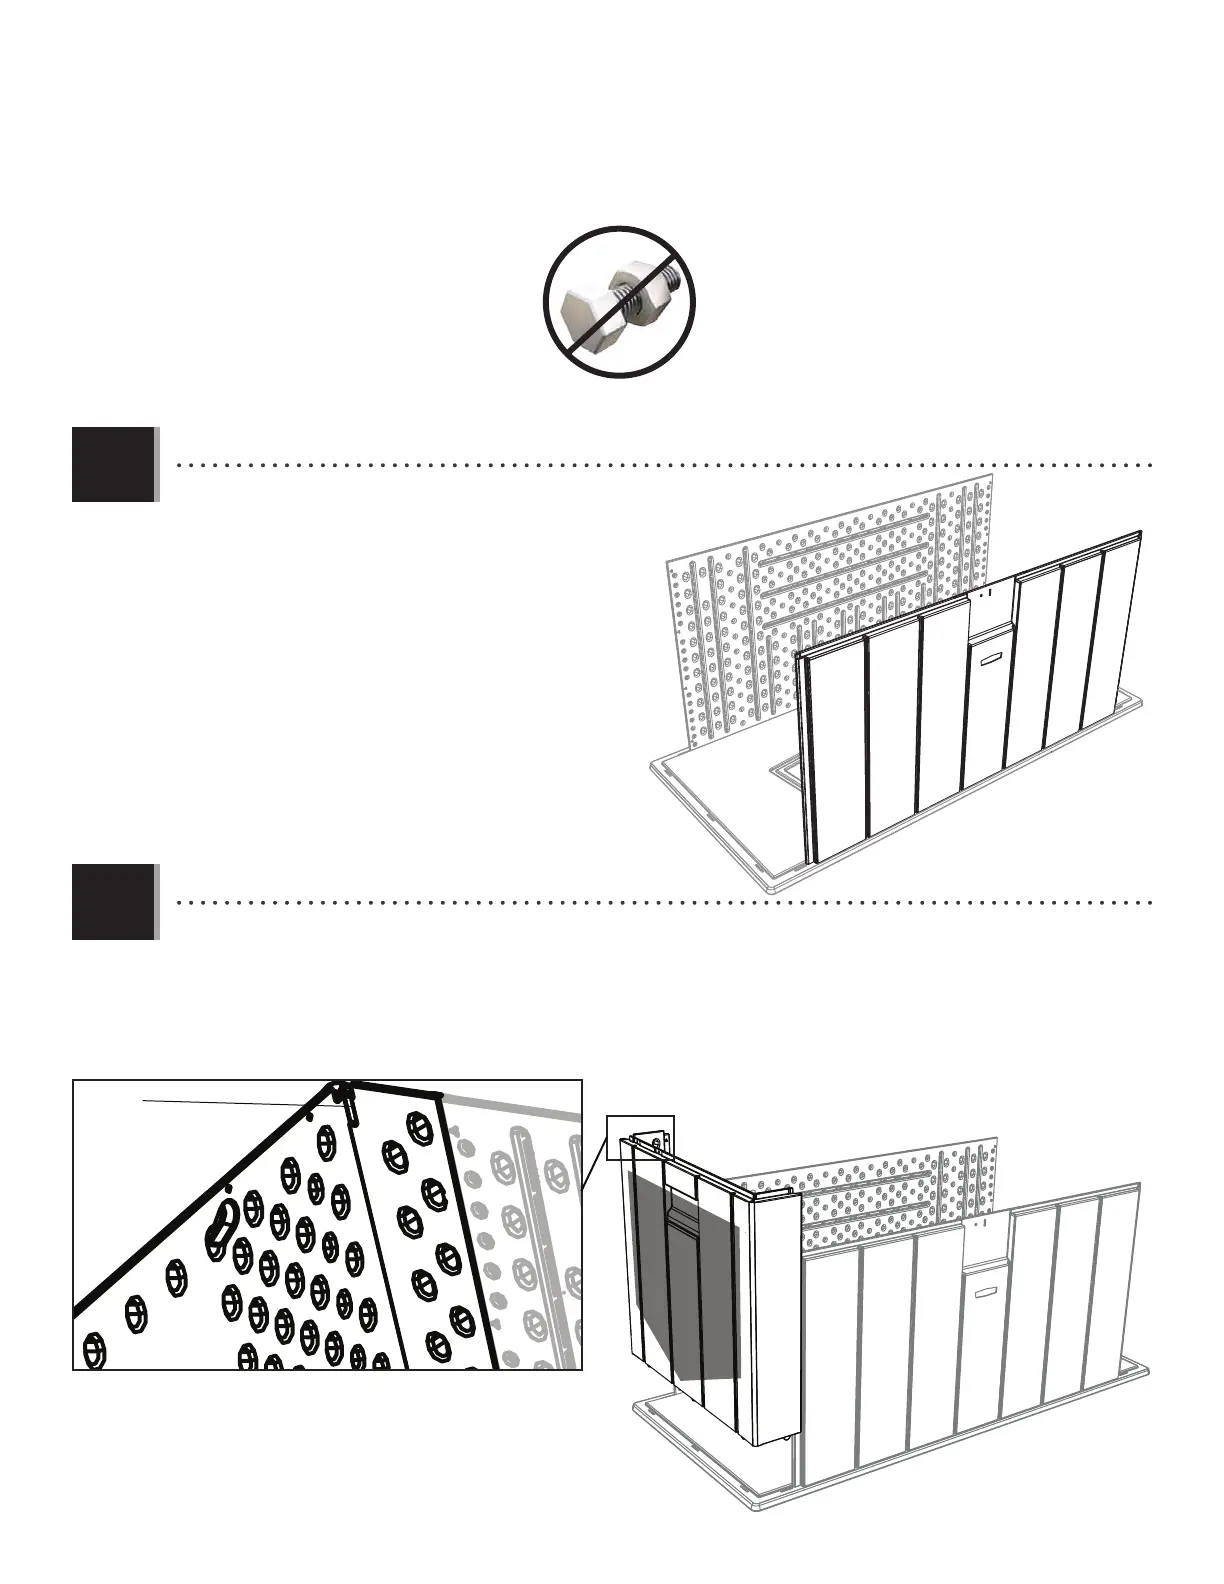
1.3
• Repeat steps 1.1–1.2 for the Front Panel (AMZ).
• Répéter les étapes 1.1 – 1.2 pour le panneau avant (AMZ).
• Repetir los pasos 1.1–1.2 para el panel delantero (AMZ).
1.4
• Fold over the ends of the Left Side Panel (AGN), and insert the tabs at the bottom of the Panel into the slots in the
Floor Panel. You should hear the tabs snap into place. The notch goes at the back.
• Plier les extrémités du panneau latéral gauche (AGN), et insérer les languettes au bord inférieur du panneau dans les
fentes dans le panneau de plancher. Insérer les languettes jusqu’à ce qu’elles s’enclenchent. L’encoche va à l’arrière.
• Doblar los extremos del panel lateral izquierdo (AGN), e insertar las lengüetas al borde inferior del panel en las
ranuras en el panel de piso. Insertar las lengüetas hasta que se encajen en su lugar. La muesca va en la parte trasera.
• Notch
• Encoche
• Muesca