17
TOOLS AND HARDWARE REQUIRED / OUTILS ET QUINCAILLERIE REQUIS / INSTRUMENTAL Y HERRAJE REQUERIDOS
X SECTION 2 (CONTINUED) / SECTION 2 (SUITE) / SECCIÓN 2 (CONTINUACIÓN)
TOOLS AND HARDWARE REQUIRED / OUTILS ET QUINCAILLERIE REQUIS / INSTRUMENTAL Y HERRAJE REQUERIDOS
X SECTION 2 (CONTINUED) / SECTION 2 (SUITE) / SECCIÓN 2 (CONTINUACIÓN)
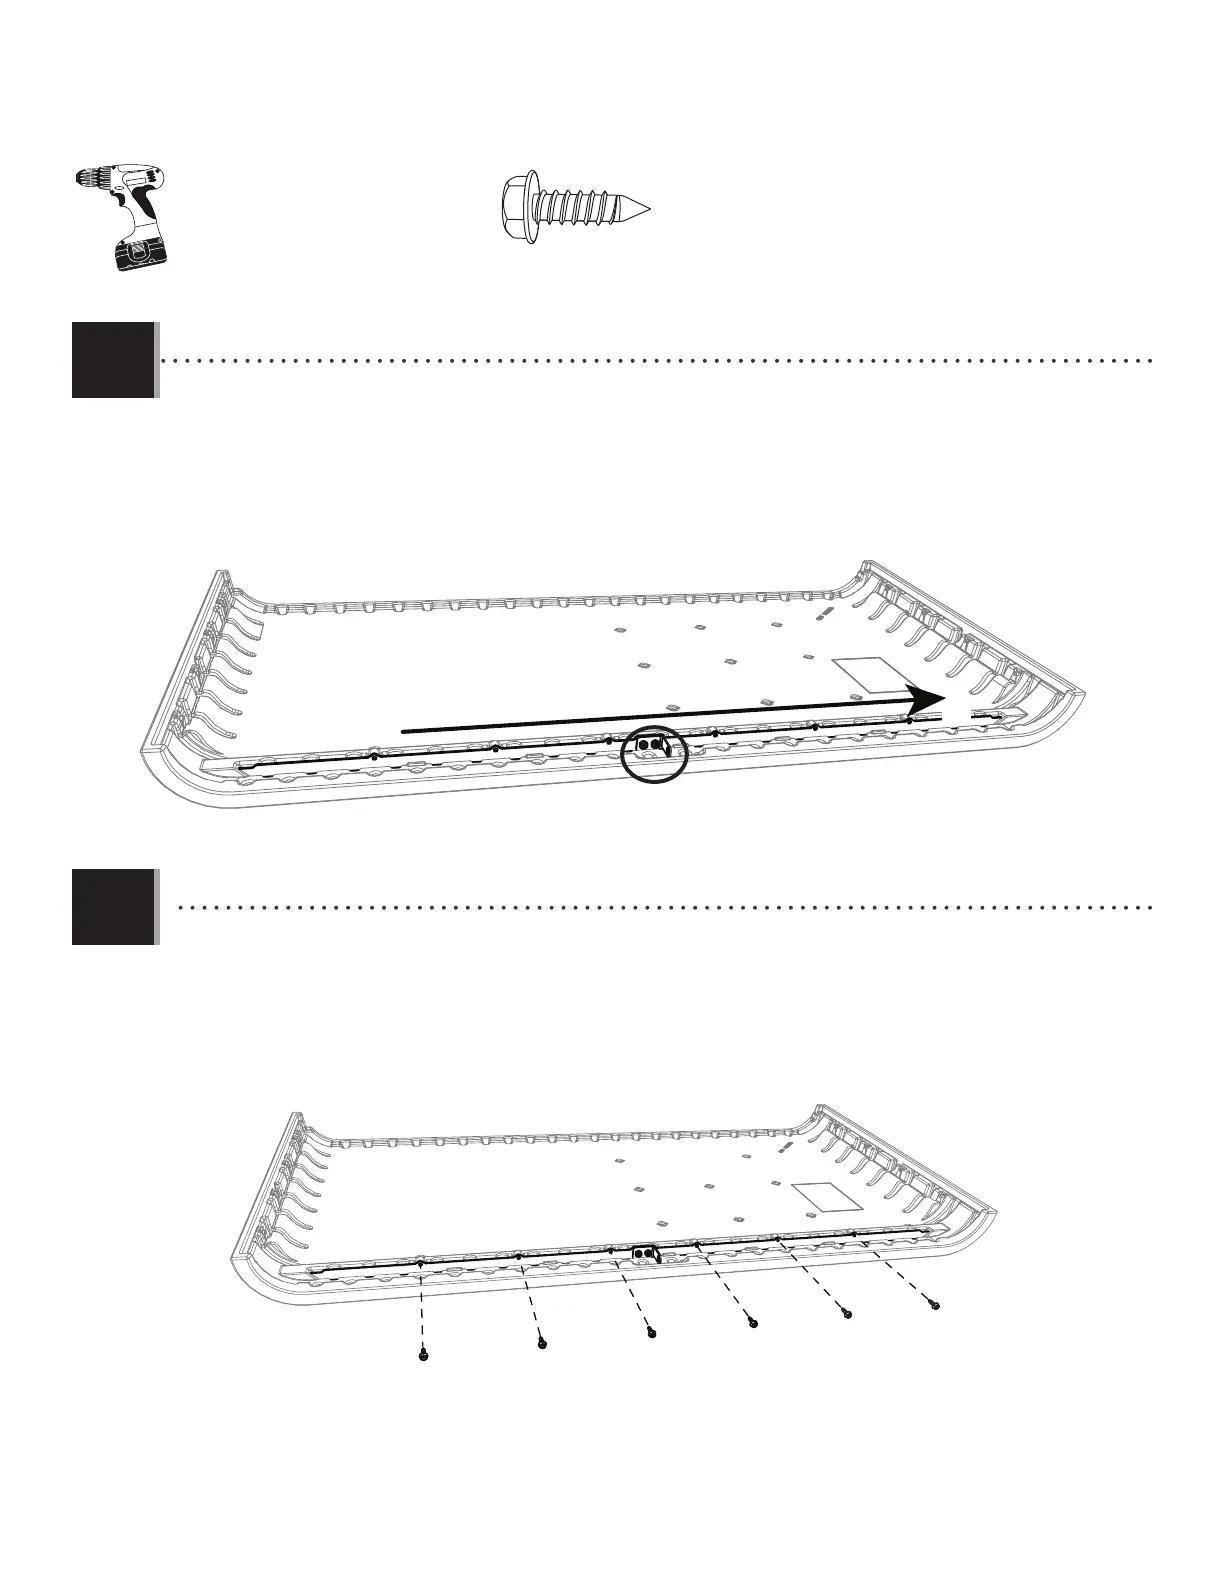
2.3
• Secure the brace to the lid with six (6) screws (BCK) at the locations shown. The diameter of the screw is meant to be a
little bit larger than the hole. Use a drill to insert the screws.
• Attacher le renfort au couvercle à l’aide de six (6) vis (BCK) aux endroits indiqués. Le diamètre de la vis est un peu plus
grand que le trou dans le renfort. Employer une perceuse électrique pour insérer les vis.
• Sujetar el tirante a la tapa usando seis (6) tornillos (BCK) a las ubicaciones indicadas. El diámetro del tornillo es un
poco más grande que el agujero en el tirante. Utilizar un taladro eléctrico para insertar los tornillos.
• Rotate the lid brace downward, and insert the opposite end into the other slit as shown. Use the lock bracket (GSV)
to push the lid brace (GSU) into position.
• Tourner le renfort du couvercle ver le bas, et insérer l’extrémité opposée dans l’autre fente comme indiqué.
Employer le support de verrouillage (GSV) pour mettre le renfort du couvercle (GSU) en place.
• Girar el tirante de la tapa hacia abajo, e insertar el extremo opuesto en la otra ranura como se muestra. Usar el
soporte de cierre (GSV) to push el tirante de la tapa (GSU) en su lugar.
2.4
BCK
BCK
BCK
BCK
BCK
BCK
BCK (x6)
GSU
GSV