19
TOOLS AND HARDWARE REQUIRED / OUTILS ET QUINCAILLERIE REQUIS / INSTRUMENTAL Y HERRAJE REQUERIDOS
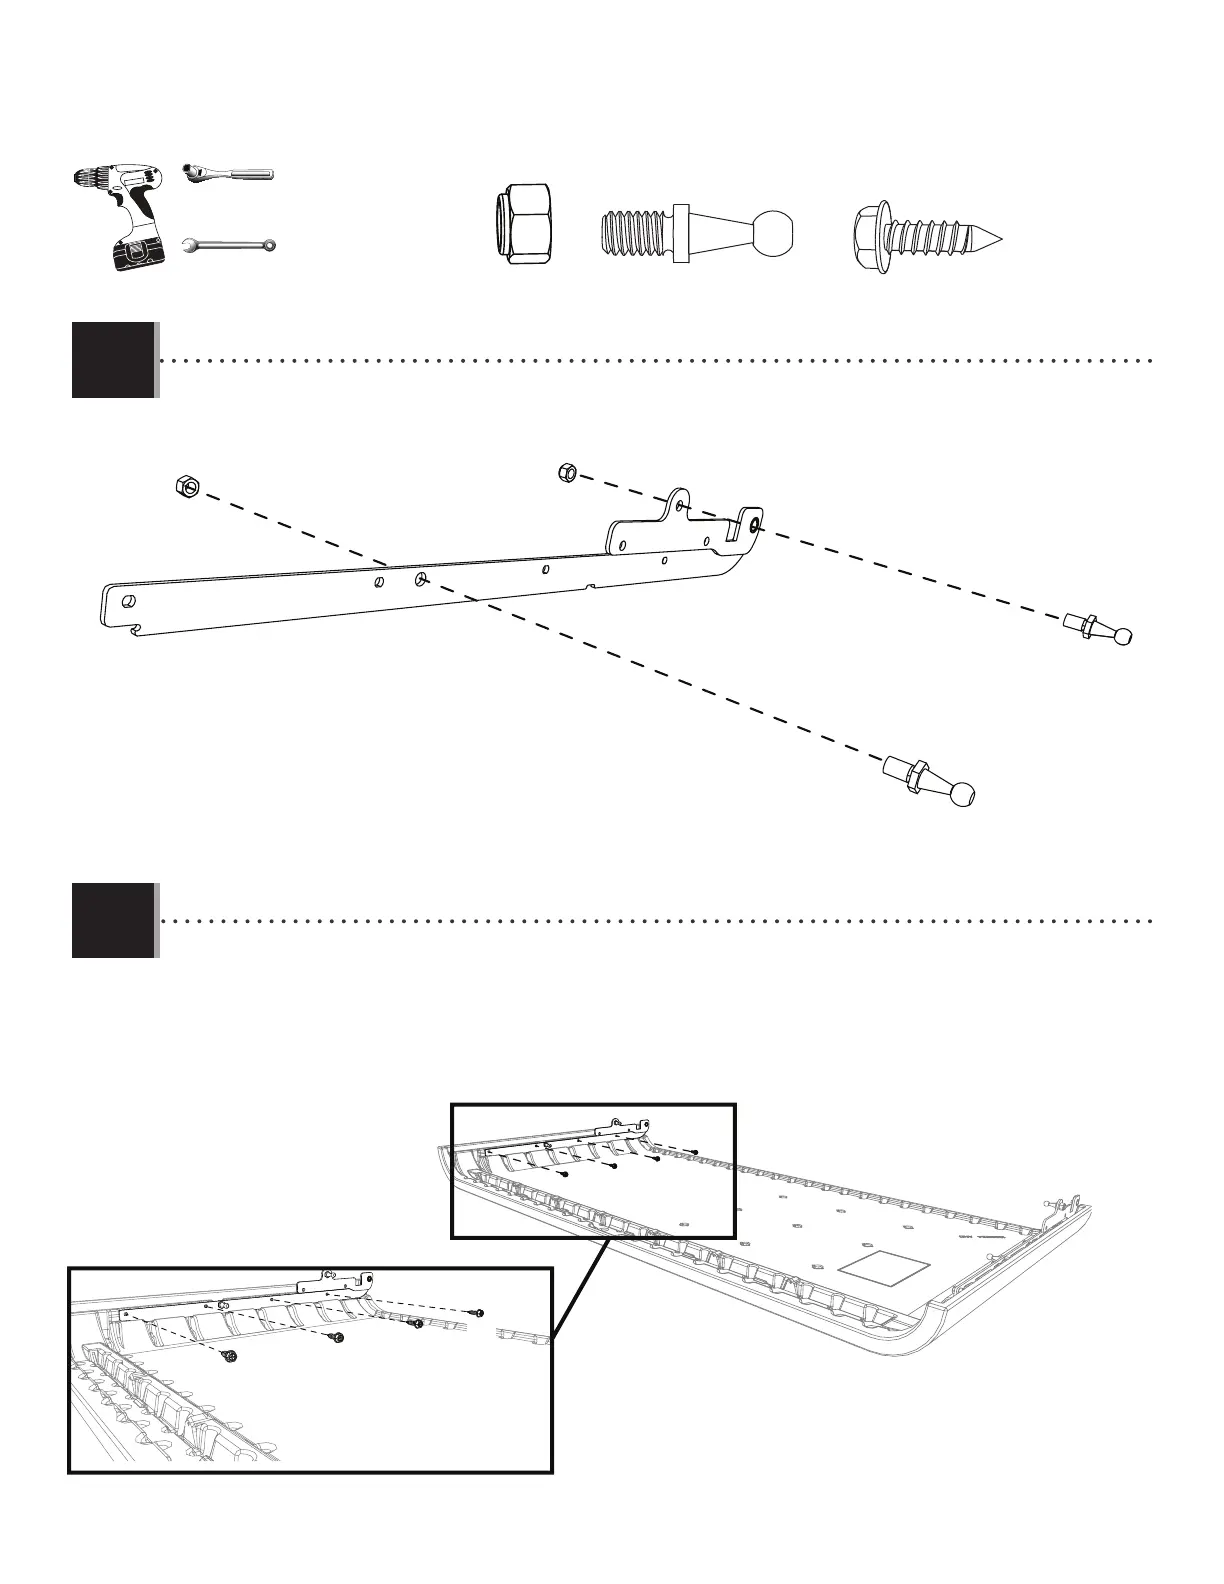
X SECTION 2 (CONTINUED) / SECTION 2 (SUITE) / SECCIÓN 2 (CONTINUACIÓN)
TOOLS AND HARDWARE REQUIRED / OUTILS ET QUINCAILLERIE REQUIS / INSTRUMENTAL Y HERRAJE REQUERIDOS
X SECTION 2 (CONTINUED) / SECTION 2 (SUITE) / SECCIÓN 2 (CONTINUACIÓN)
2.7
• Take the second hinge (GTK) and secure two (2) ball studs (BET) to it as shown.
• Prendre le deuxième charnière (GTK) et bien attacher deux (2) ball studs (BET) comme indiqué.
• Tomar la segunda bisagra (GTK) y fi jar bien dos (2) ball studs (BET) como se muestra.
AAO (x2)
BCK (x4)
BET
AAO
BET
AAO
GTK
BET (x2)
• Secure the hinge to the right side of the lid with four (4) screws (BCK). The diameter of the screw is meant to be a little bit larger
than the hole. Use a drill to insert the screws. Tighten only until fl ush with the hinge.
• Bien attacher la charnière au côté droit du couvercle à l’aide de quatre (4) vis (BCK). Le diamètre de la vis est un peu plus grand
que le trou dans la charnière. Employer une perceuse électrique pour insérer les vis. Serrer seulement jusqu’à ce qu’elles soient
au ras de la charnière.
• Fijar bien la bisagra al lado derecho de la tapa con cuatro (4) tornillos (BCK). El diámetro del tornillo es un poco más grande que
el agujero en la bisagra. Utilizar un taladro eléctrico para insertar los tornillos.
2.8
BCK
BCK
BCK
BCK
1/2 in/po
(≈13 mm)
3/8 in/po
(≈10 mm)