Do you have a question about the Lifetime 60076 and is the answer not in the manual?
Instructions and benefits for registering your Lifetime product online at www.lifetime.com.
Follow warnings to avoid serious injury or property damage and voided warranty.
Two capable adults are required for assembly. Use caution when using the product.
Provides customer service number and warnings in multiple languages for missing parts.
Lists assembly tools, product age requirement (18+), and contact number.
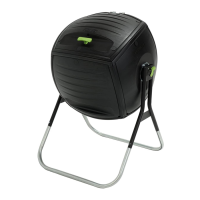
Identifies main drum panels and frame components used in assembly.
Comprehensive list of all hardware, screws, nuts, and connectors for assembly.
Connects drum panels using connectors and hardware as shown.
Attaches side panels to the drum using connectors and hardware.
Connects rear panel with connector and bottom panel into place.
Attaches rear panel to connector, then side panel to connector.
Slides panel connector onto bottom, side, and rear panel edges.
Attaches second side panel to connector, then adds connector to side/bottom panels.
Slides front panel into connector and adds final connectors.
Attaches corner caps to inside corners using screws.
Lists parts for leg assembly, including bolts, nuts, springs, and brackets.
Inserts locking pin and slides spring onto pin of the leg assembly.
Inserts cotter pin and bends ends outward to lock the pin assembly.
Slides leg brackets onto leg assembly pins and tubes, securing with nuts.
Inserts aeration tube into drum, slides spacer and leg assembly onto tube.
Attaches legs to drum using bolts and nuts at specified locations.
Slides lower legs into upper leg assemblies and tightens nuts.
Connects hardware to the drum body at specified points.
Connects additional hardware to the drum body.
Installs hole plugs into designated openings on the drum surface.
Lists parts for lid assembly, including bolts, nuts, and caps.
Connects hardware to the top panel (lid) as shown.
Inserts cap nuts into latch guides and centers them for the lid mechanism.
Connects locking guide to lid using hardware and attaches more hardware.
Connects lid hardware and snaps hole plugs into place.
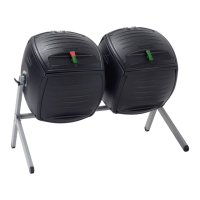
Slides the two assembled lids onto the compost drums.
Do not climb on composter, engage locking pin before opening lid, use caution with sharp objects.
Safety advice provided in multiple languages including English, Spanish, French, and German.
Clean panels with mild soap, avoid abrasives. Repair metal scratches and rust.
Avoid direct heat sources on surfaces unless using a heat barrier.
5-year warranty for defects. Excludes misuse, improper installation, accidents, damage, and commercial use.
Instructions to report defects in writing, include sales receipt/photos, and register product online.
Details warranty terms, limitations, and claim procedures in Spanish.
Details warranty terms, limitations, and claim procedures in French.
Information on purchasing accessories and other Lifetime products online or by phone.
| Brand | Lifetime |
|---|---|
| Model | 60076 |
| Category | Lawn and Garden Equipment |
| Language | English |