20
TOOLS AND HARDWARE REQUIRED / OUTILS ET QUINCAILLERIE REQUIS / INSTRUMENTAL Y HERRAJE REQUERIDOS
X SECTION 2 (CONTINUED) / SECTION 2 (SUITE) / SECCIÓN 2 (CONTINUACIÓN)
BES (x4)
7/16"
(11 mm)
7/16"
(11 mm)
AAB (x4)
• Secure the Left Hinge to the Side Panel using the hardware provided. Then attach the right Hinge.
• Attchez la charnière gauche au panneau latéral à l’aide de la quincaillerie indiquée. Ensuite, attachez la charnière droite.
• Sujete la Bisagra izquierda al panel lateral usando el herraje indicado. Entonces, sujete la bisagra derecha.
2.9
BES
BES
AAB
AAB
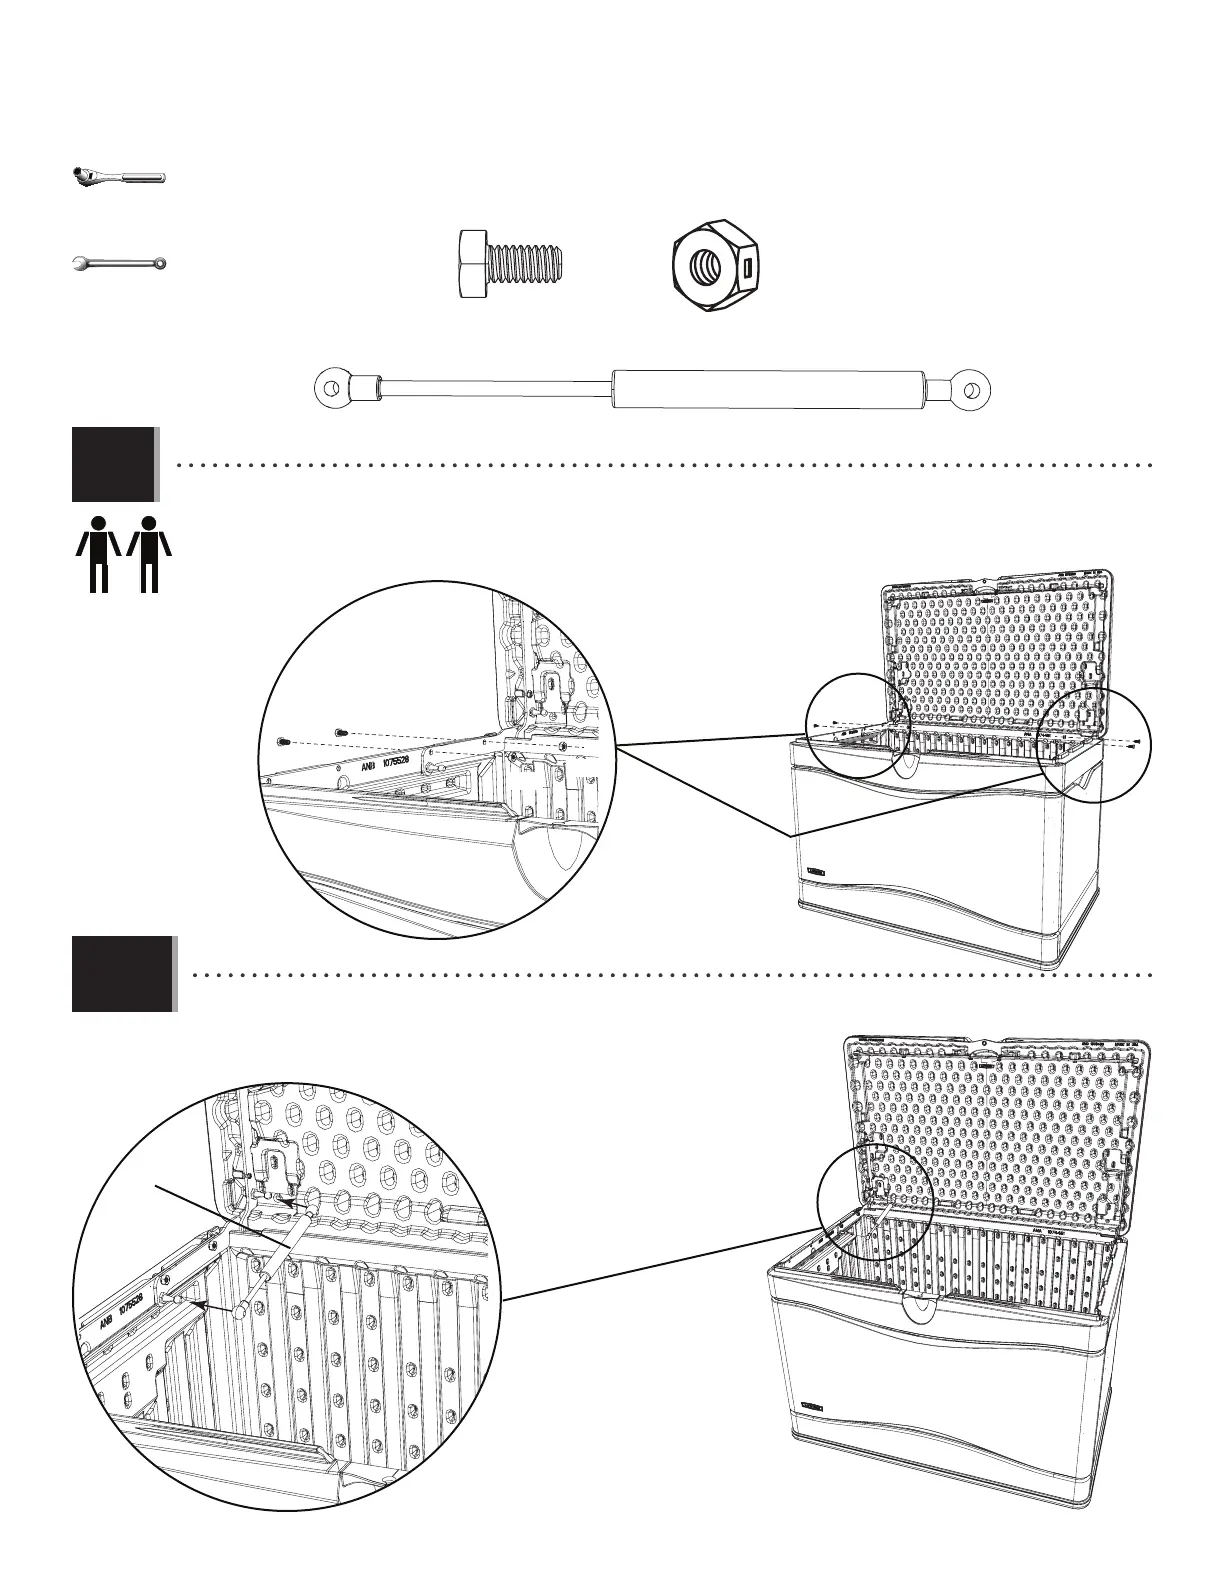
AKF (x1)
2.10
AKF
• Attach the Gas Spring (AKF) to the Left Hinge in the direction indicated.
• Attchez le piston (AKF) à la charnière gauche dans la direction illustrée.
• Sujete el amortiguador de gas (AKF) a la bisagra izquierda en la dirección indicada.