12
TOOLS AND HARDWARE REQUIRED / OUTILS ET QUINCAILLERIE REQUIS / INSTRUMENTAL Y HERRAJE REQUERIDOS
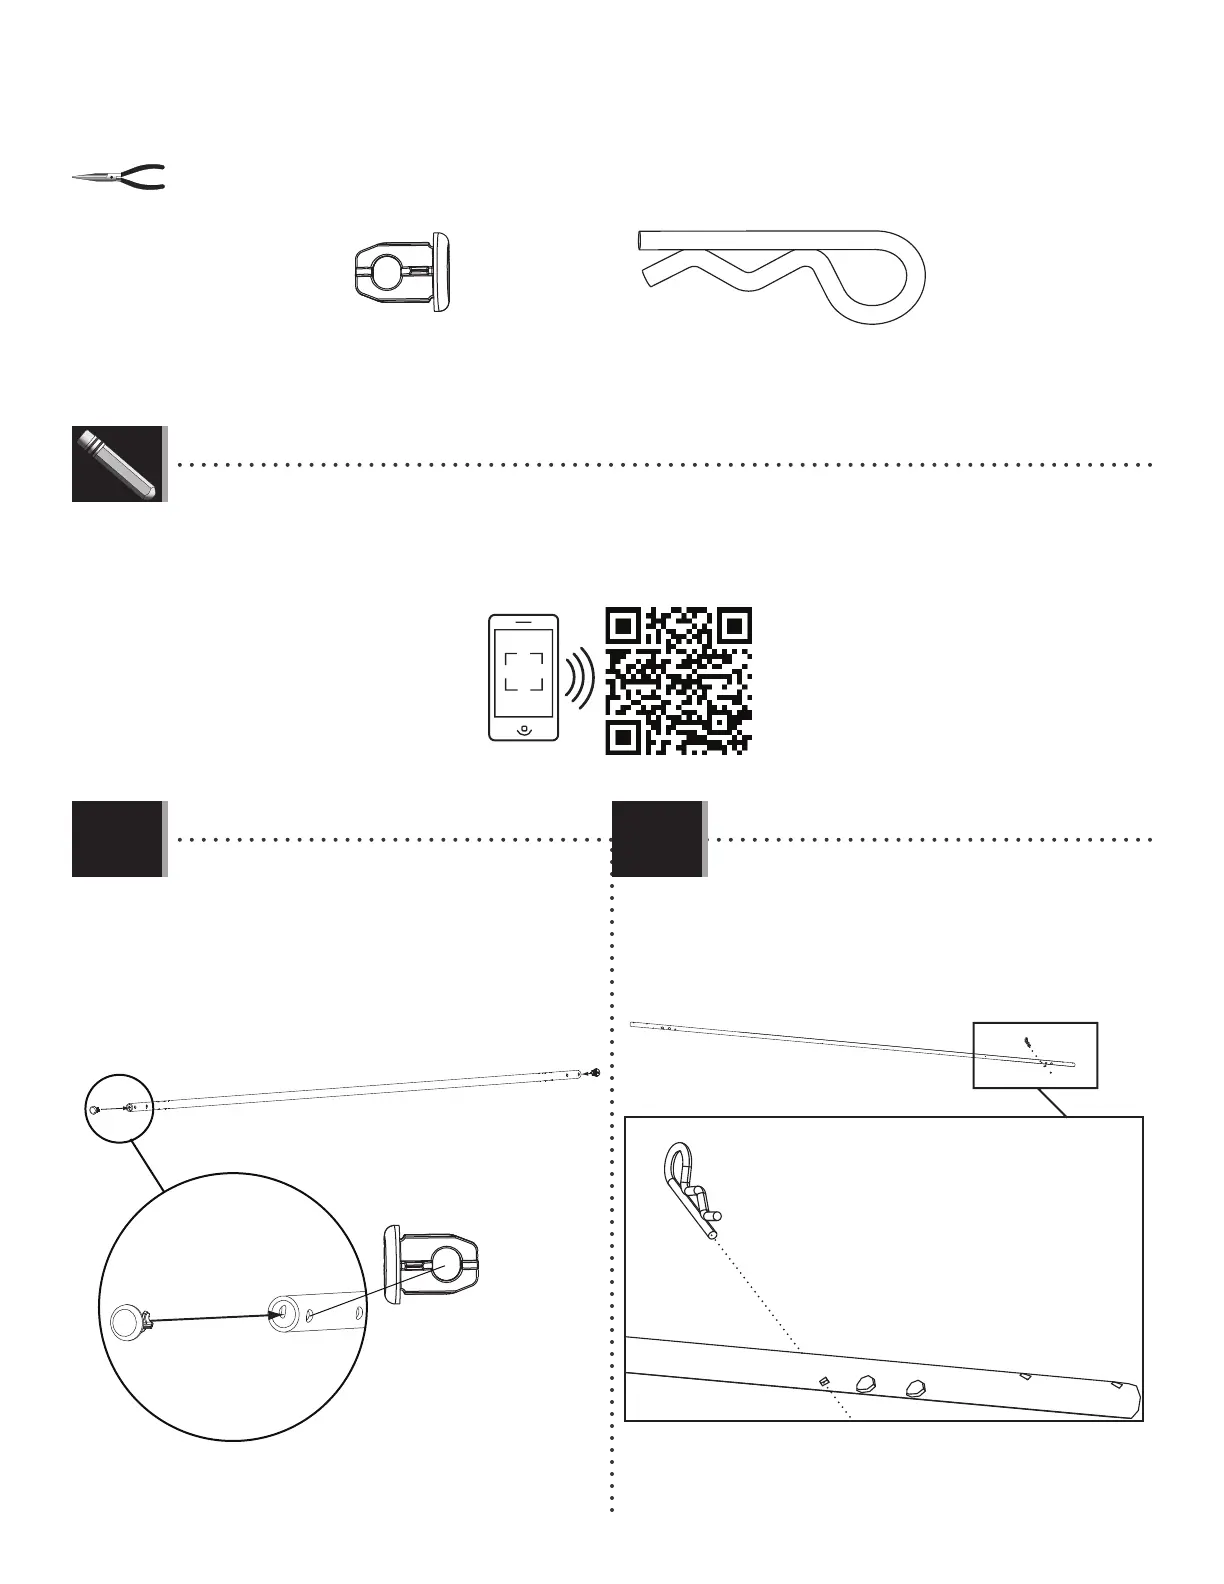
X SECTION 2 (CONTINUED) / SECTION 2 (SUITE) / SECCIÓN 2 (CONTINUACIÓN)
CUK (x2)
CUK
CUK
CTU
CTR
CTR
2.1 2.2
• Insert a Cap (CUK) into both ends of the Hinge
(CTR).
• Insérer un capuchon (CUK) dans chaque extrémité
de la charnière (CTR).
• Insertar un tapón (CUK) en cada extremo de la
bisagra (CTR).
LIFETIME
©
• If you have trouble with this section, follow the code below to view a video on the assembly in this section.
• En cas de problèmes avec cette section, suivre le code en bas pour voir un vidéo sur l’assemblage dans cette section.
• En caso de problemas con esta sección, seguir el código debajo para ver un video sobre el ensamblaje en esta sección.
http://go.lifetime.com/cbbackassembly
CTU (x2)
• Insert a Cotter Key (CTU) into the small hole in the
Hinge as shown.
• Insérer une goupille (CTU) dans le petit trou dans la
charnière comme indiqué.
• Insertar una chaveta (CTU) en el agujero pequeño
en la bisagra como se muestra.