31
SECTION 2 (CONTINUED) / SECTION 2 (SUITE) / SECCIÓN 2 (CONTINUACIÓN)
TOOLS & HARDWARE REQUIRED / OUTILS ET QUINCAILLERIE REQUIS / INSTRUMENTAL Y HERRAJE REQUERIDOS
HARDWARE IS SHOWN TO SCALE, UNLESS NOTED OTHERWISE (*) / LA QUINCAILLERIE EST ILLUSTRÉE À L’ÉCHELLE, SAUF INDICATION CONTRAIRE (*) / SE MUESTRA EL HERRAJE A ESCALA, A
MENOS QUE SE INDIQUE LO CONTRARIO (*)
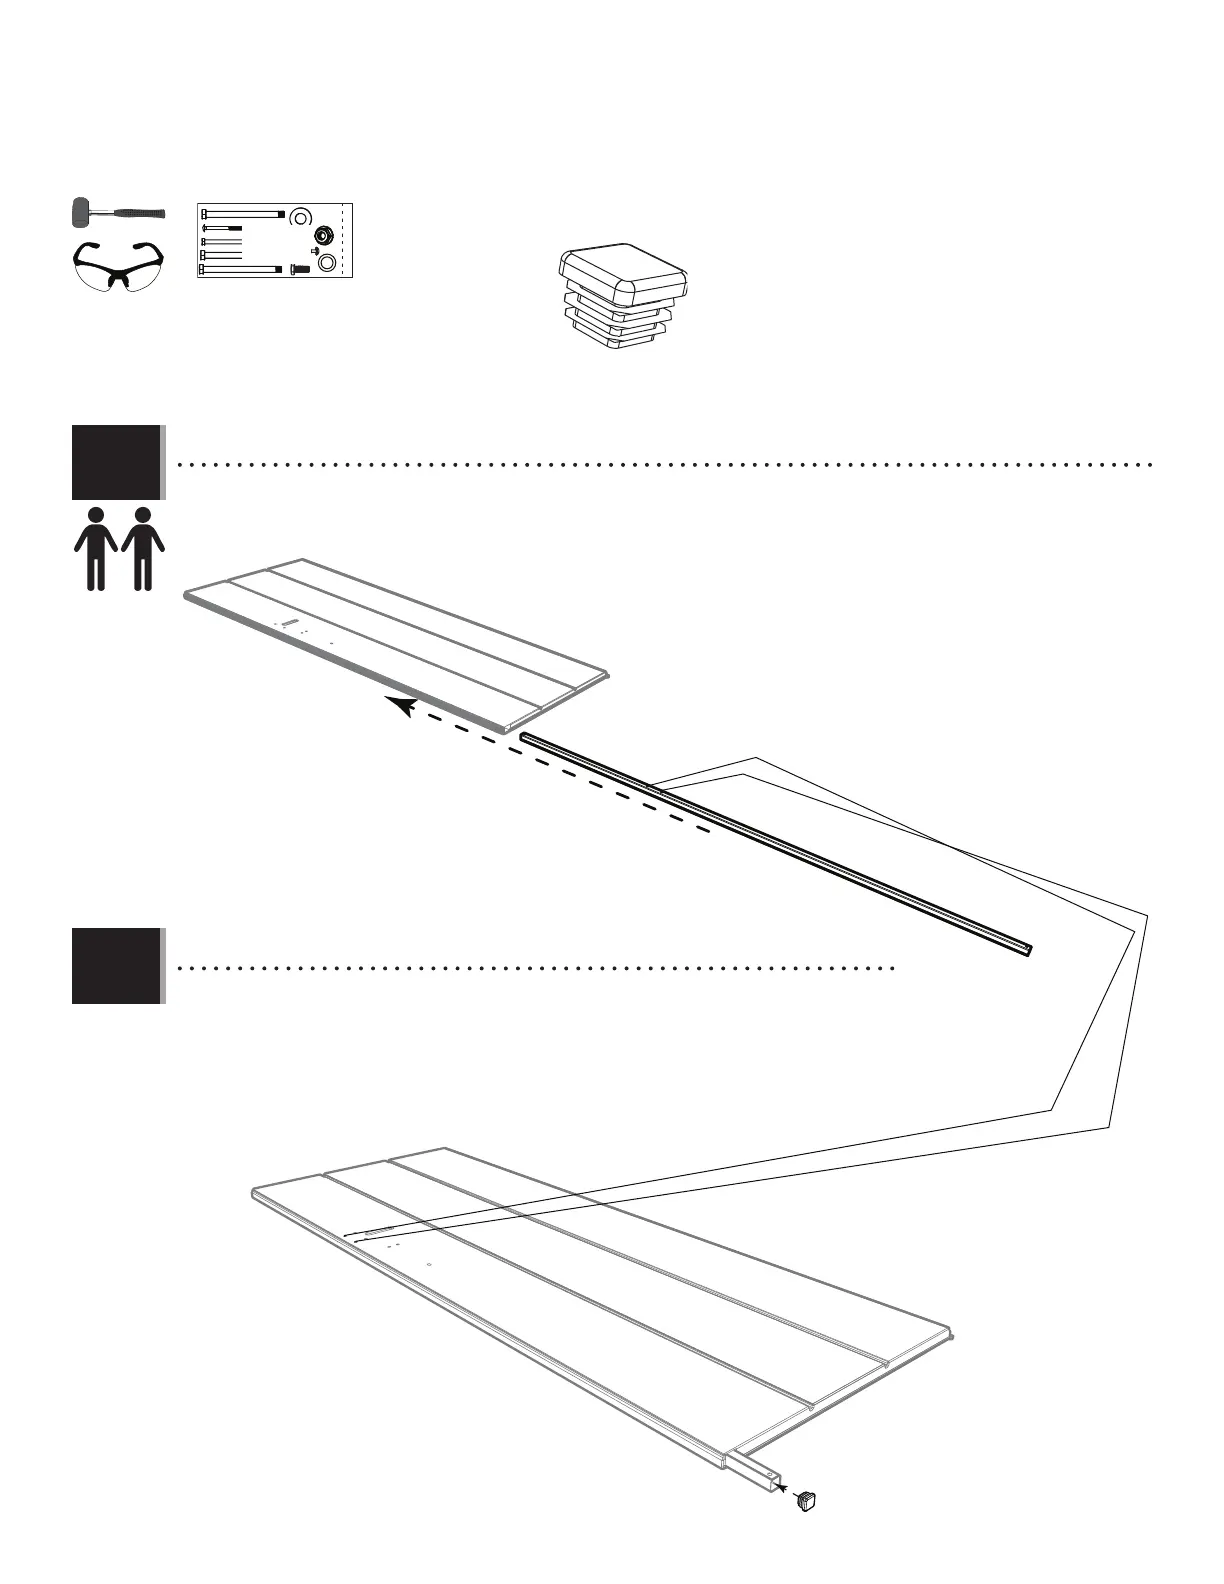
2.10
2.11
• Insert a Square Tube (FEK) into the hole at the bottom of the Door until it hangs out a few inches.
• Insérer un tube carré (FEK) dans le trou au coin inférieur de la porte jusqu’à ce qu’il sorte quelques centimètres.
• Insertar un tubo cuadrado (FEK) en el agujero a la esquina inferior de la puerta hasta que se cuelgue unos centímetros.
• Insert an End Cap (AHS) into the Tube, and continue inserting the Tube until the two holes in the Tube are
aligned with those in the Door.
• Insérer un capuchon (AHS) dans le tube, et continuer à insérer le tube jusqu’à ce que les deux trous dans
le tube s’alignent avec ceux de la porte.
• Insertar un tapón (AHS) en el tubo, et continuar insertando el tubo hasta que los dos agujeros estén
alineados con ellos en la puerta.
AHS (x1)
FEK
AHS
GEE