36
SECTION 2 (CONTINUED) / SECTION 2 (SUITE) / SECCIÓN 2 (CONTINUACIÓN)
TOOLS & HARDWARE REQUIRED / OUTILS ET QUINCAILLERIE REQUIS / INSTRUMENTAL Y HERRAJE REQUERIDOS
HARDWARE IS SHOWN TO SCALE, UNLESS NOTED OTHERWISE (*) / LA QUINCAILLERIE EST ILLUSTRÉE À L’ÉCHELLE, SAUF INDICATION CONTRAIRE (*) / SE MUESTRA EL HERRAJE A ESCALA, A
MENOS QUE SE INDIQUE LO CONTRARIO (*)
2.17
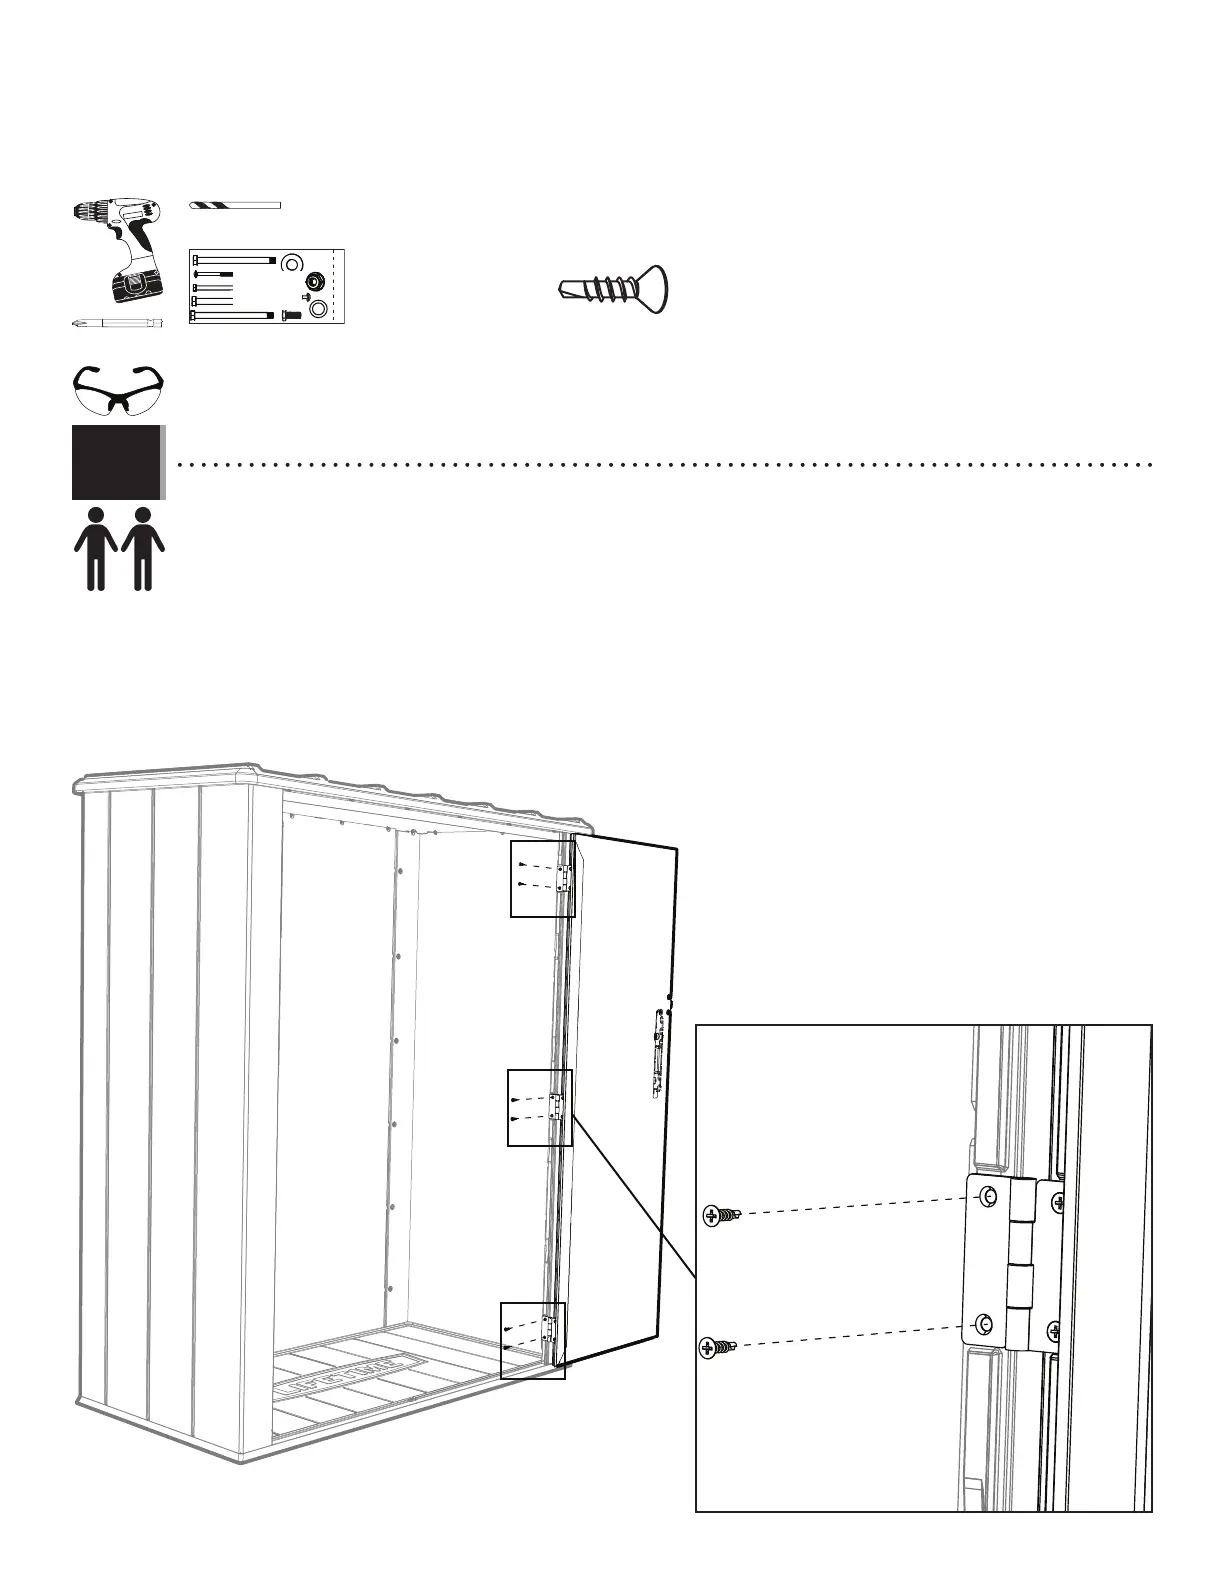
• Align the holes in the hinges on the Right Door with the divots on the Right Wall Panel, and secure the Door to the
Cabinet using six (6) Screws (DUL). The Screws (DUL) are self-tapping screws. The tips are like drill bits, but we highly recommend
fi rst drilling through the divots with the 1/8" drill bit provided. Do not drill all the way through the Panel.
• Aligner les trous dans le charnières sur la porte droite avec les marques sur le panneau mural droit, et fi xer la porte
au meuble à l’aide de six (6) vis (DUL). Les vis (DUL) sont vis auto-taraudeuses. Les pointes sont comme les forets, mais nous
recommendons fortement the drilling through the divots fi rst à l’aide du foret de 3 mm (1/8") inclus. Ne pas percer à travers l’autre
côté du panneau.
• Alinear los agujeros en las bisagras en la puerta derecha con las marcas en el panel mural derecho, y fi jar la
puerta al mueble usando seis (6) tornillos (DUL). Los tornillos (DUL) sont autoroscantes. Las puntas son como las brocas, mas
recomendamos fuertamente that you drill fi rst through the divots usando la broca de 3 mm (1/8") incluida. No taladrar por la puerta
entera.
DUL (x6)
DUL
DUL
ADC (x1)
ARA (x1)
GEG