18
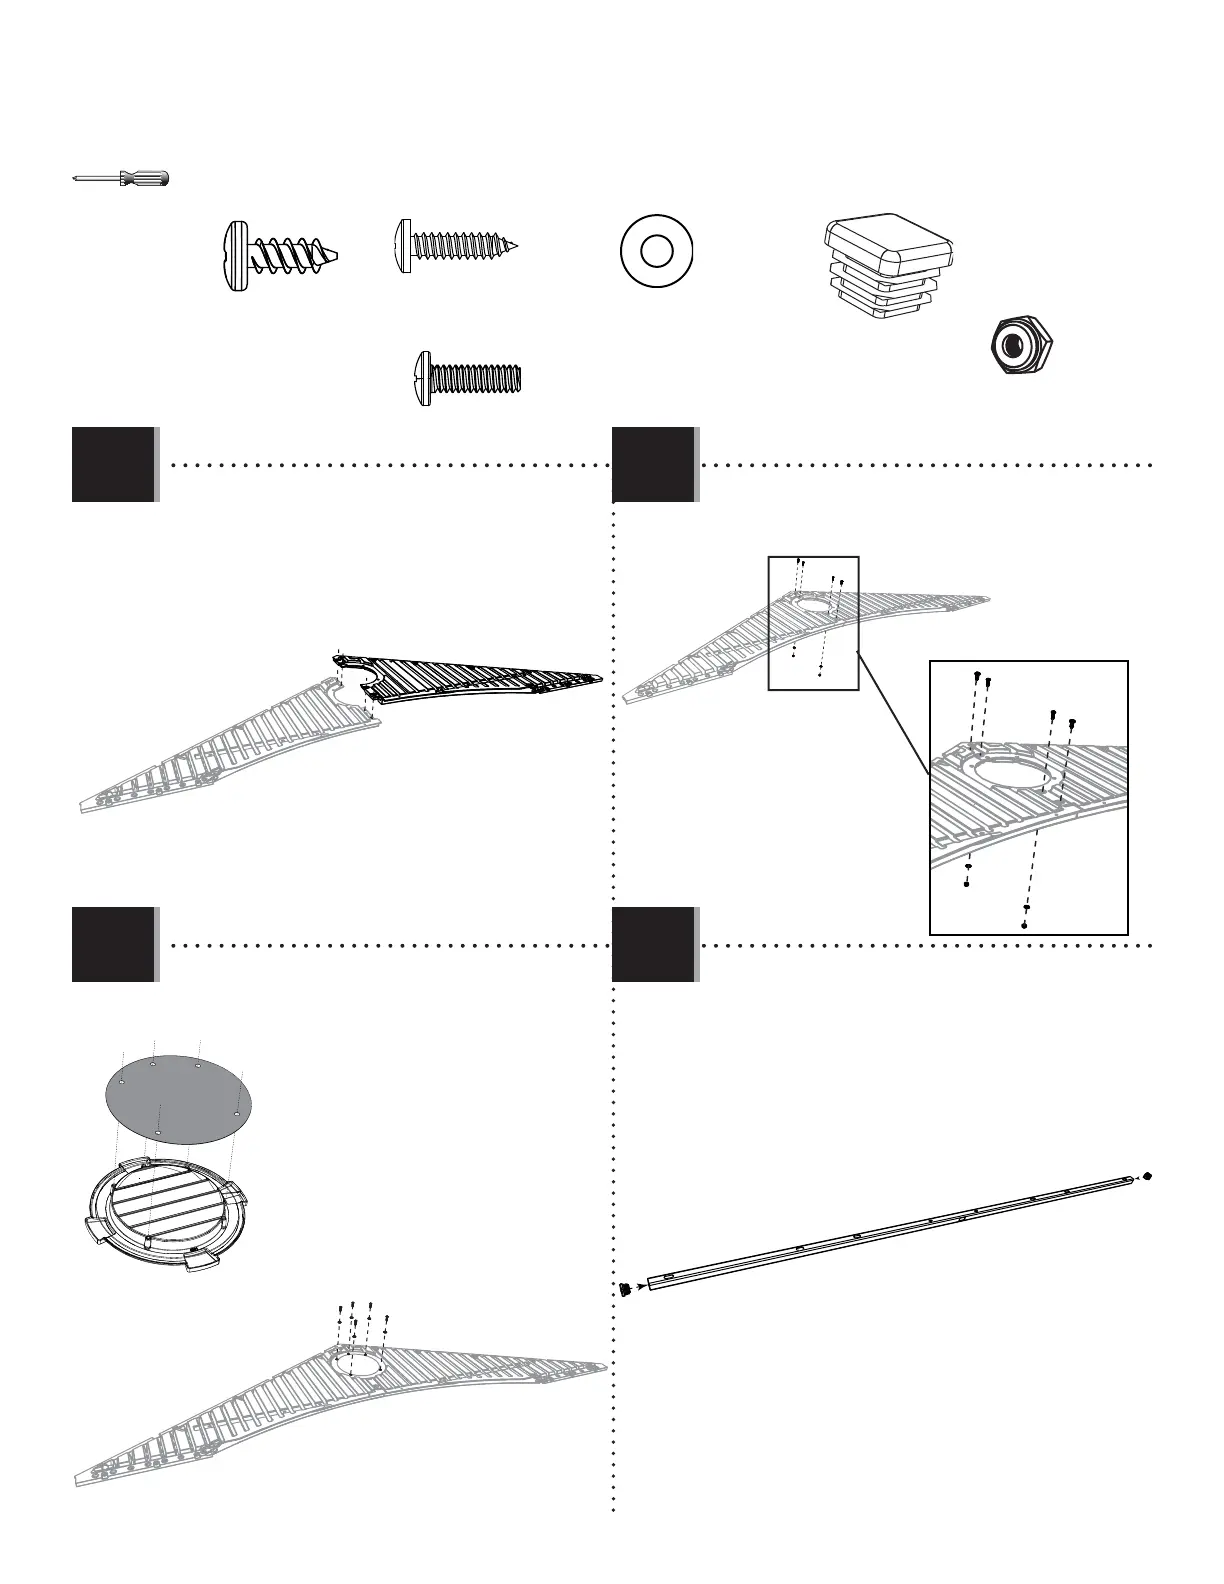
TOOLS AND HARDWARE REQUIRED / OUTILS ET QUINCAILLERIE REQUIS / INSTRUMENTAL Y HERRAJE REQUERIDOS
X SECTION 3 (CONTINUED) / SECTION 3 (SUITE) / SECCIÓN 3 (CONTINUACIÓN)
ADW (x5)
EYQ (x2)
AEE (x7)
AIQ
ENH
ADW
AEE
• Repeat steps 3.3–3.4 for the Entry Gable.
• Répétez les étapes 3.3 – 3.4 pour le pignon d’entrée.
• Repita los pasos 3.3–3.4 para la fachada de entrada.
• Align the holes in the Left (EVZ) and Right (EWA) Entry
Gable Halves.
• Alignez les trous dans les demis pignons d’entrée
gauche (EVZ) et droit (EWA).
• Alinee los agujeros en las mitades de la fachada
trasera izquierda (EVZ) y derecha (EWA).
• Secure with the hardware included.
• Fixez à l’aide de la quincaillerie incluse.
• Sujete con el herraje incluido.
• Insert an End Cap (AHS) into each end of the Header
(EYS).
• Insérez un capuchon (AHS) dans chaque extrémité du
linteau (EYS).
• Inserte un tapón (AHS) en cada extremo del dintel (EYS).
AHS
AHS
EYS
AHS (x2)
CXK (x2)
3.5 3.6
3.7
3.8
EWA
EVZ
ADZ (x2)
ADZ
ADZ
AEE
CXK
CXK
AEE
EYQ
EYQ