14
TOOLS & HARDWARE REQUIRED / OUTILS ET QUINCAILLERIE REQUIS / INSTRUMENTAL Y HERRAJE REQUERIDOS
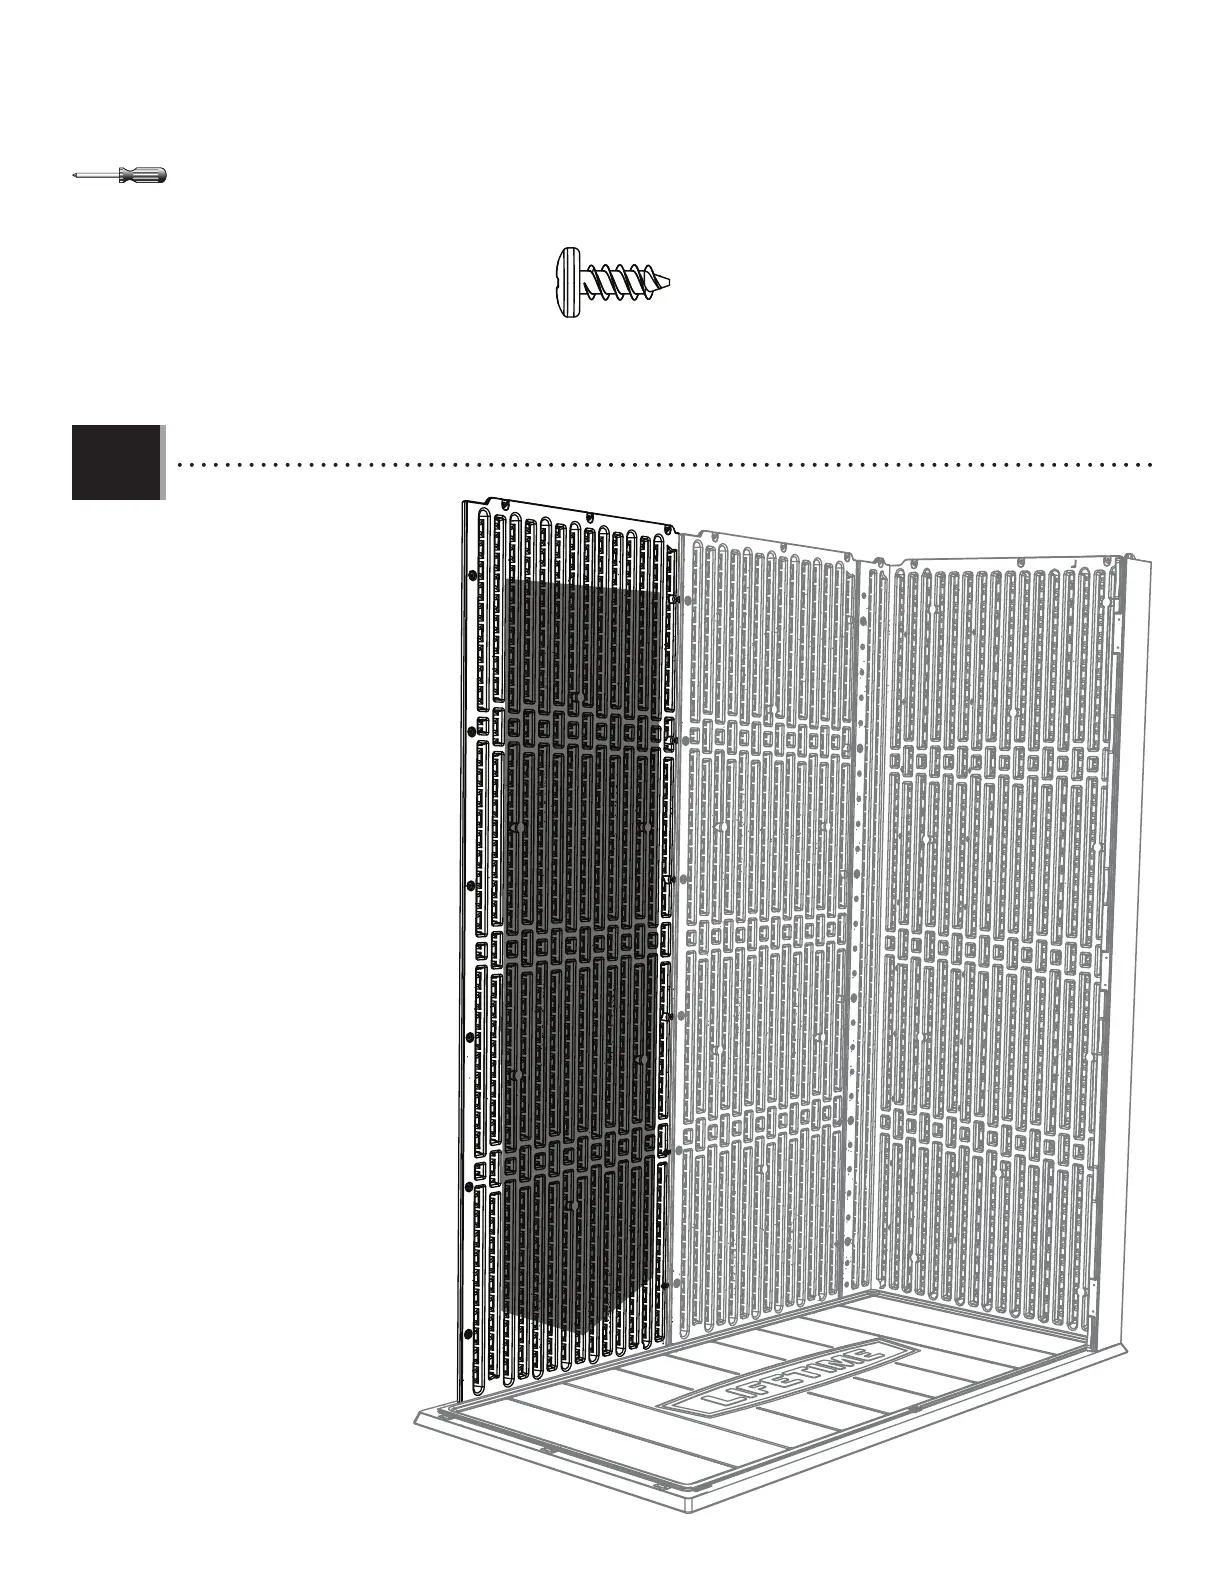
u SECTION 1 (CONTINUED) / SECTION 1 (SUITE) / SECCIÓN 1 (CONTINUACIÓN)
1.9
• Insert the three tabs at the
bottom of the second Rear Wall
Panel (ANA) into the 2nd, 3rd,
and 4th slots from the left
corner of the Floor panel. The
right edge of the Left Panel is behind
the left edge of the Right Panel.
Secure with six (6) Screws (ADZ).
• Insérez les trois languettes au
bord inférieur du panneau mural
arrière (ANA) dans les 2e, 3e, et
4e fentes du côté gauche du
panneau de plancher. Le bord
droit du panneau de plancher est
arrière du bord gauche du panneau
droit. Fixez avec six (6) vis (ADZ).
• Inserte las lengüetas al borde
inferior del panel mural trasero
(ANA) dentro de las 2ª, 3ª, y 4ª
ranuras del lado izquierdo del
panel de piso. El borde derecho
del panel izquierdo se ubica detrás
del borde izquierdo del panel
derecho. Fije con seis (6) tornillos
(ADZ).
ADZ (x6)
ANA