13
TOOLS AND HARDWARE REQUIRED / OUTILS ET QUINCAILLERIE REQUIS / INSTRUMENTAL Y HERRAJE REQUERIDOS
1
X SECTION 1 (CONTINUED) / SECTION 1 (SUITE) / SECCIÓN 1 (CONTINUACIÓN)
1.9
1.10
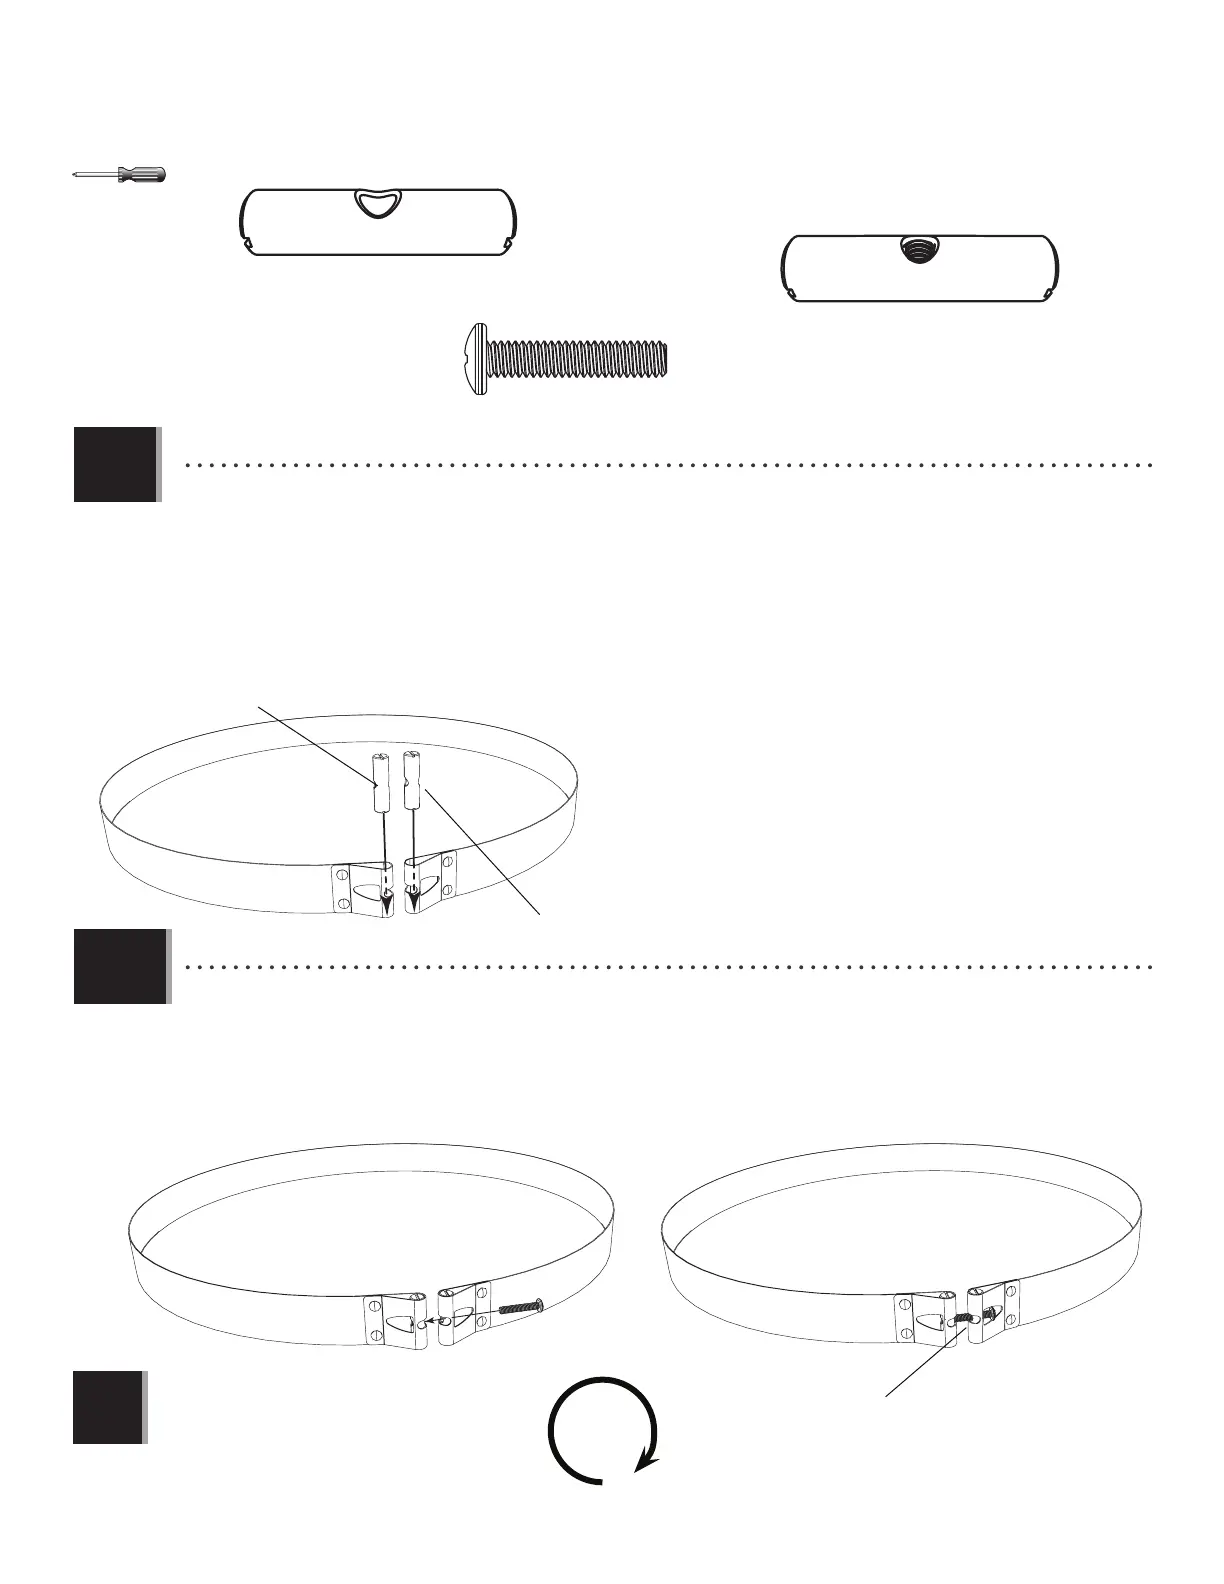
• Curve a Metal Band (EGV) into a loop, and insert a Non-Threaded Pin (EGX) and a Threaded Pin (EGW) through the ends of
the Band as shown.
• Courber une bande en métal (EGV) en forme de cercle, et insérer une goupille non filetée (EGX) et une goupille filetée
(EGW) à travers les extrémités de la bande comme illustré.
• Curvear un flejado de metal (EGV) en forma circular, e insertar un pasador no taladrado (EGX) y un pasador taladrado
(EGW) por los extremos del flejado como se muestra.
• Insert a Screw (EGY) through the Non-Threaded Pin and into the Threaded Pin. Turn the Screw only two revolutions for
now.
• Insérer une vis (EGY) à travers la goupille non filetée et dans la goupille filetée. Ne visser la vis que deux tours en ce
moment.
• Insertar un tornillo (EGY) por el pasador no taladrado y dentro del pasador taladrado. Atornillar el tornillo sólo dos
revoluciones en este momento.
• Turn the Screw only two revolutions for now.
• Ne visser la vis que deux tours en ce moment.
• Atornillar el tornillo sólo dos revoluciones en este momento.
EGX (x4)
EGW (x4)
EGW
EGX
EGV
Non-Threaded Pin / Goupille non filetée / Pasador no taladrado
Threaded Pin / Goupille filetée / Pasador taladrado
EGY (x4)
2
Note: Repeat steps 1.9–1.10 for a second Metal Band.
Remarque : Répéter les étapes 1.9–1.10 pour une deuxième
bande en métal.
Nota: Repetir los pasos 1.9–1.10 para un segundo flejado.
!