23
SECTION 2 (CONTINUED) / SECTION 2 (SUITE) / SECCIÓN 2 (CONTINUACIÓN)
TOOLS & HARDWARE REQUIRED / OUTILS ET QUINCAILLERIE REQUIS / INSTRUMENTAL Y HERRAJE REQUERIDOS
Hardware is shown to scale, unless noted otherwise (*) / La quincaillerie est illustrée à l’échelle, sauf indication contraire (*) / Se muestra el herraje a escala, a menos que se indique lo contrario (*)
2.1
2.2
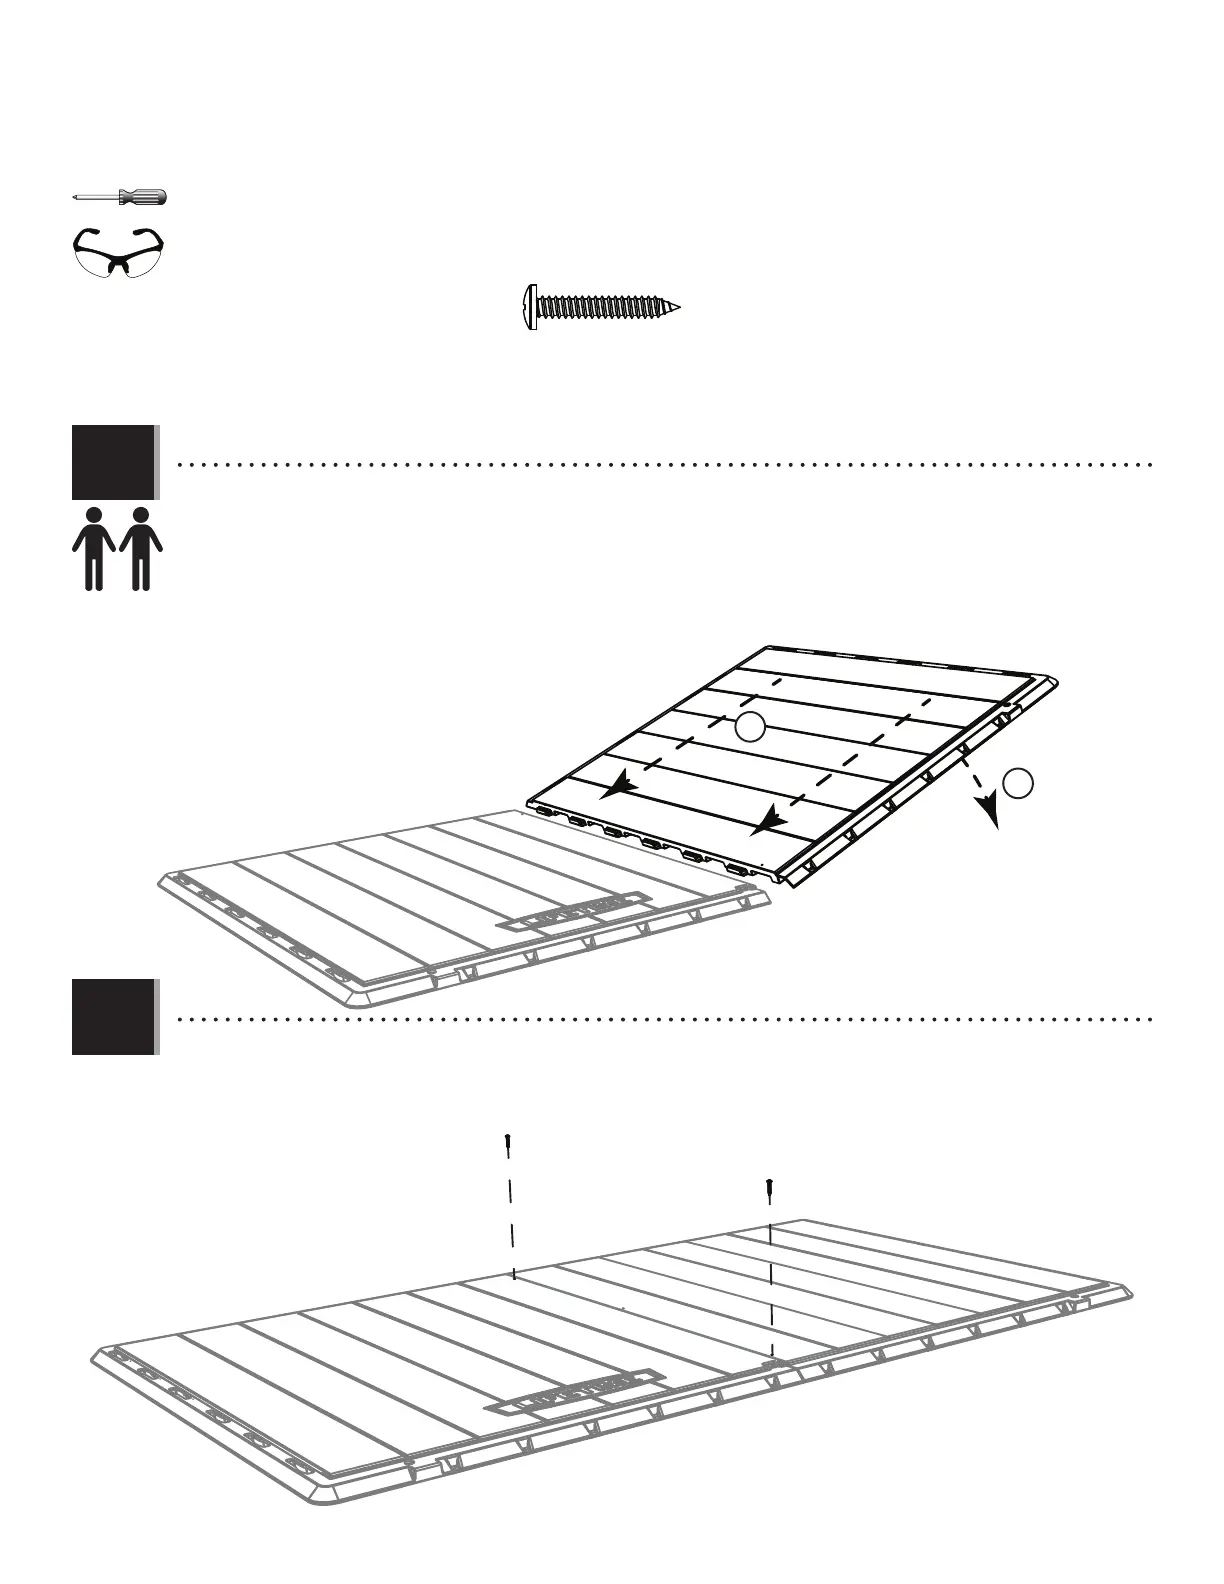
• Set the fl oor panel (DRI) fl at on the ground. Place the fl oor panel (DRH) at a 45° angle next to fl oor panel (DRI) with
the tabs on one panel between those on the other. (1) Push the panel (DRH) next to the other and (2) lay fl at.
• Mettre le panneau de plancher (DRI) à plat sur le sol. Mettre le panneau de plancher (DRH) à un angle de 45° à côté de
l’autre et avec les languettes sur un panneau entre ceux de l’autre. (1) Pousser le panneau (DRH) contre l’autre et
(2) le poser à plat.
• Colocar el panel del piso (DRI) sobre suelo plano. Situar el panel de piso (DRH) a un ángulo de 45° al lado del otro y
con las lengüetas en un panel entre ellas del otro. (1) Empujar el panel (DRH) contra el otro y (2) aplanarlo.
DRI
DRH
AYR (x2)
• Secure the two panels together with two (2) screws (AYR). Do not overtighten.
• Bien attacher les deux panneaux à l’aide de deux (2) vis (AYR). Ne pas trop serrer.
• Fijar bien los dos paneles usando dos (2) tornillos (AYR). No apretar demasiado.
1
2
AYR
AYR