46
SECTION 2 (CONTINUED) / SECTION 2 (SUITE) / SECCIÓN 2 (CONTINUACIÓN)
TOOLS & HARDWARE REQUIRED / OUTILS ET QUINCAILLERIE REQUIS / INSTRUMENTAL Y HERRAJE REQUERIDOS
Hardware is shown to scale, unless noted otherwise (*) / La quincaillerie est illustrée à l’échelle, sauf indication contraire (*) / Se muestra el herraje a escala, a menos que se indique lo contrario (*)
CHK (x2)
2.26
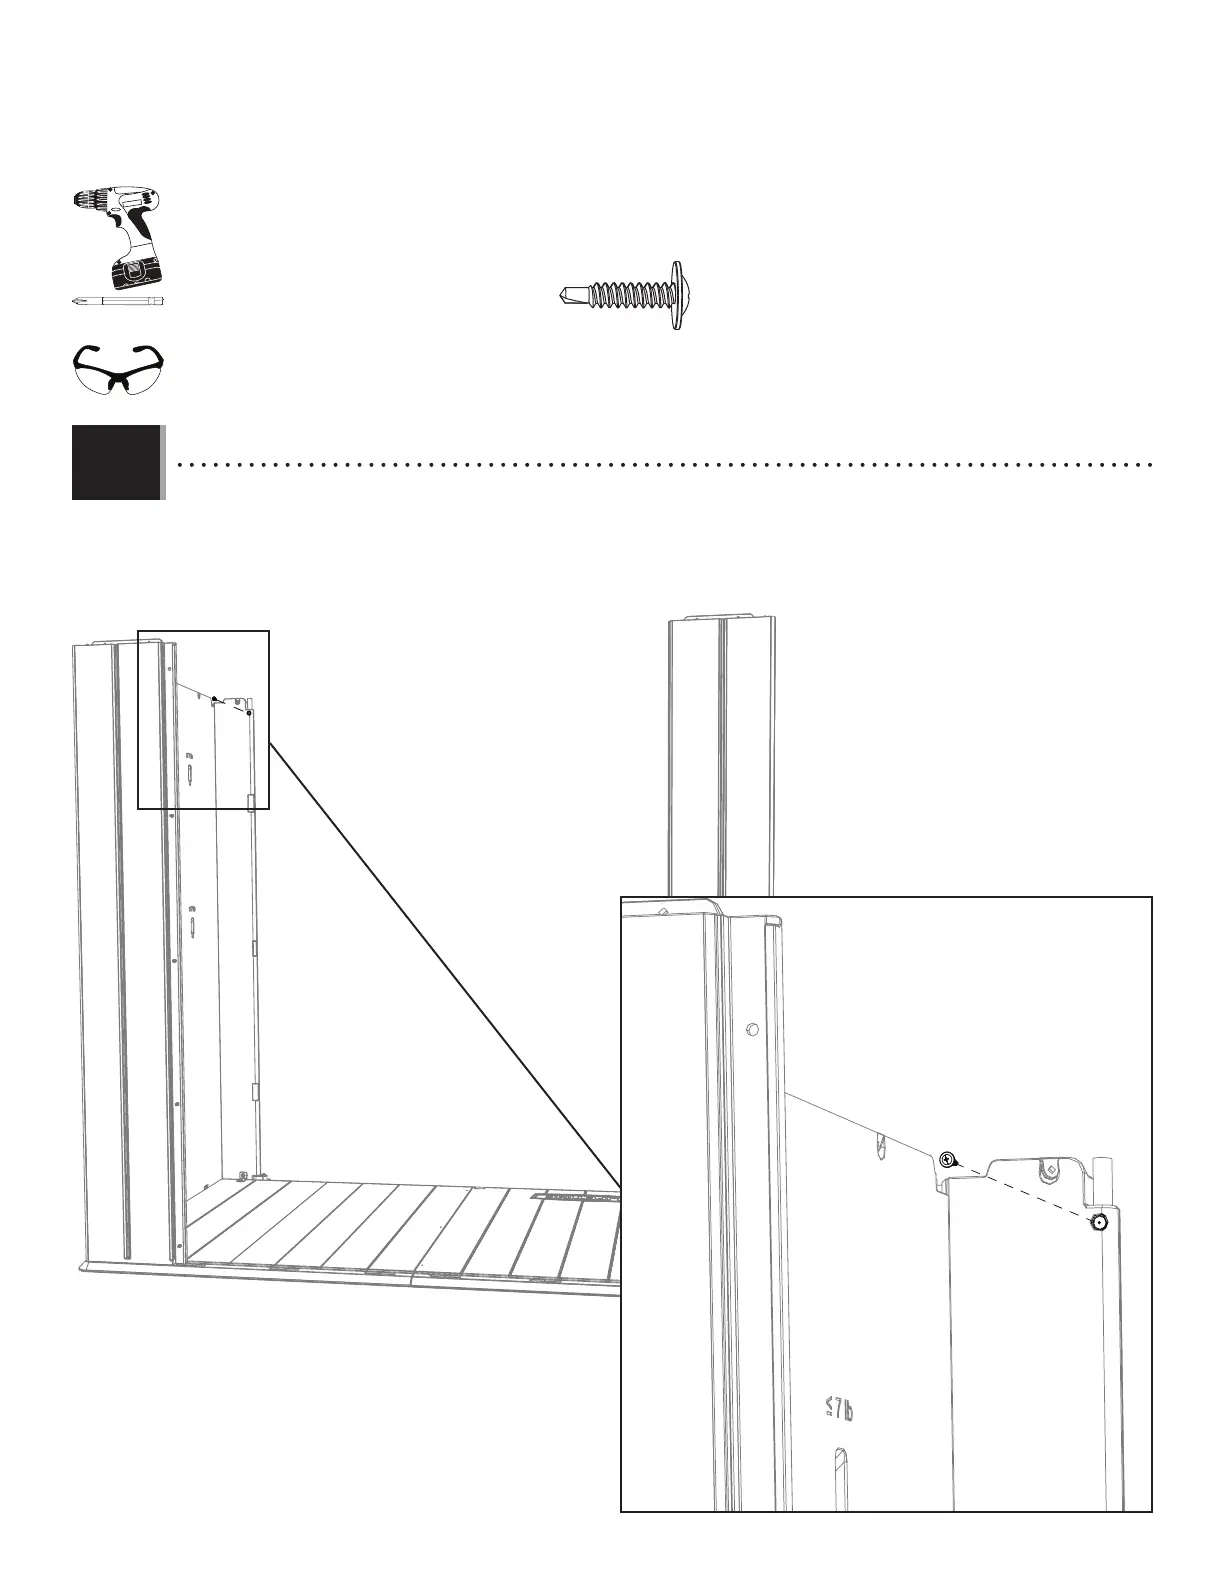
• Using an electric drill, insert a screw (CHK) through the right, front corner wall panel and into the wall tube. Repeat this step for
the left, front corner wall panel.
• En utilisant une perceuse électrique, insérer une vis (CHK) à travers le panneau angulaire avant droit et dans le tube mural.
Répéter cette étape pour le panneau angulaire avant gauche.
• Usando un taladro eléctrico, insertar un tornillo (CHK) a través el panel angular delantero derecho y en el tubo mural. Repetir
este paso para el panel angular delantero izquierdo.
Rear walls have been removed for clarity / Les murs arrières
ont été rétirés par souci de clarté / Los muros traseros han sido
quitados para mayor claridad
CHK
ADC (x1)