29
TOOLS AND HARDWARE REQUIRED / OUTILS ET QUINCAILLERIE REQUIS / INSTRUMENTAL Y HERRAJE REQUERIDOS
X SECTION 4 (CONTINUED) / SECTION 4 (SUITE) / SECCIÓN 4 (CONTINUACIÓN)
4.4
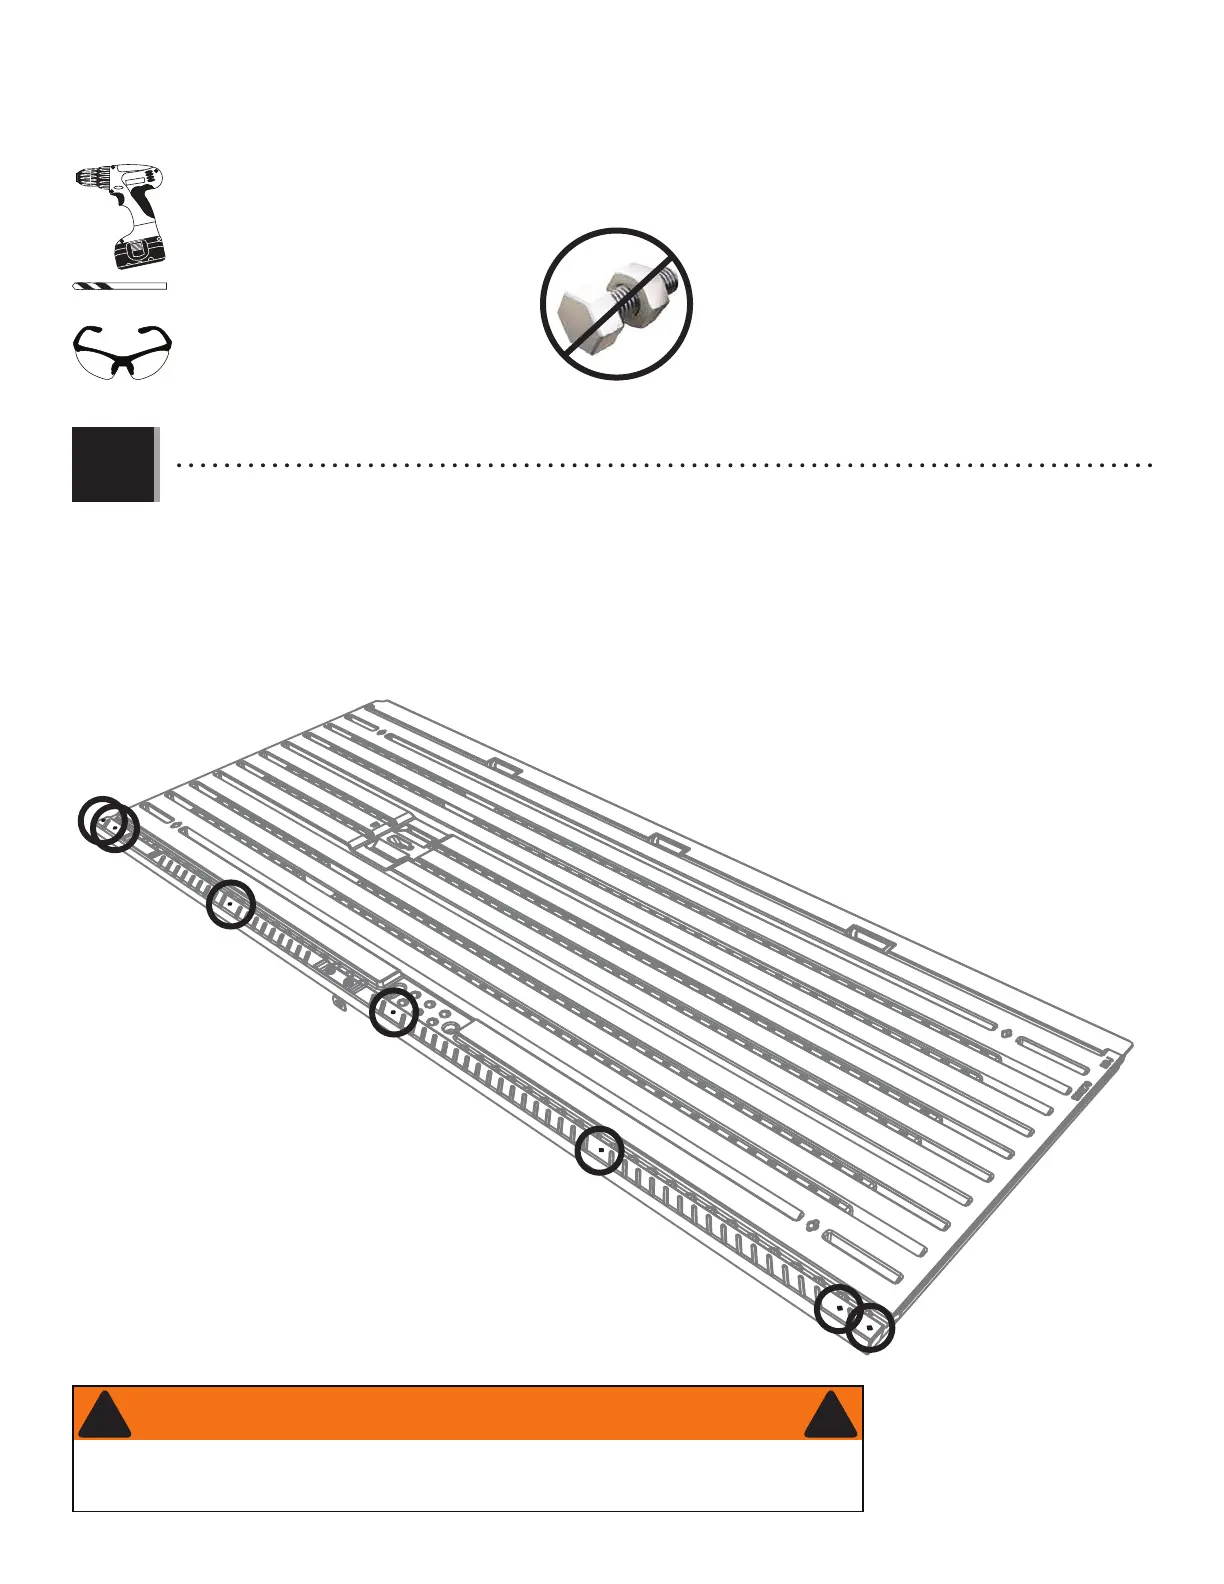
• Turn the door onto its front. There are seven small impressions (divots) running along the edge of the door—two
at each end and three inbetween. Using the 5/32" (≈4 mm) drill bit (GHO) included and an electric drill, drill through the
divots and into the square tube. Do not drill all the way through the door.
• Poser la porte sur sa face avant. Il y a sept petites impressions (marques) le long du bord de la porte — deux a
chaque extrémité et trois entre elles. À l’aide du foret de 5/32" (≈4 mm) (GHO) inclus et d’une perceuse électrique, percer
les marques et dans le tube carré. Ne pas percer de face en face.
• Colocar la puerta sobre la cara delantera. Hay siete mellas pequeñas (marcas) a lo largo del borde de la puerta, dos
a cada extremo y tres entre ellas. Usando la broca de 5/32" (≈4 mm) (GHO) uncluida y un taladro eléctrico, taladrar las
marcas en la puerta y dentro el tubo cuadrado. No taladrar la puerta por completo.
GHO
• When drilling through metal, beware of burrs, shavings and other sharp edges.
• En perçant le métal, faire attention aux bavures, copeaux de métal et autres bords aiguisés.
• Al perforar metal, tenga cuidado con las rebabas, virutas y otros bordes afilados.
WARNING / AVERTISSEMENT / ADVERTENCIA
! !