35
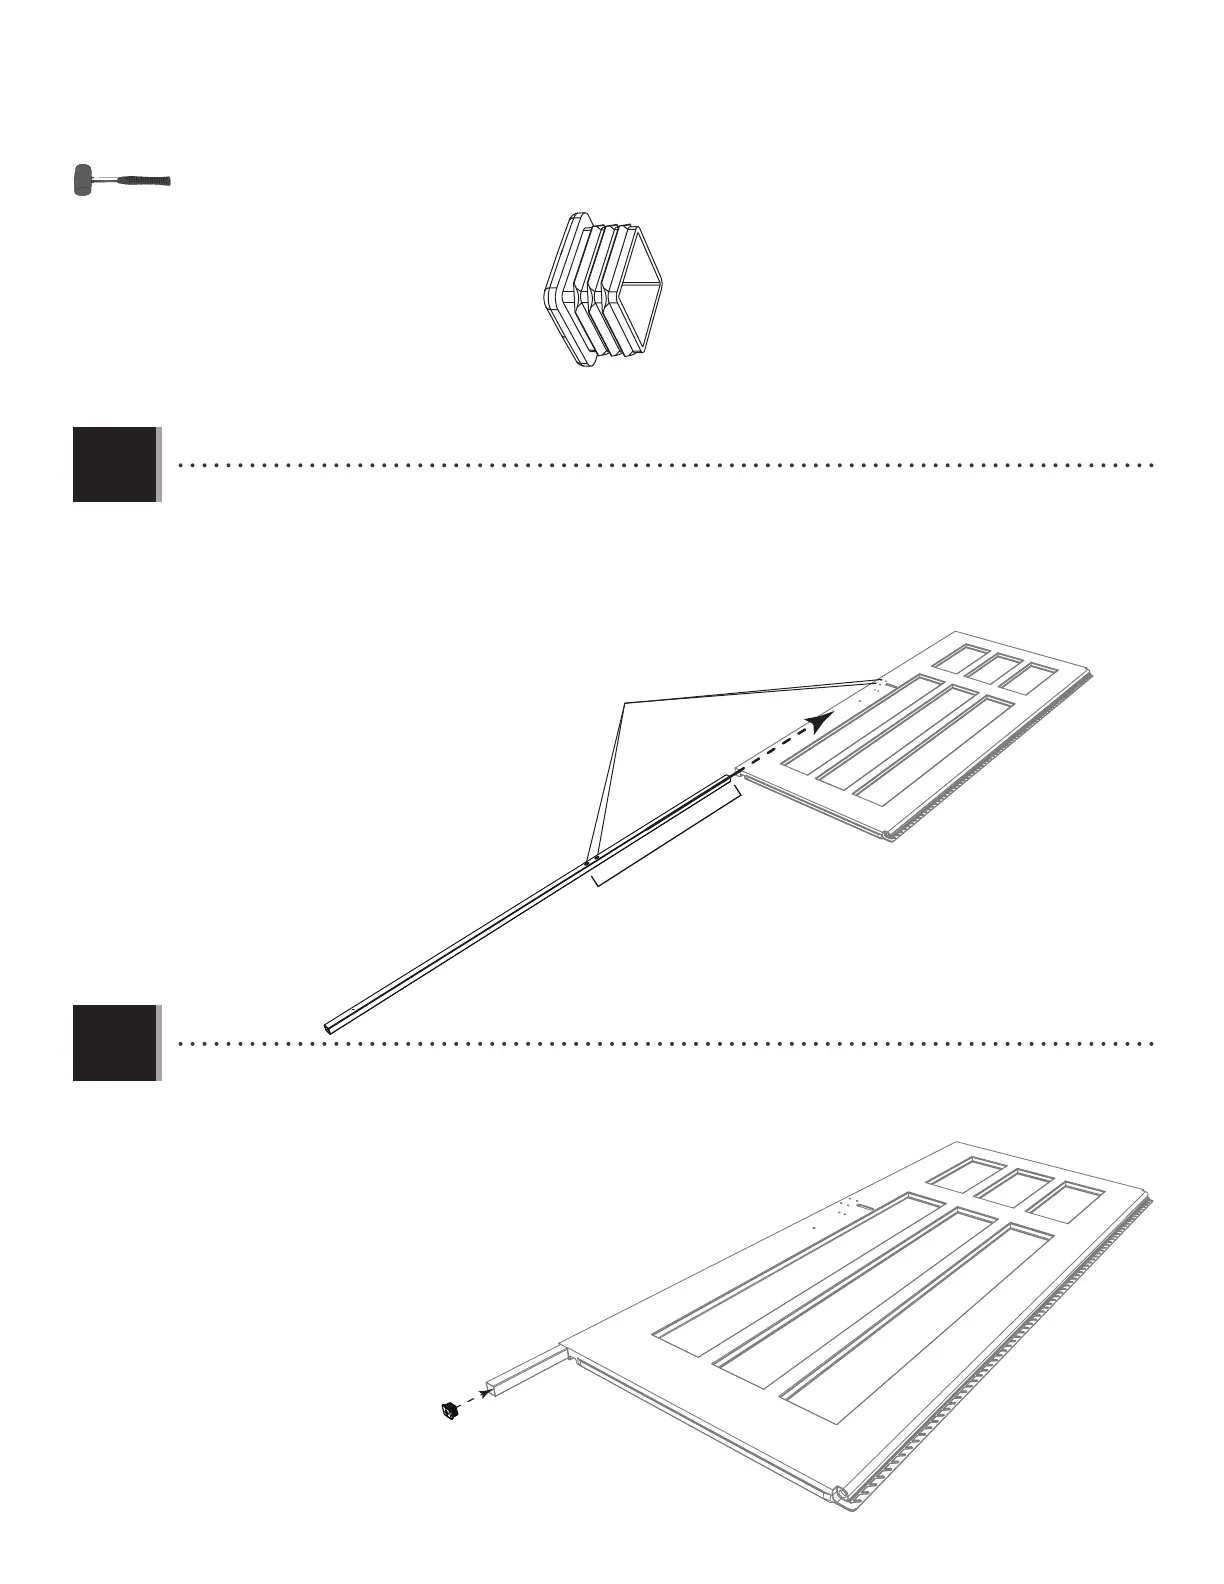
TOOLS AND HARDWARE REQUIRED / OUTILS ET QUINCAILLERIE REQUIS / INSTRUMENTAL Y HERRAJE REQUERIDOS
X SECTION 5 (CONTINUED) / SECTION 5 (SUITE) / SECCIÓN 5 (CONTINUACIÓN)
5.1
5.2
BBH (x1)
BDK
GJT
BBH
• Slide a square tube (GJT) into the square hole at the bottom of the right door (BDK) until about 6" (≈15 cm) of the tube
hang out of the hole.
• Faire glisser un tube carré (GJT) dans le trou carré au bord inférieur de la porte droite (BDK) jusqu’à ce que environ
≈15 cm (6 po) étendent du trou.
• Deslizar un tubo cuadrado (GJT) en el orifi cio cuadrado a la parte inferior de la puerta derecha (BDK) hasta que unos
≈15 cm (6 in) cuelguen del agujero.
• Insert the end cap (BBH) into the end of the square tube and continue inserting the tube until it is fl ush with the
bottom of the door. Align the two holes in the tube with the two holes in the door. If necessary, gently tap with a
rubber mallet.
• Insérer un capuchon (BBH) dans l’extrémité du tube carré et continuer à insérer le
tube jusqu’à ce qu’il soit à ras del borde inférieur de la porte. Aligner les deux
trous dans le tube avec les deux trous dans la porte. Si besoin, frapper
soigneusement avec un maillet en caoutchouc.
• Insertar un tapón (BBH) en el extremo del tubo cuadrado y
continuar a insertar el tubo hasta que esté al ras del borde
inferior de la puerta. Alinear los dos agujeros en el tube
con ellos en la puerta. Si es necesario, golpear
cuidadosamente con un mazo de goma.
• Align these holes
• Aligner ces trous
• Alinear estos agujeros