85
X SECTION 10 (CONTINUED) / SECTION 10 (SUITE) / SECCIÓN 10 (CONTINUACIÓN)
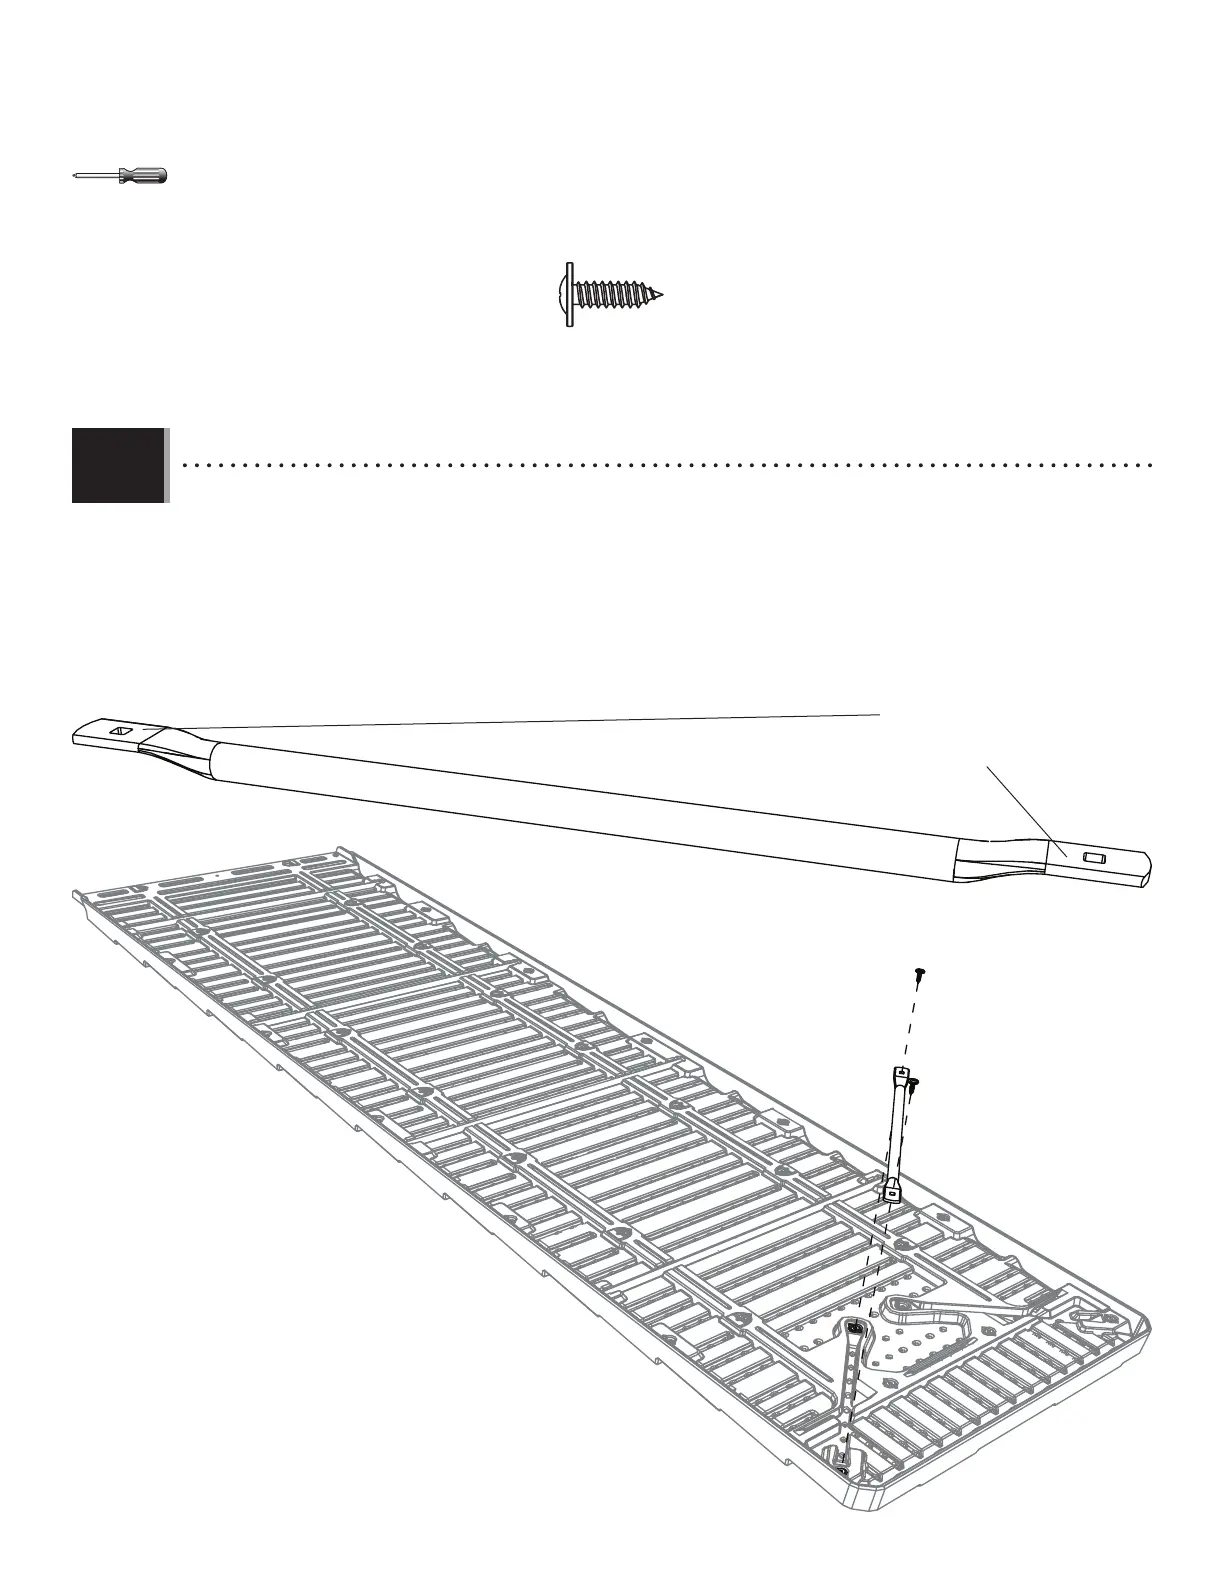
TOOLS AND HARDWARE REQUIRED / OUTILS ET QUINCAILLERIE REQUIS / INSTRUMENTAL Y HERRAJE REQUERIDOS
• Using the lower roof panel from step 10.3, secure a diagonal roof support (GKQ) to the location indicated using two (2)
screws (GJZ). The fl at ends of the support should face upward. DO NOT REPEAT this step for the other three (3) lower roof panels. This lower
roof panel will go on the lower left side of the shed later.
• En utilisant le panneau de toit inférieur de l’étape 10.3, bien attacher un support de toit diagonal (GKQ) à l’endroit indiqué
à l’aide de deux (2) vis (GJZ). Orienter les extrémités plates du support vers le haut. NE PAS RÉPÉTER cette étape pour les autres trois (3)
panneaux de toit inférieurs. Ce panneau de toit inférieur s’attache au côté inférieur gauche de l’abri plus tard.
• Usando el panel de techo inferior del paso 10.3, fi jar bien un soporte de techo diagonal (GKQ) a la ubicación indicada
usando dos (2) tornillos (GJZ). Orientar los extremos planos del soporte hacia arriba. NO REPETIR este paso para los otros tres (3)
paneles de techo superiores. Este panel de techo inferior se fi ja al lado inferior izquierdo de la caseta más tarde.
10.4
GJZ (x2)
GJZ
GKQ
GKQ
• Flat side up
• Côté plat vers le haut
• Lado plano hacia arriba
GJZ