1616
TOOLS AND HARDWARE REQUIRED / OUTILS ET QUINCAILLERIE REQUIS / INSTRUMENTAL Y HERRAJE REQUERIDOS
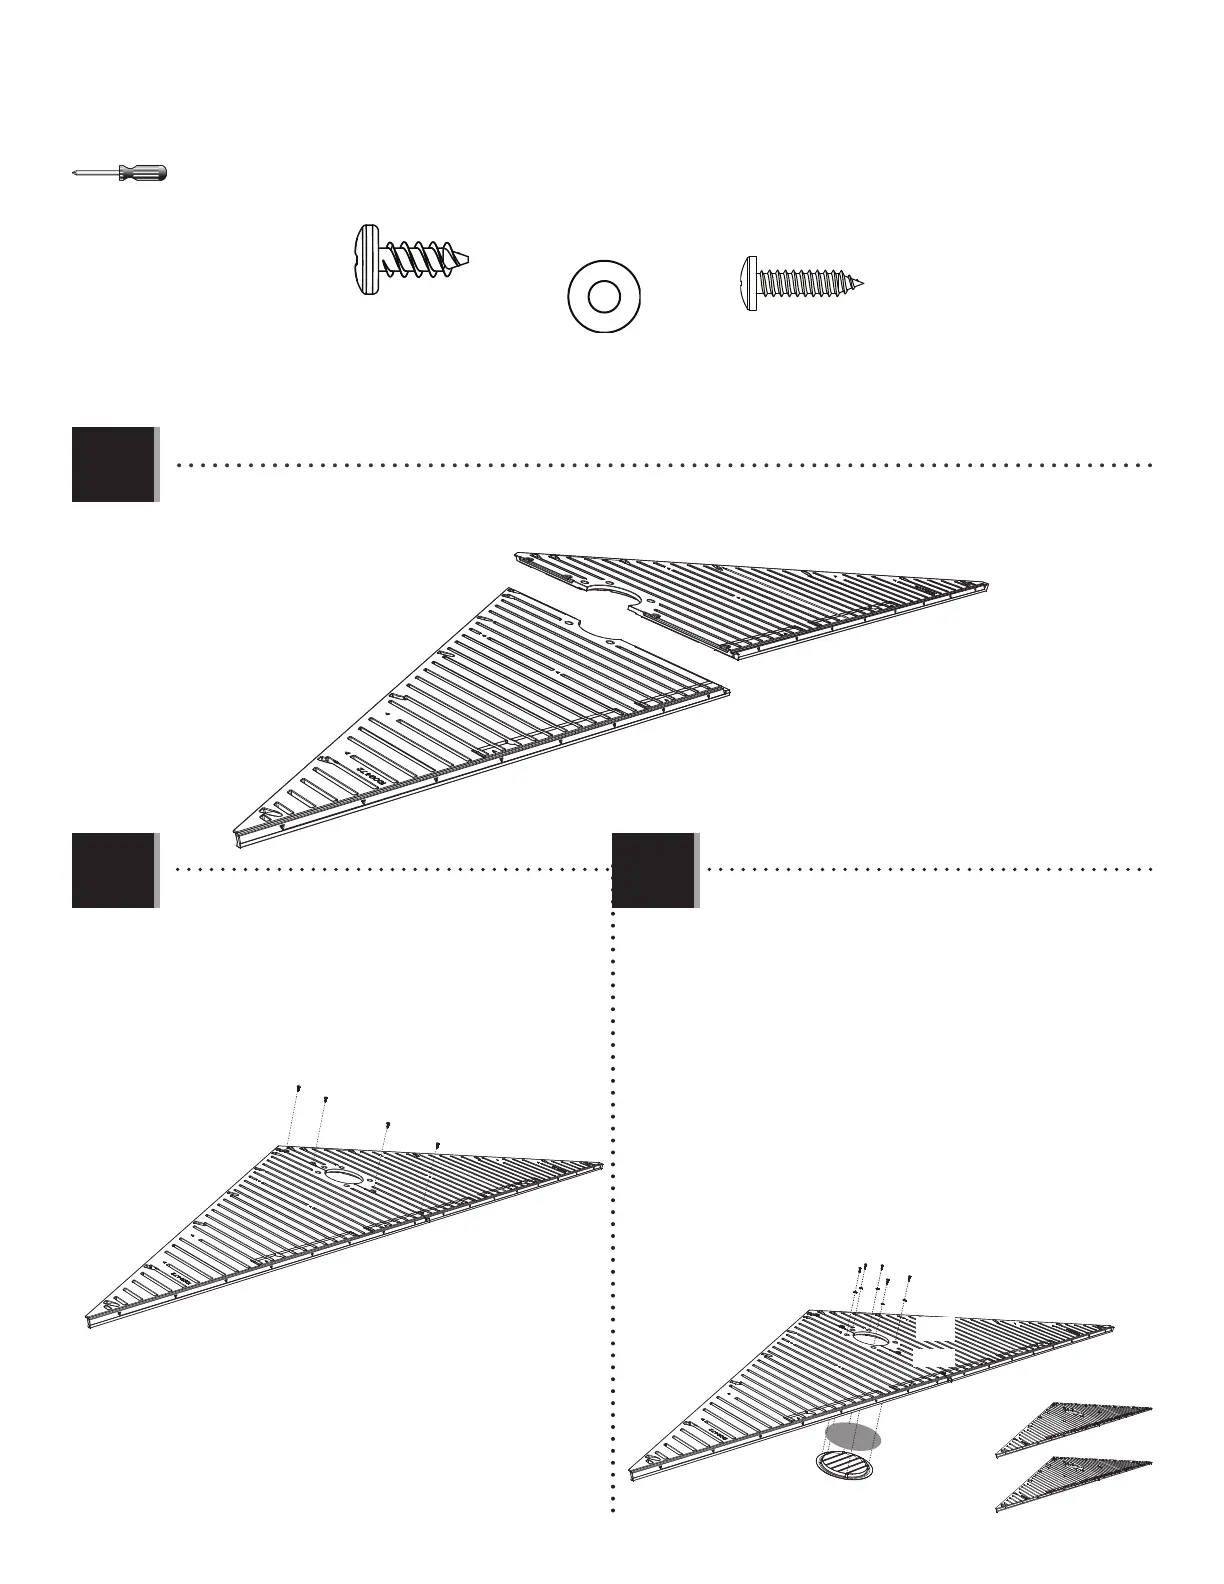
X SECTION 3 (CONTINUED) / SECTION 3 (SUITE) / SECCIÓN 3 (CONTINUACIÓN)
ADZ
ADZ
ADZ
ADZ
AGH
AGI
ADZ (x8)
ADW (x10)
AEE (x10)
AGP
AIQ
ADW
AEE
• Set the edge of Gable Side A (AGH) over the edge of Gable Side B (AGI), and align the four holes.
• Mettre le bord du pignon A (AGH) sur le bord du pignon B (AGI), et aligner les quatre trous.
• Colocar el borde de la fachada A (AGH) encima del borde de la fachada B (AGI), y alinear los cuatro agujeros.
• Place a Screen (AIQ) over a Vent (AGP). Set the
Gable Assembly over the Screen and Vent so the
holes in the Gable align with those in the Vent.
Secure with the hardware included. Repeat these
steps for the second Gable.
• Mettre un mosquitaire (AIQ) sur un évent (AGP).
Mettre le pignon sur le mosquitaire et l’évent pour
que les trous dans le pignon s’alignent avec ceux
de l’évent. Attacher l’évent au pignon à l’aide des
accessoires inclus. Répéter ces étapes pour le deuxième
pignon.
• Colocar un mosquitero (AIQ) encima de una ventila
(AGP). Colocar la fachada encima del mosquitero
y la ventila para que los agujeros en la fachada se
alineen con ellos en la ventila. Sujetar la la ventila
a la fachada usando el herraje incluido. Repitir estos
pasos para la segunda fachada.
• Secure Gable Side A to Gable Side B using the
hardware included.
• Attacher le pignon A au pignon B à l’aide de la
quincaillerie incluse.
• Sujetar la fachada A a la fachada B usando el
herraje incluido.
3.2
3.1
3.3