19
TOOLS AND HARDWARE REQUIRED / OUTILS ET QUINCAILLERIE REQUIS / INSTRUMENTAL Y HERRAJE REQUERIDOS
X SECTION 1 (CONTINUED) / SECTION 1 (SUITE) / SECCIÓN 1 (CONTINUACIÓN)
1.5
Small hole
Petit trou
Agujero pequeño
GPKGPJ
1.6
GPL
BTS
GPK
BTS (x1)
GPL (x1)
GPJ
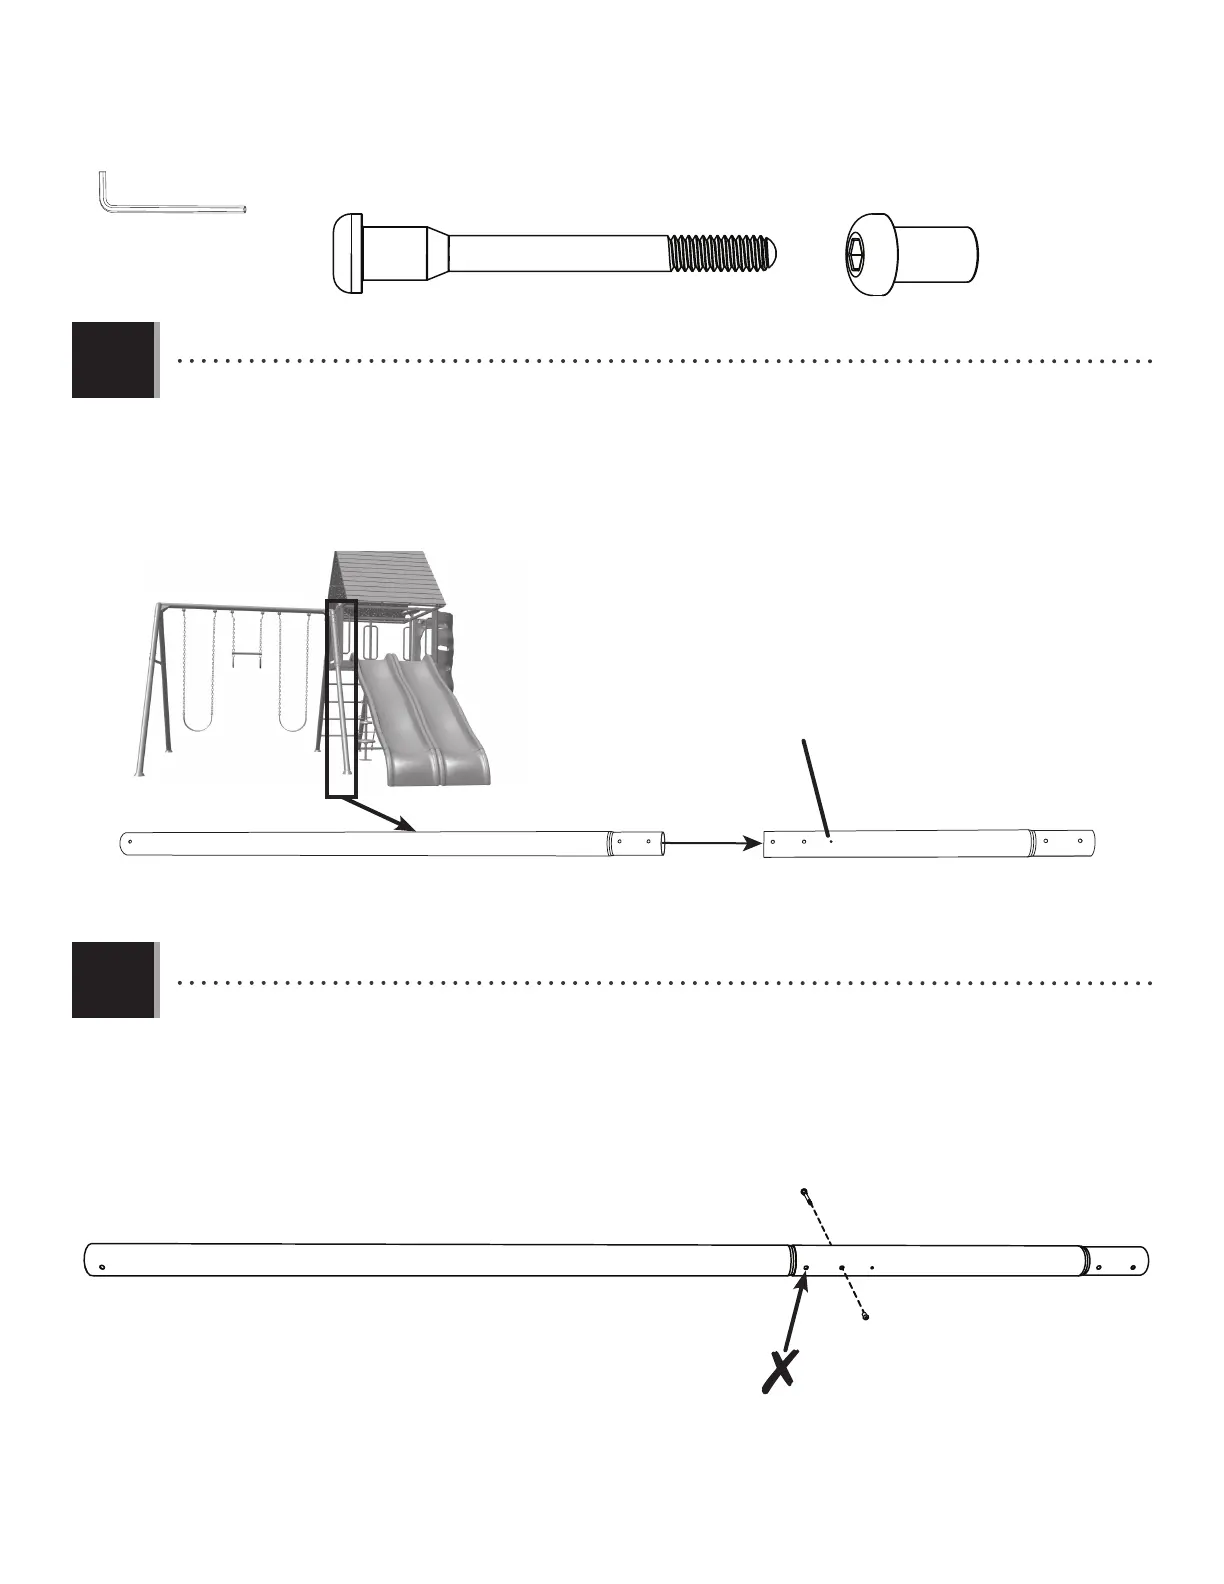
• Insert the top A-frame pole (GPK) into the bottom A-frame pole (GPJ). The bottom A-frame cargo net pole has no small
holes and the top A-frame pole has one (1) small hole. Line up the holes.
• Insérez lemât supérieur du support en A (GPK)dans lepoteau inférieur du support en A (GPJ). Le poteau inférieur de fi let
de cargaison du support en A n’a pas de petits trous et le poteau supérieur du support en A a un (1) petit trou.
Alignez les trous.
• Inserte el poste superior del marco-A (GPK) en el poste inferior del marco-A (GPJ). El poste inferior de la red de carga del
marco-A no tiene pequeños orifi cios y el poste superior del marco-A tiene un (1) pequeño orifi cio. Alinee los
orifi cios.
• Attach the bottom A-frame pole and the top A-frame pole together with the hardware indicated. Only attach the poles
at the location illustrated. The other hole will be attached later in the assembly.
• Fixez le mât inférieur du support en A et le mât supérieur du support en A avec la quincaillerie indiquée. Fixez les
poteaux uniquement à l’emplacement illustré. L’autre trou sera fi xé plus tard dans l’assemblage.
• Fije el poste inferior del marco-A al poste superior del marco-A con el herraje indicado. Fije los postes únicamente en
el sitio que aparece en la ilustración. El otro orifi cio se unirá posteriormente en el montaje.
(2)
3/16 in/po (≈5 mm)