14
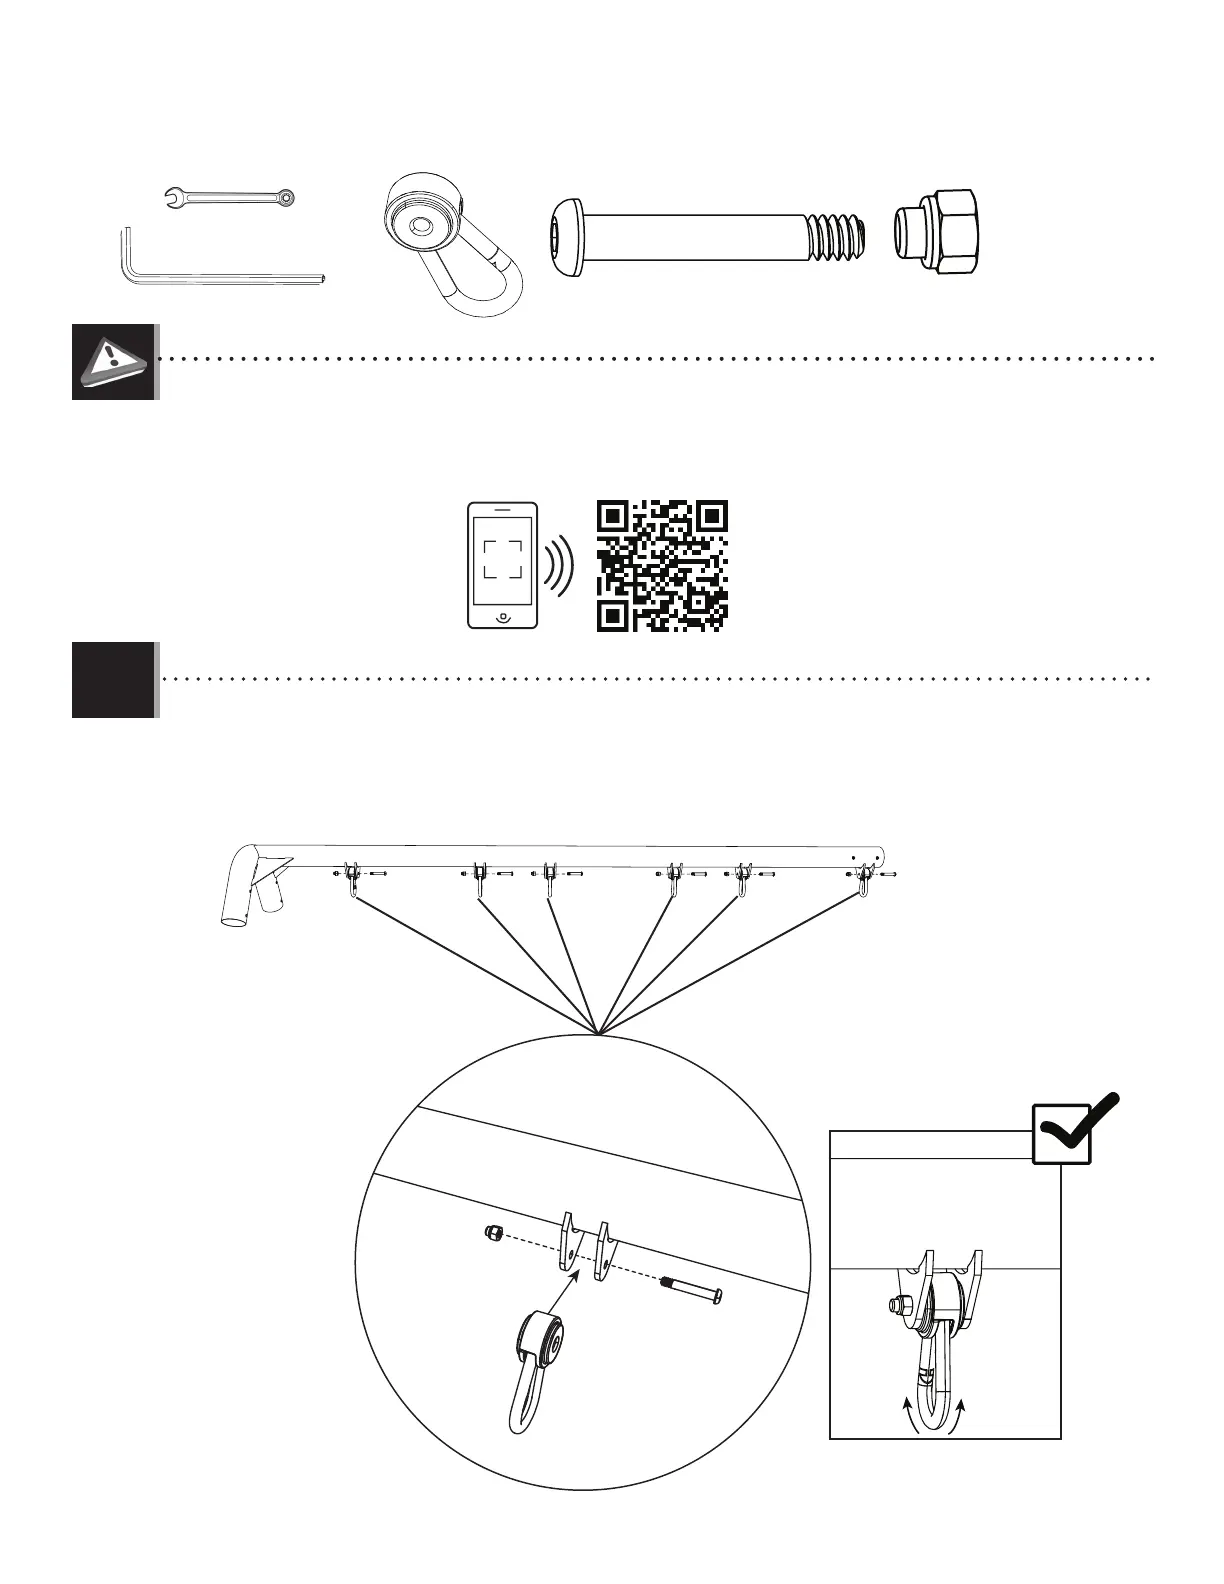
TOOLS AND HARDWARE REQUIRED / OUTILS ET QUINCAILLERIE REQUIS / INSTRUMENTAL Y HERRAJE REQUERIDOS
X SECTION 1 (CONTINUED) / SECTION 1 (SUITE) / SECCIÓN 1 (CONTINUACIÓN)
DZR (x6)
• Attach the pendulums (DZQ) to the swing bar (GER) using the hardware shown. Do this for each set of brackets on the
swing bar.
• Attachez un pendule (DZQ) à la barre horizontale des balançoires (GER) à l’aide des quincailleries illustrés. Répétez
cette étape pour chaque jeu de supports de la barre horizontale des balançoires.
• Sujete los péndulos (DZQ) al caño horizontal principal (GER) usando los herraje de fi jación ilustrados. Haga este paso
para cada juego de soportes en el caño.
1.1
AAN
DZR
DZQ
GER
AAN (x6)
DZQ (x6)
3/16 in/po (≈5 mm)
1/2 in/po (≈13 mm)
(1)
(1)
http://go.lifetime.com/monkeybaraframeassembly
• If you have trouble with this section, scan the code below to view a video on how to assemble the A-frame.
• Si vous avez des problèmes avec cette section, scannez le code en bas pour voir un vidéo de l’assemblage de la
charpente en « A ».
• Si tiene problemas con esta sección, escanee el código abajo para ver un video del ensamble de la ensamble del
armazón en «A».
 Loading...