16
TOOLS AND HARDWARE REQUIRED / OUTILS ET QUINCAILLERIE REQUIS / INSTRUMENTAL Y HERRAJE REQUERIDOS
X SECTION 1 (CONTINUED) / SECTION 1 (SUITE) / SECCIÓN 1 (CONTINUACIÓN)
6
DSA (x4)
1.4
BTS (x4)
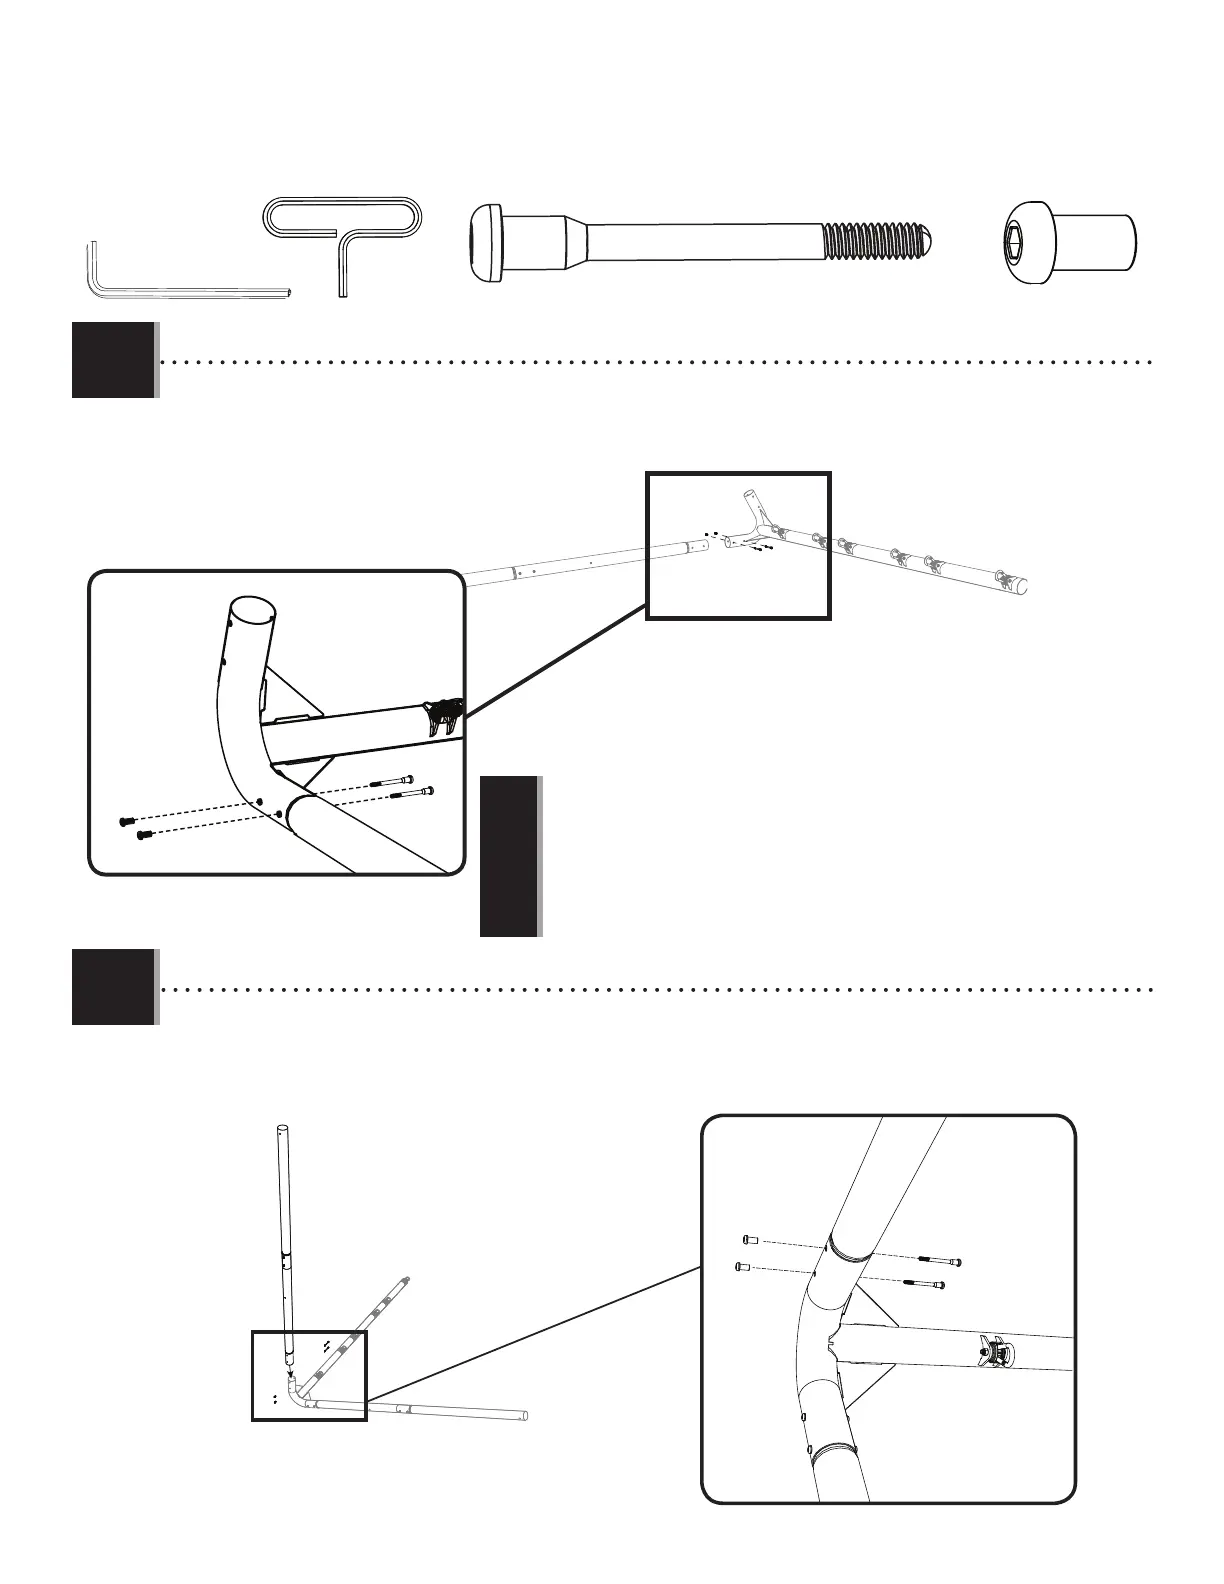
• Attach an A-frame pole to the swing bar (GER) in the location indicated.
• Attachez un poteau du cadre en « A » à la barre horizontale des balançoires (GER) à l’endroit indiqué.
• Sujete una pata del armazón en «A» al caño horizontal principal (GER) a la ubicación indicada.
BTS
DSA
BTS
DSA
GER
1.5
!
• If your A-frame pole has a dimpled hole, make sure the dimpled
hole faces away from the swing bar.
• S’il y a une fossette sur votre poteau du cadre en « A »,
orientez-la en la direction illustrée.
• Si el caño del armazón en «A» tiene un agujero abollado,
asegúrese de orientar este agujero en la dirección opuesta del
caño.
• Repeat step 1.4 to attach the remaining A-frame pole to the swing bar (GER).
• Répétez étape 1,4 pour attacher l’autre poteau du cadre en « A » à la barre horizontale des balançoires (GER).
• Repita el paso 1.4 para sujetar una pata del armazón en «A» al caño horizontal principal (GER).
BTS
BTS
DSA
DSA
GER
3/16 in/po (≈5 mm)
(1)
(1)
3/16 in/po (≈5 mm)

 Loading...