Light & Motion
300 Cannery Row
Monterey, CA 93940, USA
www.lightandmotion.com
sales@lightandmotion.com
905-0367-A
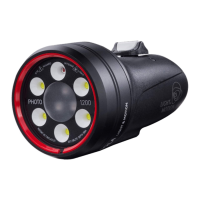
1. White/Red toggle:
(Sola Photo 1200 & 800 only)
2. Brightness:
Low - Med - High - Low
3. Off:
Hold either direction 2 seconds.
4. SOS Mode:
With light o, hold switch “back” for 4
seconds to engage SOS mode. To exit SOS
mode, hold switch in either direction for
2 seconds to turn o, or press the switch
forward and release it to turn light on in
normal mode.
1. Cambiador de blanco/rojo: (Sola Photo 1200 & 800 only)
2. Intensidad: (Baja – Media – Alta – Baja)
3. Para apagar: Presione el interruptor en cualquier dirección durante 2 segundos.
4. Modo de emergencia (SOS): Para activar el modo de emergencia, apague el foco y sostenga el interruptor «hacia
atrás» durante 4 segundos. Para desactivar el modo de emergencia, sostenga el interruptor en cualquier dirección durante 2
segundos para apagarlo, o sostenga el interruptor hacia delante y suéltelo para encender la luz normalmente.
5. Modo de bloqueo durante el transporte (Solo para Sola Photo 1200):
Apague la lámpara y sostenga el interruptor «hacia delante» durante 4 segundos. El foco se encenderá, luego se
apagará, y las luces del panel se encenderán y apagarán en rojo 5 veces. Active el modo de bloqueo para evitar
que el dispositivo se encienda accidentalmente durante el transporte. El dispositivo se puede cargar normalmente
durante el modo de bloqueo. Para desactivar el modo de bloqueo, sostenga el interruptor «hacia delante» durante 4
segundos. Las luces del panel se encenderán y apagarán en verde 5 veces y la lámpara se encenderá normalmente.
1. 白/ 赤の切り替え: (Sola Photo 1200 & 800のみ)
2. 明るさ: (低 – 中 – 高 – 低)
3. オフ: どちらかの方向に2秒間押し続けます。
4. SOSモード: ライトを消した状態で、スイッチを「後方」に4秒間押し続けるとSOSモードになります。SOSモード
を終了するには、スイッチをどちらかの方向に2秒間押し続けます。もしくは、スイッチを前方に押して放すと通常設
定に戻ります。
5.トラベル ロックア ウトモード (Sola Photo 1200のみ): ライトが消えた状態で、スイッチを「前方」に4秒間押し続
けます。ライトは点灯してから消え、ダッシュボードライトが赤く5 回 点 滅します。ライトはトラベルロックアウトモード
となり、点灯しません。本設定においても充電可能です。本設定を解除する場合、スイッチを「前方」に4秒間押し続け
ます。ダッシュボ ー ドライトが 緑に 5 回 点滅し 、ライト が 点 灯します。
Operation/Instrucciones de uso/操作方法:
5. Travel Lockout Mode (Sola Photo 1200
only): With light o, hold switch “forward” for
4 seconds. The light turns on, then o, and the
dashboard lights ash red 5 times. The light is
now in Travel Lockout Mode and will not turn on.
It will charge as usual in this mode. To exit, hold
switch “forward” for 4 seconds. Dashboard lights
will ash green 5 times, and the light turns on.
Travel and Storage/Transporte y almacenaje/
旅行および保管:
• Switch locked
• Interruptor bloqueado
• スイッチの固定位置
• Switch unlocked
• Interruptor desbloqueado
• スイッチの固定解除
• Rotate switch to lock/unlock
• Para bloquear/desbloquear, gire el
interruptor
• スイッチを回して固定/解除
To save battery, Sola enters a deep standby mode when turned o. It may take up to
8 seconds for the light to respond when the charger is plugged in. If the light does
not respond after 8 seconds, rapidly tap the charger against the charge contacts a few
times, and then plug it back in.
Para ahorrar energía, Sola entra en un modo de espera profundo tras el apagado, por
lo que puede llegar a tardar hasta 8 segundos en responder después de enchufar
el cargador. Si el foco no responde después de 8 segundos, golpee con el dedo
suavemente algunas veces el cargador contra los contactos de carga, y después vuelva
a conectarlo.
バッテリー節約のため、Solaは電源が切れるとディープスタンバイモードになります。
充電アダプターを差し込んだ場合、ライト点灯までに8秒ほどかかることがあります。ラ
イトが8秒以上経過しても点灯しない場合、充電接続部分を軽くたたいてから差し込
み 直してください 。
1. Unthread bezel.
2. Remove LED plate from 1x5 socket (electrically disconnecting the LEDs from the battery).
3. Keep O-Ring in place and protect from debris.
5. Thread bezel back on
Security Disassembly / Desmontaje de seguridad / セキュリティ用 の 分 解
4. Rotate the LED plate and plug the 1x5 pin connector into
empty slot for air travel.
Airline Security Only
1. Desenrosque el bisel.
2. Retire la placa LED del portalámparas 1x5 (desconectando las bombillas LED de la
batería).
3. Asegúrese de que el empaque está limpio y bien colocado.
5. Vuelva a enroscar el bisel.
4. Gire la placa LED y mantenga el conector 1x5 conectado a
la ranura vacía durante el transporte aéreo.
Seguridad aérea
1 . ベ ゼ ルを回 して 外します。
2. LEDプレートを1x5ソケットから外します (LEDをバッテリーより遮
断します ) 。
3. Oリングはそのままにし、汚れから保護します。
5. ベゼルを元に戻して締めます。
4. LEDプレートを回して1x5ピンコネクターを機内
持ち込み用の空きスロットに差し込みます。
航空会社のセキュリティ対応
6. To reassemble, reverse the steps
6. Para volver a conectar la placa LED, repita los pasos en
orden inverso.
6. 組み立て直す場合は、この手順を逆に行います。