This document provides installation, operating, and servicing instructions for the Lincat CONVECTOR Electric Convection Ovens, models CO343M and CO343T. It emphasizes the importance of reading the instructions carefully, paying particular attention to warnings, cautions, and notices to ensure safe and correct usage. The manual is intended to be kept for future reference.
The Lincat CONVECTOR ovens are designed for professional use, suitable for environments where qualified or trained personnel operate appliances. They are electric convection ovens, meaning they use fans to circulate hot air, ensuring even cooking and efficient heat distribution.
Function Description:
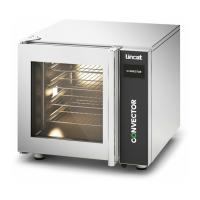
The core function of these ovens is to cook food using electric convection heating. Both models, CO343M and CO343T, are designed to accommodate four 1/1 Gastronorm (GN) trays, providing ample capacity for various cooking needs. The convection heating system ensures consistent temperatures throughout the oven cavity, which is crucial for achieving uniform cooking results.
Usage Features:
Model CO343M (Manual Control):
The CO343M model features a manual control interface, making it straightforward to operate.
- On/Off Switch (A): This switch controls the main power to the appliance. When activated, a green power supply indicator (B) illuminates, and the fan begins to rotate, signaling that the oven is ready for operation.
- Fan Speed Control (E): Users can select between slow or fast fan speeds, allowing for flexibility depending on the type of food being cooked and desired results.
- Temperature Control Knob (D): This knob allows the user to set the desired cooking temperature. An amber oven heating indicator (C) illuminates when the unit is actively heating. Once the set temperature is reached, the amber light will cycle on and off to maintain the temperature.
- 120-Minute Timer (F): A mechanical timer can be set for up to 120 minutes. When the set time expires, an audible buzzer and flashing lights will activate to alert the user.
- Reset Button (G): Opening the oven door will cancel the buzzer and flashing lights from the timer.
- Door Operation: When the door is opened, if the fan is set to fast speed, it will automatically switch to slow speed. It will return to fast speed once the door is closed, a safety and energy-saving feature.
- Turning Off: To turn off the unit, the temperature control knob should be set to the off position, and the appliance should then be switched off at the mains.
Model CO343T (Touch Screen Control):
The CO343T model offers a more advanced touch screen interface, providing enhanced control and programming capabilities.
- Touch Screen (A): This is the primary interface for operating the oven. Upon connecting to the electricity supply, the unit performs a self-test, beeps, and displays the CONVECTOR logo before transitioning to the home screen.
- Programming Guide: The touch screen allows users to access a programming guide for user interface operation and programming.
- Program Selection: Users can select pre-set programs or create custom recipes. The oven will pre-heat to the set temperature and beep when ready for loading.
- Cooking Process: After placing food in the oven, pressing "cook" initiates the cooking cycle. Upon expiration of the set time, the buzzer/lights will sound/flash, and on-screen timers will indicate completion.
- "Done" Button: Pressing "done" allows for the removal of cooked products.
- Clock Settings: The clock settings can be adjusted from the home screen by clicking on the clock icon, selecting hours or minutes, adjusting, and saving.
- Home Screen: This screen allows users to run recipes by simply pressing the desired recipe. It also provides options to switch to oven mode or access the Recipe Manager for programming.
- Recipe Manager: This section allows users to select, edit, reassign the order of recipes, access further oven settings, and run updates.
- Recipe Summary and Edit Screen: This screen displays the recipe with changes highlighted in green. Users can press on steps to edit them, rename the recipe, attach or change an icon from a library, and save or exit without saving.
- Adjusting Times, Temperature, and Fan Speeds: Within the recipe summary and edit screen, users can adjust cooking times, temperatures, and fan speeds. A recipe summary button allows reviewing changes before saving. Adjustments can be made by tapping the end of a bar for small increments or swiping for larger increments.
- Oven Mode / Timer Screen: In oven mode, users can change the temperature and run up to four countdown timers. If no time is entered, the oven will maintain the set temperature indefinitely. Fan speed can also be increased or decreased in this mode.
- USB Port (C): The presence of a USB port suggests potential for software updates or recipe import/export functionalities, enhancing the oven's versatility.
- Reset Button (B): Similar to the manual model, this is likely for fault conditions or to clear specific alerts.
Maintenance Features:
- Safety Thermostat: Both models are equipped with a safety thermostat that cuts power to the appliance under fault conditions. If the unit fails to operate, users should first check the power supply and then reset the safety thermostat by firmly pushing a recessed red button located under the front edge of the unit. This reset can only be activated once the appliance has cooled.
- Cleaning:
- General Cleaning: All panels should be cleaned with warm water and mild detergent. Abrasive materials, water jets, or steam cleaners should not be used, and the appliance should not be immersed in water. After cleaning, the unit should be dried with a soft cloth.
- Internal Cleaning: Care must be taken to avoid damaging the thermostat bulbs inside the oven during cleaning.
- Shelf Supports: Shelf supports can be removed to assist with cleaning the oven interior.
- Door Inner Glass Removal and Refitting: The inner glass of the door can be removed for cleaning or maintenance. With the door open, the inner glass assembly can be unclipped and swung open. Two screws secure a retaining bracket, which, once removed, allows the inner glass assembly to be tilted and lifted from its lower fixed pin. Refitting involves positioning it onto the lower fixed pin, replacing the retaining bracket, and refitting the screws.
- Light Bulb Replacement: To replace the light bulb, the unit must be isolated from the mains. The glass cover can be carefully removed using a flat-bladed screwdriver, allowing access to the bulb. A new bulb can then be fitted, and the cover replaced.
- Shelf Racks Removal and Refitting: Shelf racks can be lifted upwards to clear lower locating pins, then swung away from the oven side panel and lowered from the upper pins. Refitting involves locating them onto the upper pins first, then the lower pins.
- Consumable Parts: The door seal and light bulbs are considered consumable parts and are customer-replaceable, not covered by warranty.
- Servicing and Component Replacement: All servicing, maintenance, and component replacement, other than routine cleaning and customer-replaceable parts, should be carried out by Lincat's recommended service engineers. The manual provides contact information for the service department and emphasizes that unauthorized service work or incorrect installation can void the warranty.
General Safety and Installation:
The manual stresses that the appliance must be installed, commissioned, and serviced by a qualified person in accordance with national and local regulations. It highlights the importance of ensuring the plug/socket is accessible, stripping plastic coating, and cleaning the appliance before use. During operation, parts may become hot, so accidental contact should be avoided. The appliance must be disconnected before any servicing, maintenance, or cleaning. It also specifies that the appliance must be earthed and provides instructions for replacing the plug terminals. Minimum distances for installation from non-combustible partitions, walls, or furniture are provided (A 200mm, B 1000mm), with 100mm left for services. An air filter requires occasional access.