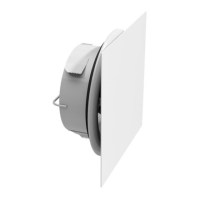
Assembly
The damper which is considered as a component (not ready-to-use-product) are only to be put into operation after it
has been built into machines or duct systems and when the system is found to be in conformity with all relevant regula-
tions.
Mount the damper according to “Assembly Instructions Lindab Safe” to meet the requirements for tightness class C.
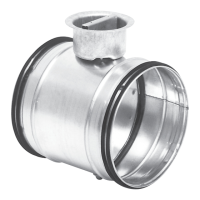
Dampers with dimension 400, 500 and 630 are provided with transport protections. Remove these before assembly.
Consider required straight distance after or before disturbance, as mentioned on the card attached to the measurement
nozzles, to obtain accurate flow measurement.
The damper may not be loaded with weight from connected ducts, specially when assembled vertically. Make sure that
there is enough free space for moving parts.
Installation, electrical connection and commissioning are only to be performed by authorised personnel and in accor-
dance with the requirements of the installation.
Electrical connection shall be done according to the wiring diagram on the motor, in the catalogue and the markings on
the cable.
The damper must not be used in an explosive atmosphere or connected to flue ducts.
The damper can have sharp edges and corners which may cause injuries. It also has moving parts.
Do not lift the dampers by the electric cable.
Before initial operation, check the following:
• electrical connection has been properly completed.
• Safety devices are in place.
• Leftover installation materials and foreign materials have been removed from the casing.
• Make sure the damper is functional by checking the end positions: press the button on the motor and
move the lever to each end.
When putting in operation, check the following:
• Smoothness of motor operation and no abnormal noises.
Measuring
By measuring the pressure difference ∆p in Pa between the measure nozzle, you can through the equation
Balancing
The damper is delivered fully open. Set the maximum and minimum flow by connecting hoses to the measurement no-
zzles. Press the button on the motor and move the lever until required pressure for maximum flow receives. Fasten the
left screw on the motor. Repeat the procedure to set the minimum flow and fasten the right screw.
Measurement accuracy
Consider required straight distance after or before disturbance, as mentioned on the card attached to the measurement
nozzles, to obtain accurate flow measurement. The accuracy is ±7 % when required distance is complied.
Damper with flow meter
DIRBU, DIRVU
 Loading...