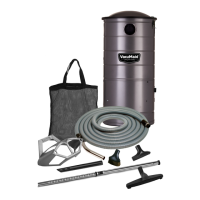
Owners Manual
IMPORIMPOR
IMPORIMPOR
IMPOR
TT
TT
T
ANTANT
ANTANT
ANT
::
::
: Carefully read and retain this booklet.
Safety Instructions
Grounding Instructions
Operating Your Central Vacuum
Maintenance
Single Piece Cyclonic Units
Split Canister Cyclonic Units
Servicing Air Channel
Inverted Bag Units
Paper Bag Units
Troubleshooting Guide
Warranty
Vacu-Maid & Silent Partner
Astro Vac
Tips on the Care of Your Central Vacuum
Serial Number Location
TT
TT
T
ABLE OF CONTENTSABLE OF CONTENTS
ABLE OF CONTENTSABLE OF CONTENTS
ABLE OF CONTENTS
Pg. 1-2
Pg. 2-3
Pg. 4
Pg. 5
Pg. 6
Pg. 7
Pg. 8
Pg. 9
Pg. 10-12
Pg. 13
Pg. 14
Pg. 15
Pg. 15
Lindsay Manufacturing, Inc.
CENTRAL VACUUM SYSTEMS
Your power unit is warranted against defective materials and workmanship but not against misuse. There is a service
charge for repairing or replacing damaged or misused components of the system or for unnecessary service calls.
Your built-in system is a lifetime improvement for you and your family. Follow these simple tips and you will enjoy
it for many years:
1) DO NOT PLACE ANYTHING ON TOP OF THE POWER UNIT1) DO NOT PLACE ANYTHING ON TOP OF THE POWER UNIT
1) DO NOT PLACE ANYTHING ON TOP OF THE POWER UNIT1) DO NOT PLACE ANYTHING ON TOP OF THE POWER UNIT
1) DO NOT PLACE ANYTHING ON TOP OF THE POWER UNIT
To do so would cause the motor to overheat as it will impair the cooling air flow.
2) DO NOT OVERFILL YOUR DIRT CANISTER2) DO NOT OVERFILL YOUR DIRT CANISTER
2) DO NOT OVERFILL YOUR DIRT CANISTER2) DO NOT OVERFILL YOUR DIRT CANISTER
2) DO NOT OVERFILL YOUR DIRT CANISTER
Allowing the dirt canister to fill up to the bottom of the plastic cone will nullify the cyclonic separator system
and could cause debris to be drawn into the upper screen which may, in time, damage your power unit.
3) USE ONE INLET AT A TIME TO MAINTAIN PROPER AIR FLOW3) USE ONE INLET AT A TIME TO MAINTAIN PROPER AIR FLOW
3) USE ONE INLET AT A TIME TO MAINTAIN PROPER AIR FLOW3) USE ONE INLET AT A TIME TO MAINTAIN PROPER AIR FLOW
3) USE ONE INLET AT A TIME TO MAINTAIN PROPER AIR FLOW
Using more than one vacuum inlet at a time reduces the air flow to a level below that which is required to effectively
deep clean your carpets.
4) STORE YOUR HOSE AND TOOLS PROPERLY4) STORE YOUR HOSE AND TOOLS PROPERLY
4) STORE YOUR HOSE AND TOOLS PROPERLY4) STORE YOUR HOSE AND TOOLS PROPERLY
4) STORE YOUR HOSE AND TOOLS PROPERLY
When not in use, always hang up your hose and store the cleaning tools and wands in a place where they
will not be damaged.
5) HOLD THE INLET DOOR OPEN WHEN REMOVING THE HOSE5) HOLD THE INLET DOOR OPEN WHEN REMOVING THE HOSE
5) HOLD THE INLET DOOR OPEN WHEN REMOVING THE HOSE5) HOLD THE INLET DOOR OPEN WHEN REMOVING THE HOSE
5) HOLD THE INLET DOOR OPEN WHEN REMOVING THE HOSE
After removing the hose from the inlet, hold the inlet door open for a few seconds to:
a) Make sure the unit has stopped.
b) Clear any residual dirt out of the vacuum tubing
6) DO NOT PICK UP ANY LIQUIDS6) DO NOT PICK UP ANY LIQUIDS
6) DO NOT PICK UP ANY LIQUIDS6) DO NOT PICK UP ANY LIQUIDS
6) DO NOT PICK UP ANY LIQUIDS
Do not pull liquids into the vacuum tubing since any liquid left in the tubing may:
a) Drain back out of the wall inlet and cause streaking of the walls.
b) Cause dirt build-up in the tubing that could eventually clog the system.
Wet Pick-up Units are available for this type of use. Contact your local dealer.
7) BE CERTAIN TO FILL OUT AND RETURN THE WARRANTY CARD7) BE CERTAIN TO FILL OUT AND RETURN THE WARRANTY CARD
7) BE CERTAIN TO FILL OUT AND RETURN THE WARRANTY CARD7) BE CERTAIN TO FILL OUT AND RETURN THE WARRANTY CARD
7) BE CERTAIN TO FILL OUT AND RETURN THE WARRANTY CARD
Take just a few moments to fill out the warranty card, cut it out, place a stamp on it and drop it in the mail.
- IMPORTANT -
SERIAL NUMBER LOCATION FOR CENTRAL
VACUUM SYSTEM
The serial number for your wall mounted central vacuum system
can be found located under the unit model label (see represen-
tative diagram below). The unit model label will be found on the
left or right side of the unit near the top and close to the wall.
Unit Label
(representative only-
yours may differ)
XXXX
XXXXXXXXXXX
Date Code
(representative only.
Yours may differ)
Serial Number
(representative only.
Yours may differ)
15
L653 ©Lindsay Manufacturing, Inc. 2005 Printed in USA by LMI 01/05
This unit comes equipped
with an internal thermal
switch. When tripped it
requires up to 10 (ten)
minutes to reset before
using.
Cette unite vient equipe d’un
commutateur thermique
interne. Une fois declenche
inutes pour remettre a zero
avant utilisation.
ON ALL SR36 & SR36C POWER UNITS:
TIPS ON THE CARE OF YTIPS ON THE CARE OF Y
TIPS ON THE CARE OF YTIPS ON THE CARE OF Y
TIPS ON THE CARE OF Y
OUR CENTRAL VOUR CENTRAL V
OUR CENTRAL VOUR CENTRAL V
OUR CENTRAL V
AA
AA
A
CUUM SYSTEMCUUM SYSTEM
CUUM SYSTEMCUUM SYSTEM
CUUM SYSTEM