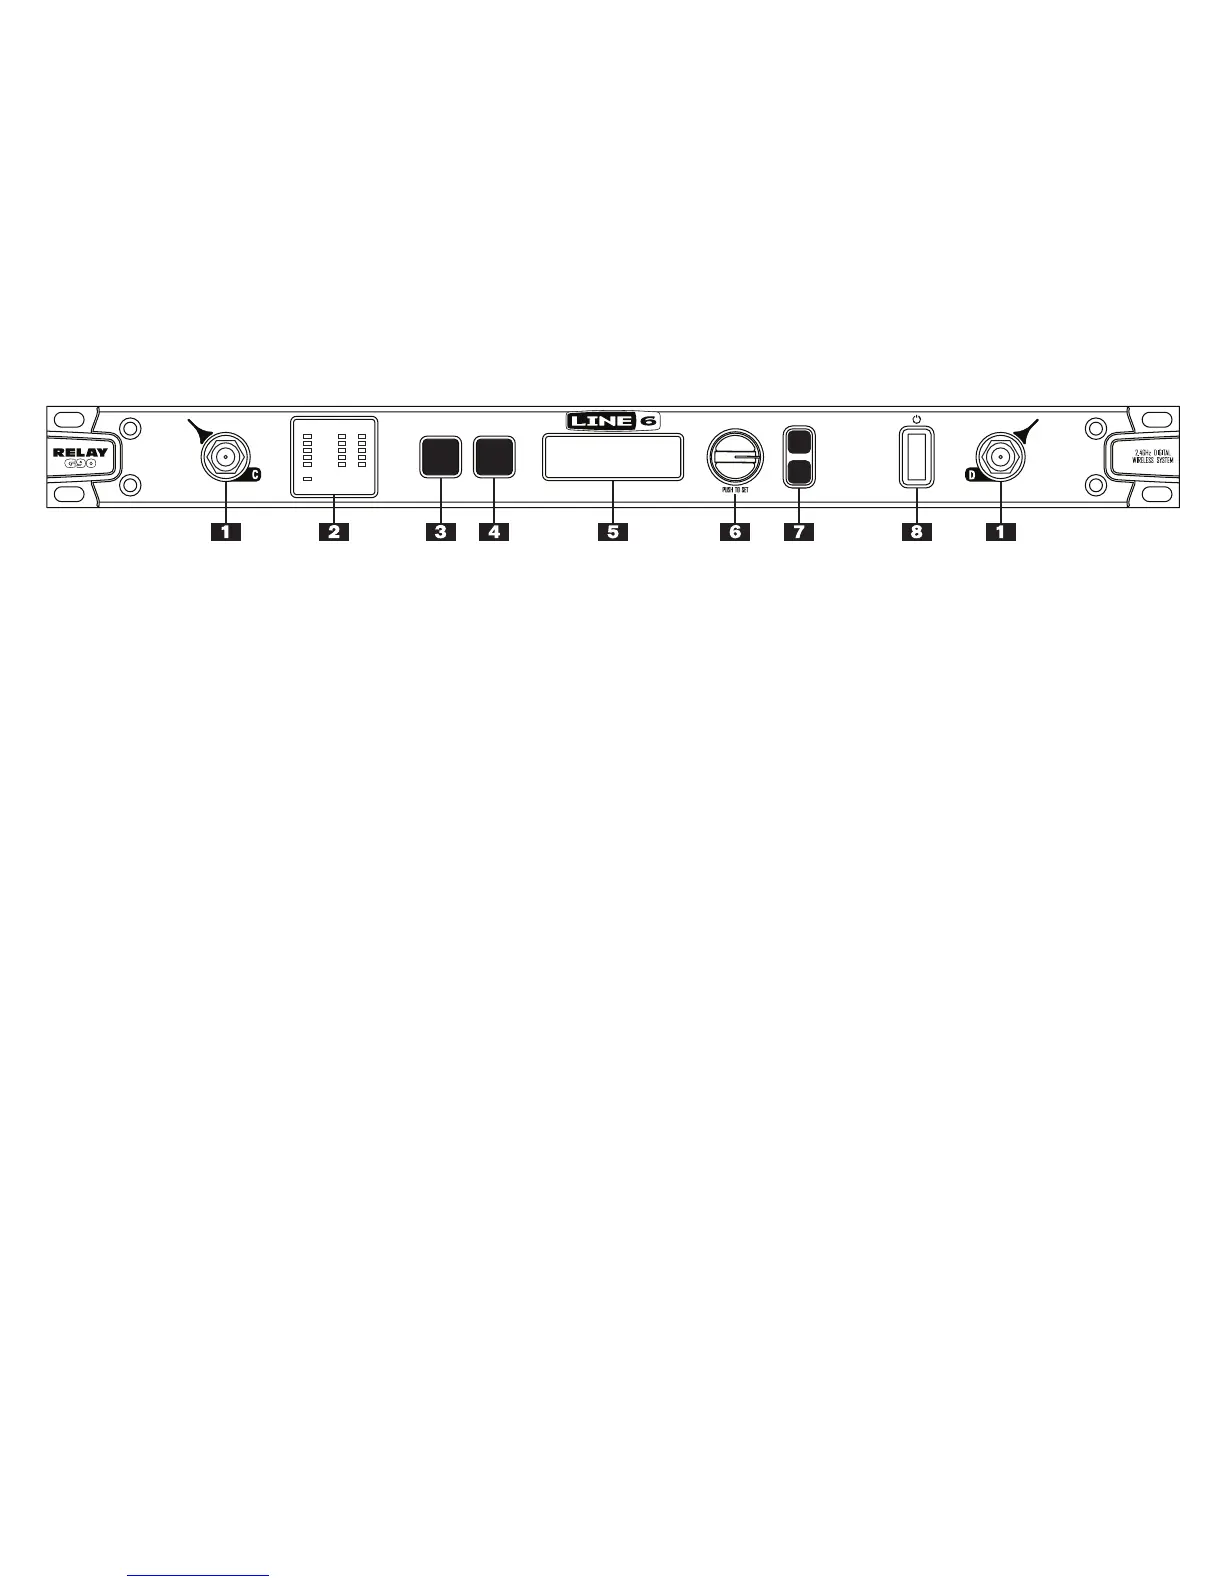
1. Antenna C & D Input Connectors (BNC) - For correct operation connect
the supplied detachable antenna by pressing on the BNC connector and
twisting clockwise for 1/2 turn.
Note: C & D Antenna inputs are not DC
Biased.
2. Transmitter Status Display
Audio - Green LEDs will light indicating the audio signal level.
Battery - All five battery LEDs will be lit to indicate full battery life.
The bottom LED will change to red once your battery life falls below two
hours and flash red when it falls below one hour.
RF - When transmitter is on and has the same channel set as the
receiver, these LEDs light green to indicate signal strength/quality: from
5 Green = Data excellent, interference low to 1 Green meaning Data
minimal, may have significant interference. When transmitter is off, or
set to a different channel than receiver these LEDs show as follows: No
LED = No data, no interference. 1 Red = No data, some interference up
to 5 Red = No data, high interference.
Mute - Lit LED indicates muted transmitter.
3. Channel Select - You must have the same channel selected on the
transmitter and receiver. Both ship from the factory set to channel 1, so
you’re all ready to go. To select a different channel:
• Press the
Channel Select, turn Edit knob to select a channel and
then press Edit (Push To Set) knob to commit the channel.
• Set the transmitter’s channel to match, as described in its Pilot’s
Handbook.
The Scan Channel feature checks all available channels for interference,
and recommends the best channels to use:
• Press
Channel Select button, then press the Select Button.
• The Display shows all 12 possible channels. The best channels are
highlighted, and if the transmitter is on there’s also indication of
which channel that’s currently set to.
• Turn the
Edit knob to select one of the channels that’s highlighted
as best to use, and select that same channel on the transmitter.
4. Cable Tone - Guitar cables have a natural electrical property called
capacitance. This means that longer cables roll off more high frequencies.
You can use Cable Tone to simulate the effects of different guitar cable
lengths and styles.
5. Display - The display will normally show the current channel you are
receiving as well as expected battery life and signal strength of your
antenna frequencies. The display also can show
Channel Select, Cable
Tone and Setup options.
6. Edit (Push To Set) Knob - Use this knob to adjust a currently selected
parameter in your display such as channel number or setup features. Push
the
Edit Knob in to commit any changes made when using it.
7. Setup Buttons - Press Select Button to see the list of Setup parameters.
Turn
Edit Knob to move through the list. To edit a parameter, press
Select Button turn Edit Knob, and press Edit Knob to lock that value in.
Press
Exit to leave Setup page.
8. Power Switch - Flip this switch to turn your G90 receiver on or off.
CABLE
TONE
CHANNEL
SELECT
RFBATTERYAUDIO
MUTE
TRANSMITTER
STATUS
EXIT
SELECT
 Loading...