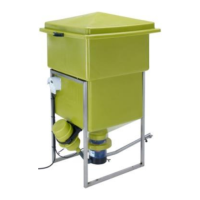
Operating instructions
LINN PROFI feed sprinkler
with LINN feeding clock
With this feeder it is possible to feed your fish automatically - just as you want! The feed is
spread automatically with a blower motor on the pond. All parts in and under the container are
completely fixed and connected. As the container is supplied with a high-grade steel frame it can
be put down at the edge of the pond.
Assembly instructions
You simply have to put the enclosed “ejector pipe” into the existing opening under the container
and to tighten the screw.
Because of the combination of the curved ejector pipe and the built on deflection angle
nearly every ejectortype is possible by adjustment.
Place the container in the wanted position at your pond. Fix or weight down the container so that
it can´t tip over.
At the feed ejector is an adjustable metering device. Here you can adjust the proportioning
fingers:
Adjustment Adjustment
for little food 3+4 mm for a lot of food
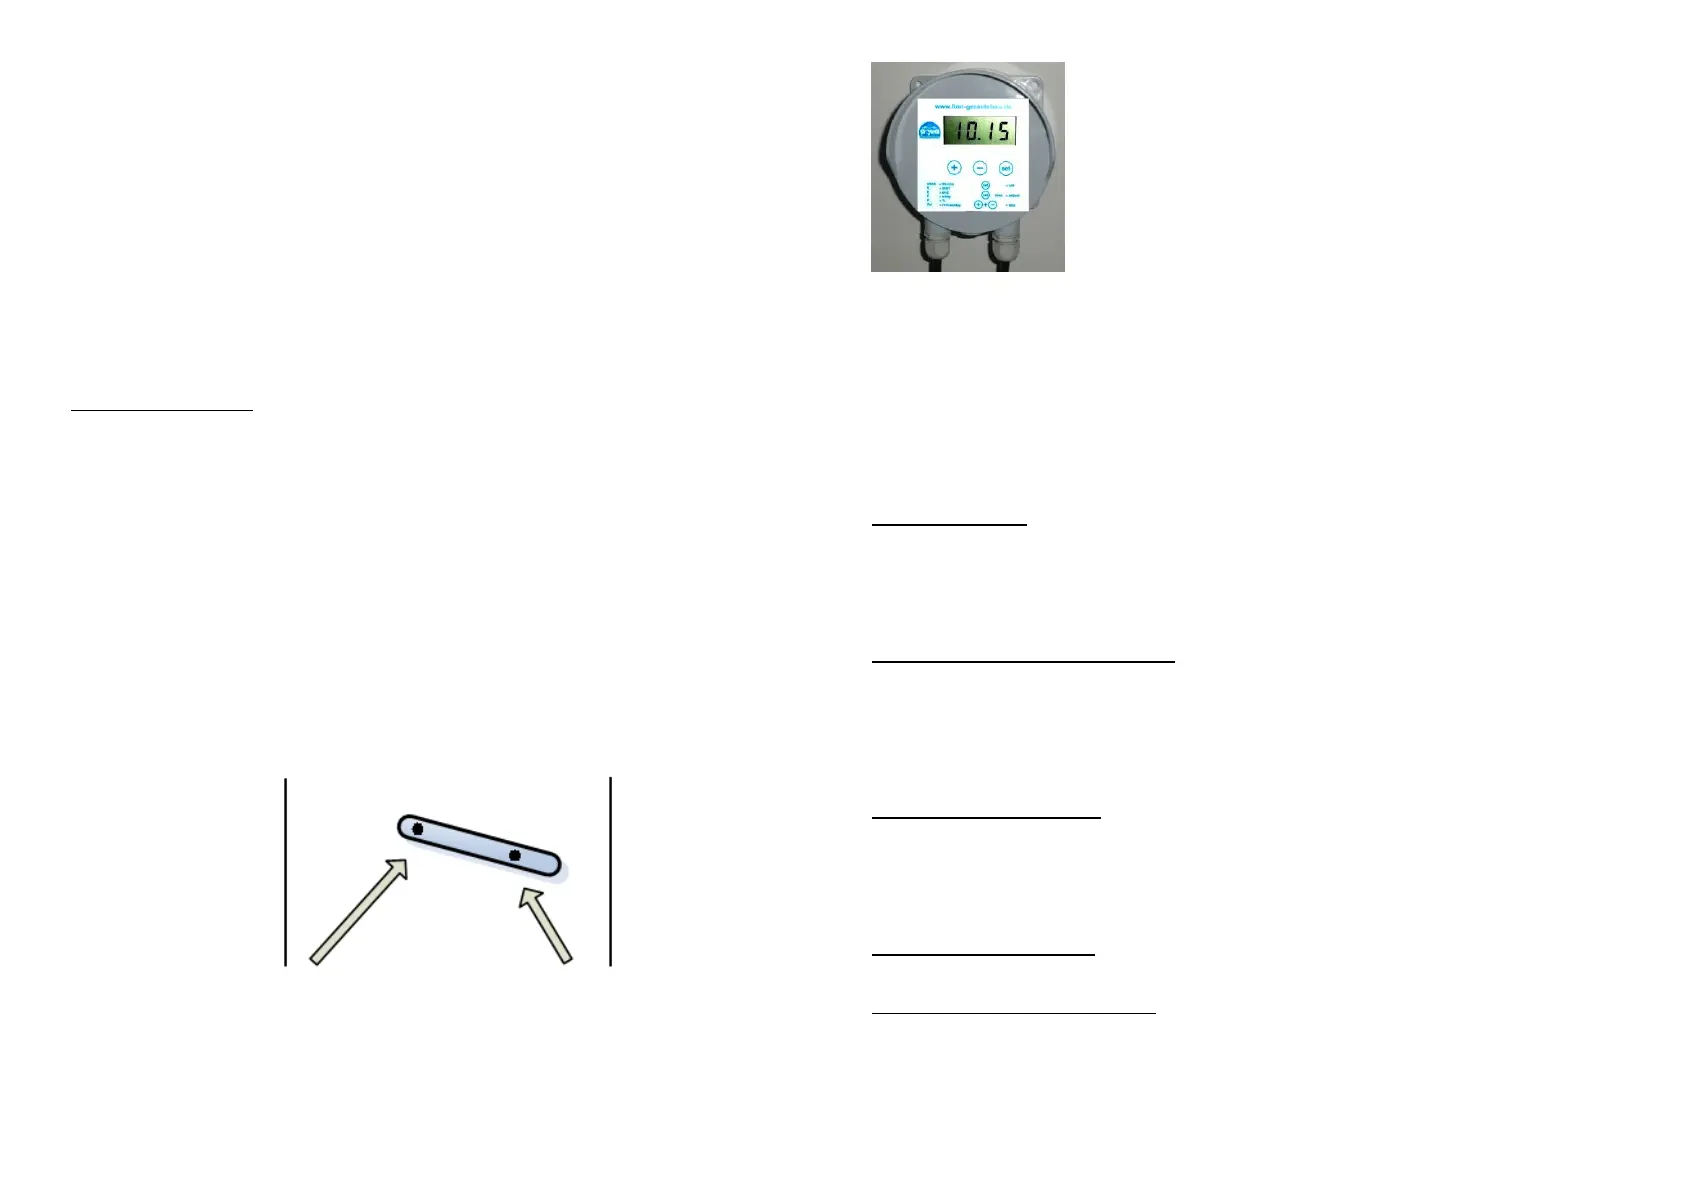
Setting the feeding programme – LINN feeding clock
After securing the feeder in place plug into a 230 v socket. The display will show the total feeding
time per day in minutes and seconds, not the time of the day!
To create a feed programme, decide the required feed quantity per day based on the fish stock.
The quantity of feed dispensed depends on the sort, size and manufacturer of the feed. It is
advisable to test with the chosen feed to get the total feeding time per day to dispense the
required amount. Fill the hopper with a weighed amount of the chosen food. Press the buttons
“+” and “-“ together. The feeder will then enter test mode. Take the time, that the feeder needs
for this 1kg feed. In this way you can determine how much the feeder ejects per minute and how
long you have to feed per day to feed the required quantity.
clock - Set the time
Firstly you have to set the time of the feeding clock. Press the “Set” button so often until “clock”
will appear on the display. Press and hold the “Set” button for 3 seconds. When the display
starts flashing, the hours can be adjusted with “+” and “-“. Further pressing of the “Set” button will
allow the setting of the minutes. When the time is set, press and hold the ”Set” button for 3
seconds – your settings will be saving.
Fd - Set the total feeding time per day
For adjusting the total feeding time per day, press the “Set” button until the display shows “Fd”.
Then hold the button for 3 seconds until the display flashes. Now you can adjust the required
minutes by repeatedly pressing the “Set” button and the minutes with “+” and “-“. To store the
setting press and hold the “Set” button again for 3 seconds.
Example: The setting “10:12” means that the total feeding time is 10 minutes and 12 seconds at
one day
S - Set the feeding start time
It is necessary to set the required start time for feeding (in the morning) and the stop time (in the
evening).
To set the start time press the “Set” button until “S” is displayed. Then, as usual, press the “Set”
button for 3 seconds until the display flashes. Now you can set the required time with “+” and “-“.
By pressing and holding the “Set” button again for 3 seconds, the time is stored.
E - Set the feeding end time
For setting the stop time press the “Set” button until an “E” appears on the display. To set the
stop time, continue as for setting the start time.
F - Set the number of feeds per day
To set the number of feeds per day, press the “Set” button until “F” is displayed. Press the “Set”
button for 3 seconds and then enter the number of feeds. Store the value, as usual.
Feeds will then be made at intervals automatically.
 Loading...