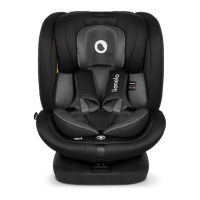
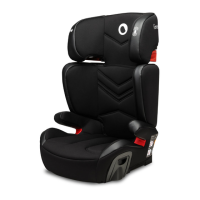
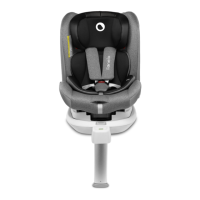
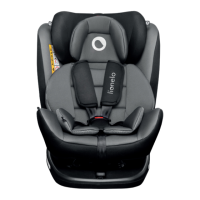
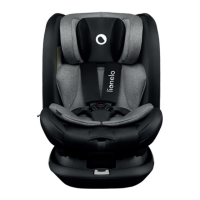
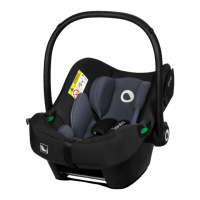
The device described in the manual is the Astrid i-Size car seat by Lionelo, a Universal Belted Enhanced Child Restraint System designed for infants.
Function Description:
The Astrid i-Size car seat is designed to provide safety and comfort for children from birth up to 13 kg and with a height between 40 and 87 cm. It is intended for rear-facing installation only, using the vehicle's three-point seat belts. The car seat features a headrest, canopy, protective pads for seat belts, and a reduction insert for smaller infants. It is approved according to UN Regulation No. 129, for use primarily in "Universal seating positions" as indicated by vehicle manufacturers' manuals.
Important Technical Specifications:
- Weight Range: From birth up to 13 kg.
- Height Range: 40 to 87 cm.
- Installation: Rear-facing, using three-point seat belts.
- Headrest Adjustment: Integrated with belt height adjustment, with an adjustment range of 7 cm.
- Handle Positions: 4 available positions: car, carrying, storage, and for placing on a flat surface.
- Reduction Insert: Required for children up to 60 cm tall; removed for children over 60 cm.
- Standard Compliance: R129/03.
Usage Features:
- Buckling a Child:
- Place the seat on a level surface.
- Loosen seat belts by pressing the tension adjustment button and pulling on the belts (fig. 1).
- Unbuckle seat belts by pressing the red button on the buckle (A, fig. 3) and extending/unbuckling belt connectors (B, C, fig. 3).
- Place the child in the seat.
- Adjust the headrest to the child's height (fig. 12).
- Fasten seat belts by connecting belt connectors (A, fig. 4) and sliding them into the buckle (B, fig. 4) until a "click" is heard (C, fig. 4).
- Tighten seat belts by pulling the tension adjustment strap (fig. 2).
- Important: Shoulder belts must fit properly around the child's shoulders, with two fingers' space between the shoulder belt and the child's chest (fig. 14). Lap belts should run low to secure the pelvis. Belts must not be twisted. Headrest should be adjusted so shoulder straps are not too high or too low (fig. 15).
- Unbuckling a Child: Loosen seat belts by pressing the tension adjustment button and pulling on the belts (fig. 1). Unbuckle by pressing the red button on the buckle (A, fig. 3) and extending/unbuckling belt connectors (B, C, fig. 3).
- Installation in the Car:
- Move the seat handle to the carrying position (A, fig. 16).
- Place the seat on the car's seat back, close to the backrest of the rear seat, positioned opposite the direction of travel.
- Extend the car seat belt as far as possible through the green lap belt guides (B, fig. 16) and fasten the belt (C, fig. 16) until a "click" is heard.
- Pass a section of the car seat belt under the hinge of the seat holder (D, fig. 16) and through the green shoulder belt guide (E, fig. 16). Make sure the belt is tight.
- Pull the lap belt horizontally to tighten. Pull the shoulder belt to tighten the rest of the car seat belt (F, fig. 16).
- Adjust the car seat handle to the car position (G, fig. 16).
- Important: Do not install the seat in a location with the front airbag activated. It is recommended to install the seat only in the rear seats. Ensure seat belts are not twisted and are correctly positioned in the guides. Do not position the car seat too close to the car seat belt buckle. The correct position is indicated by a checkmark symbol (fig. 16).
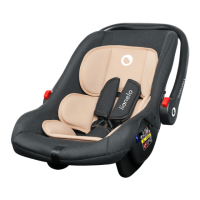
- Installation on a Stroller Frame:
- Insert adapters into the appropriate place on the frame, following the stroller's instructions. A "click" will be heard.
- Insert the seat into the adapters, ensuring it is properly locked. A "click" will signal correct installation.
- To release the seat from the stroller frame, press the stroller adapter release buttons (15, fig. A).
- Canopy Adjustment: Adjust by pulling the front of the canopy in the desired direction (fig. 8).
- Canopy Removal: Remove rubber clips (A, fig. 9), slide off the cover (B, fig. 9), and remove the stiffening bar from attachment points (A, B, fig. 10) on the seat. Then remove the stiffening bar from the fabric cover (fig. 11).
- Headrest Adjustment: Loosen belts (fig. 1), then pull the headrest adjustment lever and adjust height (fig. 5).
Maintenance Features:
- Cleaning:
- Minor dirt can be cleaned with a damp sponge and mild detergent.
- The cover can be washed at a maximum temperature of 30°C. To do this, the cover must be completely removed from the seat (see "Cover Removal").
- Do not use dryers for drying. The cover should not be exposed to sunlight.
- Plastic parts can be cleaned with a damp cloth and mild detergent.
- Warning: Do not use strong detergents or bleaching agents.
- Cover Removal:
- Remove the canopy cover (A, fig. 17).
- Unbuckle the seat belts (B, fig. 17).
- If necessary, remove the reduction insert (C, fig. 17), then protective pads (D, fig. 17) and seat belt protector (E, fig. 17).
- Tilt the lower part of the headrest and slide off the cover (A, fig. 18), then pass the headrest adjustment lever through the corresponding hole (B, fig. 18) and remove the headrest cover.
- Pass the seat belt buckle through the corresponding hole in the cover (A, fig. 19), then remove the entire cover by putting the individual hard parts of the seat through the corresponding holes in the cover (B-E, fig. 19).
- To reattach the cover, follow the steps in reverse order.
Warnings:
- Hard parts and plastic parts should be placed to avoid being trapped by a sliding seat or vehicle door.
- Seat belts must be well-fitted to the child's body and not twisted.
- Straps securing the restraint to the vehicle must be tight.
- Lap belts must run low to adequately secure the pelvis.
- Replace the product if exposed to strong impacts.
- Do not make changes or add components without approval from the authority.
- Plastic parts can heat up in the sun and cause burns.
- Never leave a child unattended in the car seat.
- Luggage and other similar items should be secured.
- Do not use the seat without its fabric cover.
- The cover cannot be replaced with an item from another set.
- Always keep the instruction manual handy.
- Refer to the vehicle manufacturer's instruction manual.