‑ 4 ‑EN
• Do not drag the bike behind the car or other vehicle.
•
Keep the product away from sources of heat, high temperatures, hot surfaces,
sources of ignion, naked ame, oil and sharp edges.
• Store the bike in a dry place.
•
Do not use the product in unfavorable weather (e.g. frost, rain, snow, black ice).
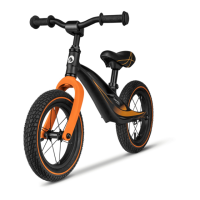
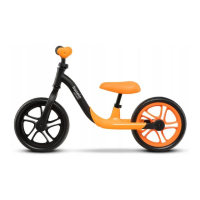
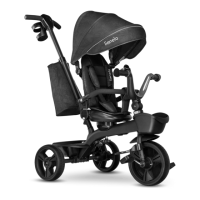
Product descripon (g. 1)
1. Handlebars grips
2. Handlebars with shank hole
3. Saddle
4. Front fork
5. Crossbar
6. Rear wheel
7. Front wheel
8. Wheel clamping ring
9. Saddle clamping ring
How to assemble
The bike must be assembled, disassembled and adjusted by an adult only.
1. Handlebars (g. 2)
Insert the shank with a cap (marked as B in g. 2) into the handlebars hole. Next
insert the handlebars into the front fork of the bike. Make sure the handlebars
have been xed properly and the wheels are in a forward posion (see: g. 2)
Adjust the handlebars height to your child’s height - the handlebars depth marker
(marked as C in g. 2) must not be visible, it must be inside the bike crossbar.
Use an Allen wrench (included in the set) to screw the shank in the handlebars
unl it resists. When the procedure is done, make sure the handlebars have been
mounted securely. If not, ghten up the shank so that the handlebars get stable.
2. Saddle (g. 3)
Release the nut on the saddle clamping ring (9). Insert the saddle tube into the
saddle hole in the crossbar. Adjust the saddle height to your child’s height - the
saddle depth marker (marked as A in g. 3) must not be visible, it must be inside
the crossbar. Tighten up the nut on the saddle clamping ring (9) properly. When