‑ 8 ‑EN
• Insert baeries with the correct polarity.
• Exhausted baeries should be removed from the toy.
• The supply terminals are not to be short – circuited.
• To replace the baeries: use a screwdriver to open the door and access the
baery compartment. Replace the baeries and make sure they are inserted
correctly. Screw the door with a screwdriver.
• The toy cannot be connected to more power sources than recommended.
Assembly instrucon
1.
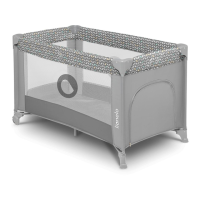
Take the travel baby bed out of the bag and loosen the adhesive straps.
Place the bed on the oor and put the bag aside (see g. 1).
2. Separate the legs pulling them apart. Keep the central lock up. Otherwise
handrails will not t in the right place (see g. 2).
3. Pull the middle part of each top rail covered with material so that they t
into place. Start with the longer rails, and then the shorter ones (see g. 3).
Note! So that the sides of the cot / handrails are properly blocked, the central blockade
of the oor must be raised upwards. The baby rails will not lock when the oor
is unfolded.
4. Push the middle lock unl the surface is completely at (you will hear the
click sound) (see g. 4).
5. Place the maress in the baby bed (see g. 5, 6). Fasten the maress using
Velcro on the two short sides of the maress (there are special openings in
the oor for fastening).
Base installaon
The base must be aached using the zipper. Once the base is aached, cover
the zipper with a Velcro pad. Slide the reinforcement tubes into the sewn handles
and connect them (they must be paired properly). Place the maress onto the
tube-reinforced base and fasten it with Velcro.
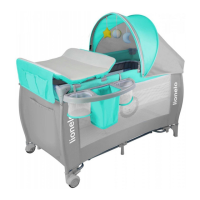
Canopy installaon
Slide the plasc arches into the material guide of the canopy and connect them
in the middle. Place the rear part of the canopy on the baby bed, then stretch
the fabric and aach the canopy to the baby bed using plasc clamp holders.
Aer the roof has been mounted, it should be pressed several mes from the