4
lippert.com 432-LIPPERT (432-547-7378) Rev:11.07.22
Manual Sidewinder
Tongue Jack
Installation and Owner’s Manual
(For Aftermarket Applications)
CCD-0003785
Prior to Installation
THE TRAILER MUST BE SUPPORTED PER
THE MANUFACTURER’S RECOMMENDATIONS
BEFORE WORKING UNDERNEATH. FAILURE
TO DO SO MAY RESULT IN DEATH, SERIOUS
PERSONAL INJURY AND/OR SE VERE PRODUCT OR
PROPERTY DAMAGE.
1. Make sure the trailer is parked on level ground.
2. Chock all tires.
3. Support the trailer according to the manufacturer’s
recommendations.
4. Remove existing tongue jack from A-frame and
properly dispose of jack. Retain mounting hardware
and/or footpad and footpad hardware for future use. If
hardware is damaged or missing, refer to the Additional
Parts Available Separately table section for replacement
hardware options.
Installation
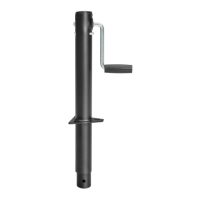
1. Carefully slide the jack leg (Fig.1A) through the hole in the
coupler (Fig.1B) of the trailer’s A-frame (Fig.1C).
Fig.1
A
B
C
2. Align the three holes in the Manual Sidewinder Tongue
Jack’s mounting plate (Fig.2A) with the three holes in the
A-frame coupler (Fig 2B), ensuring that the “at spot”
on the mounting plate (Fig 2C) is facing forward towards
the hitch (Fig 2D).
A
B
D
C
Thread three
3/8”-16 x 1” bolts (Fig 3A) through the
previously aligned holes in the jack’s mounting plate and
A-frame coupler (Fig 3B). Some frames may require 5/8”-11
nuts. Leave slack in each bolt to allow for adjustments to
be made as needed when positioning the jack plate to
the coupler.
Fig.2
A
B
Fig.3