English
Fig. 19
Continuous bead
around corners
Butyl Tape/Foam Sealant
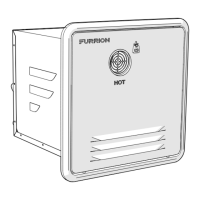
3. Position the door frame into the water heater housing and
press firmly against the sidewall. (Fig. 20)
Fig. 20
4. Mount the door frame to the side wall frame using 12 - #8
(min 1") pan head screws (not provided) through each hole
along the perimeter. Verify that a tight seal exists between
the side wall and the flange. (Fig. 21)
NOTE: Ensure the butyl tape/foam sealant completes a
tight seal between the RV siding and appliance flange. If
gaps exist, remove the appliance and apply a double layer
of butyl tape/foam sealant.
Fig. 21
5. Apply a liberal amount of sealant around the door frame
to fill any gaps to the RV wall. (Fig. 22) Wipe any excess
sealant.
Fig. 22
6. Insert the door into the pins at the bottom of the water
heater. (Fig. 23)
Pin
Hole
Fig. 23
7. Align the latch on the flange with the slot on the door, then
push the door and rotate the latch to lock the door into
place. (Fig. 24)
Step
1
: Pull and rotate the lever 90° to lock the latch.
Step
2
: Turn down the folding latch to lock.
NOTE: Damage to the assembly door and the RV if the
assembly door is not closed properly! Make sure that
the assembly door is flush with the cover plate when
closed.
Fig. 24
Door Latch
Slot
B. Integral Flange on Door Frame (front and side
mounting)
1. Verify that the gas, electrical, and water have been
connected correctly.
2. Evenly center the water heater in the frame. Position
water heater body so it protrudes slightly past the
sidewall.
3. A
pply adequate water sealing material, e.g. butyl tape
around the entire backside of the door frame, flange areas
and holes.
(Fig. 25)
NOTE: Do not use adhesive sealing material e.g. silicone
for the watertight seal.
Fig. 25
Continuous bead
around corners
Butyl Tape/
Foam Sealant
4. Position the door frame into the water heater housing with
the inner flanges located inside the water heater body,
and press firmly against the sidewall. (Fig. 26)
Fig. 26
5. Mount the door frame to the sidewall frame using 6 #8
(min 1") pan head screws (not provided). Verify that a tight
seal exists between the side wall and the door frame. (Fig.
27)
NOTE: Ensure the butyl tape/foam sealant completes
a tight seal between the RV siding and appliance door
frame. If gaps exist, remove the appliance and apply a
double layer of butyl tape/foam sealant.
 Loading...