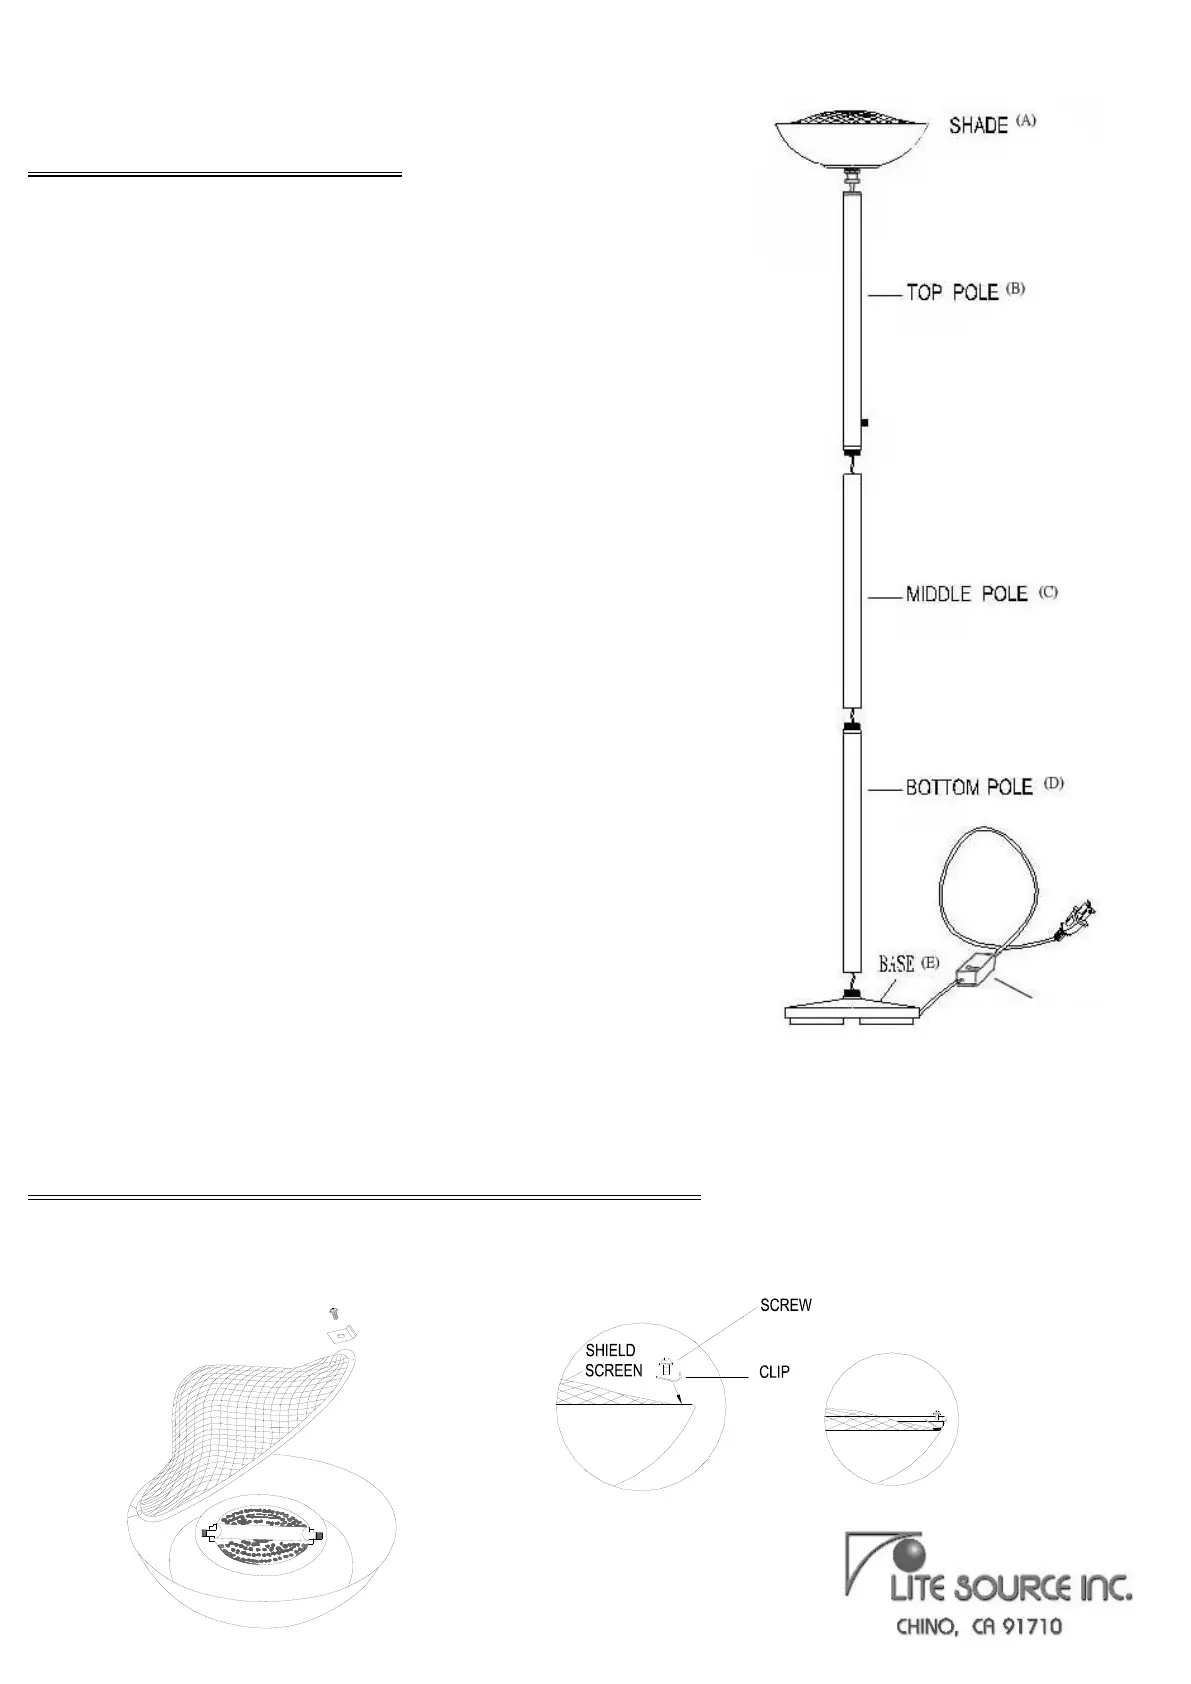
ITEM NO.:LS-80910
ASSEMBLY INSTRUCTIONS
1. When ready to assemble, place all parts on a flat and scratch
resistant surface.
2. Screw shade (A) onto top pole (B).
3. Screw middle pole (C) onto bottom pole (D) and then onto the base
(E). (Gently put the excessive wire into the upper pole).
4. Screw top pole (B) onto the middle pole (C). (Gently put the
excessive wire into the upper pole).
5. Insert plug into wall outlet and enjoy your lamp.
6. Use a max Type-J 180 watt bulb (bulb included).
7. Insert plug into wall outlet. Turn on the switch and enjoy your lamp.
8. This lamp comes with a circuit breaker (F). Lamp will not light if the
bulb is higher than 180W.
Note: Prior to turning floor lamp on for use, please make sure that you
have plugged in the power supply plug, make sure that switch is in the
off position. Press switch on the circuit breaker box (F) to on then you
may use switches for full range of light. If at any time the circuit breaker
(F) needs to be reset, repeat above procedure to make light fully
operational.
Maintenance
Finger prints may cause glass shield and/or bulb to crack and reduce
lamp life. (Shield/bulb can be cleaned with a soft cloth).
Follow instructions on relamping label near bulb to ensure maximum
safety and ensure many years of lighting pleasure.
* This lamp comes with the heat guard which is required by the new UL regulation.
INSTALLATION OF MESH COVER (HEAT GUARD)
1. Put the mesh cover over the shade.
2. Put the clip on the mesh cover, align the holes.
3. Slide the clip into the edge of the shade and fasten the screw.
 Loading...